Having used Fragments in Xamarin.Android and ContentControls in WPF I was keen to understand how to create pages composed of subviews in iOS.
I have written about the technique for sharing a view between pages using a ContainerView in the article Using the ContainerView to Share Views - aka Fragments in Xamarin.iOS.
This article demonstrates a technique for presenting views in a ContainerView and then switching between these views using a transition animation.
The source code for the initial example can be found on GitHub - TransitioningContainerViews. The source code for the example using the Segue to perform the transition can be found on GitHub - TransitioningContainerViewsUsingSegue
Overview
The transitioning of child views within a page using the ContainerView is the topic for this article. This is something which I have done a lot in the past using WPF with different forms of Transitioning Content Controls.
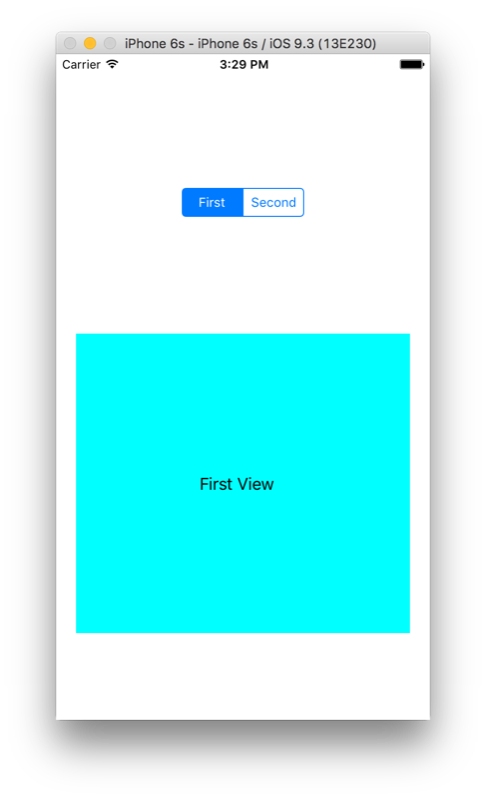
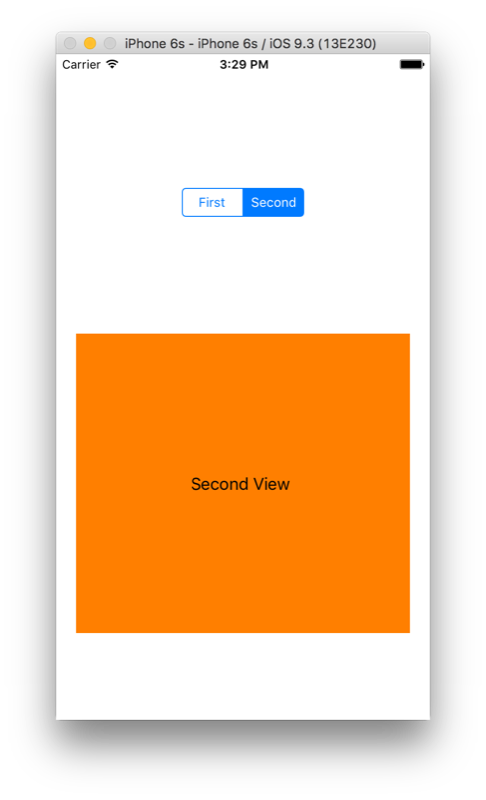
The example app demonstrates using a ContainerView to display a view which is selected using a Segmented Control. The transition between views is animated.
The technique used is adapted from Michael Luton's article Storyboards With Custom Container View Controllers. Aaqib Hussain's article Container View in iOS uses the same technique which is to use a custom Segue class derived from UIStoryboardSegue with an over-ridden Perform method which does nothing. The transition is handled in the ContainerViewController in the PrepareForSegue method.
There are two examples, the first is my Xamarin implementation of Michael's technique, with the code in the ContainerViewController modified to call methods as defined by Apple at Implementing a Container View Controller.
After getting this example working I was not sure that this was the correct approach, the Empty Segue approach seems a bit of a mis-use of the API. I then moved the code out of the ContainerViewController and into a new TransitionSegue class. This seems more in keeping with the spirit of the API and also allows the technique to be re-used elsewhere in the application.
The examples use the UIViewController's Transition method to perform the animation between the views. This has a number of options for the animation as defined by the UIAnimationOptions. For those wishing to provide a more custom animation, perhaps working with a user gesture such as panning I have included some links for the Transitioning API in the Resources section
The app showing the First View:-
The app showing the Second View:-
Resources
Michael Luton's article Storyboards With Custom Container View Controllers and Aaqib Hussain's article Container View in iOS both demonstrate the technique of using an EmptySegue class.
The Apple documentation Implementing a Container View Controller is a great starting point.
Other useful pages iin the Apple documentation include The Role of View Controllers, and Using Segues.
The Apple documentation Customizing the Transition animations is useful if we wish to explore what is possible when animating the view controllers and the user interactions such as animating in response to a user pan gesture.
For those wishing to explore the Transitioning API the tutorial Creating Custom UIViewController Transitions, Scott James Remnant's article Custom iOS segues, transitions, and animations the right way and Geppy Parziale's article Custom View Controller Transitions and Storyboard would be good references.
Key Points
Adding a
ContainerViewwill automatically create aViewControllerfor the child content and reference it using an Embed Segue. There is a limitation that a second Embed Segue to anotherViewControllercannot be used.We can create custom Segues and animate
ViewControllersin and out of theContainerVieweither in the custom Segue or by using a Segue with an empty Perform method and use theContainerViewControllerto perform the transition.In both examples presented here we are using the
UIViewController'sTransition method to perform the animation between the views.
The Example
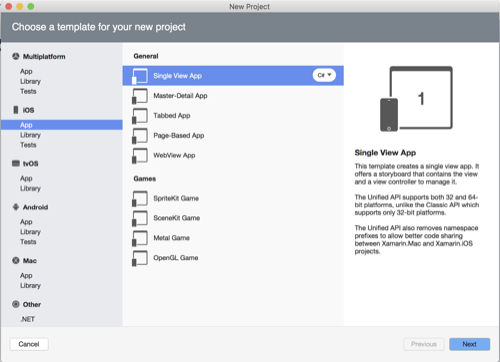
For this example I created a new solution in Xamarin Studio using the iOS Single ViewApp template:-
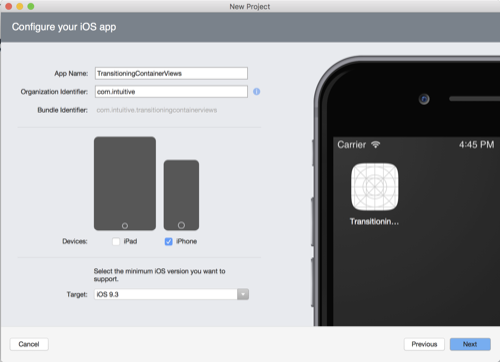
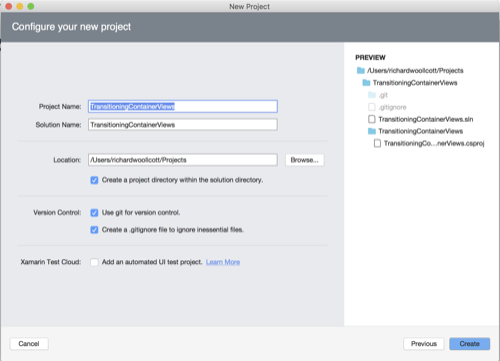
Click the Next button and provide a name for the app, in this example we will use TansitioningcontainerViews. De-select the iPad option as to keep things simple we will be targeting the iPhone only:-
Click the Next button and choose a location for the solution. Accept the defaults for Version Control:-
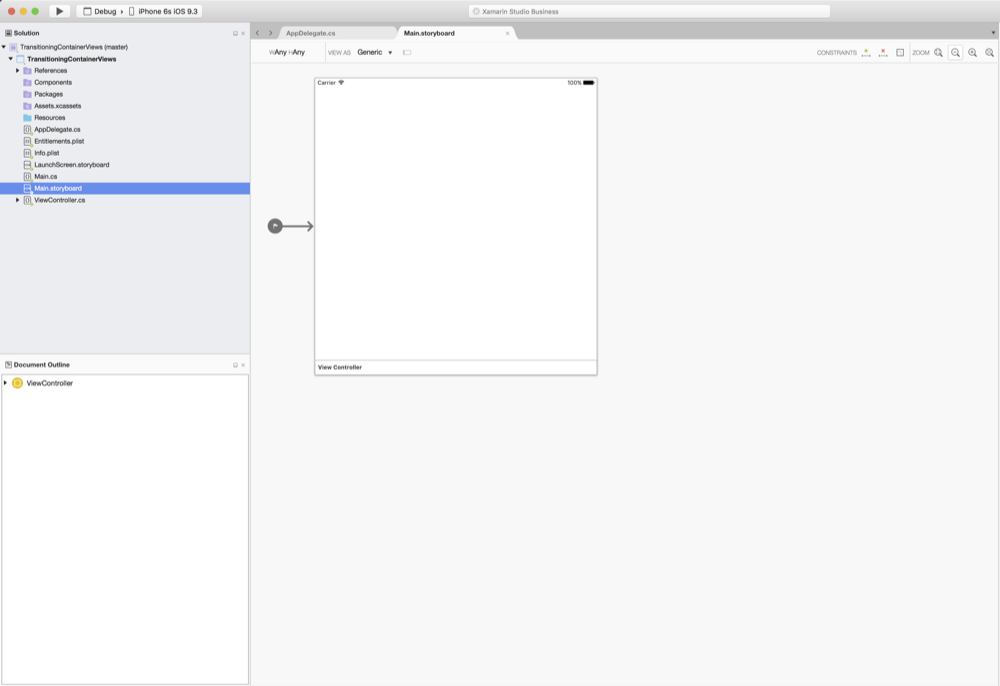
Click the Create button and the solution will be created. Open the Main.storyboard* and the Storyboard designer will be displayed:-
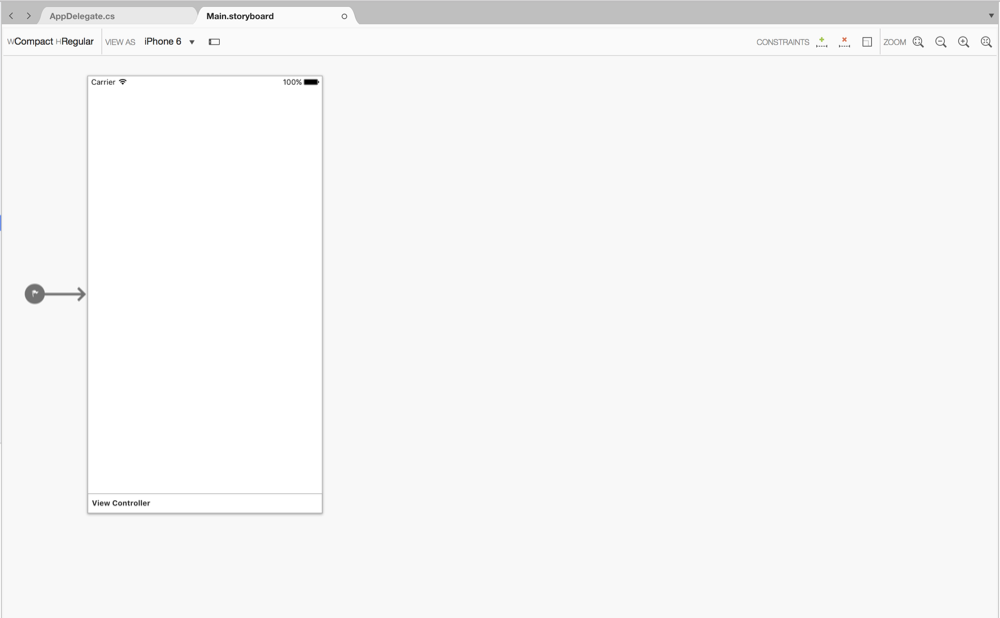
I'm working with an iPhone 6 for this example so in the VIEW AS toggle at the top-right of the designer change from the Generic option to the iPhone 6 option:-
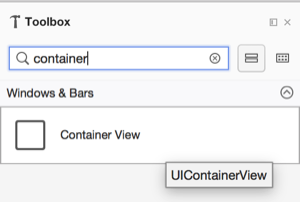
Open the Toolbox pad and type container in the Search and the Container View will be filtered in the Toolbox:-
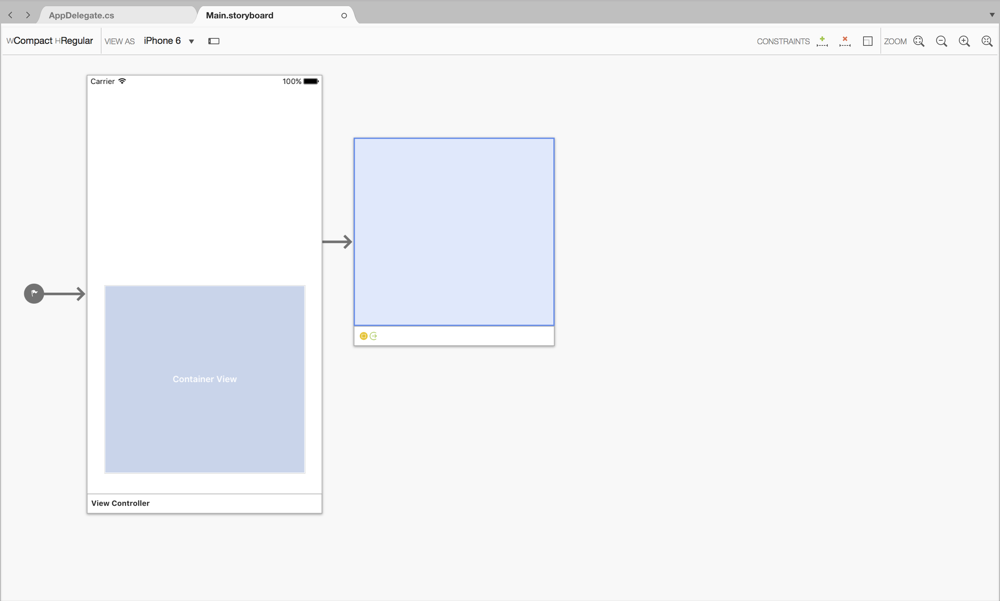
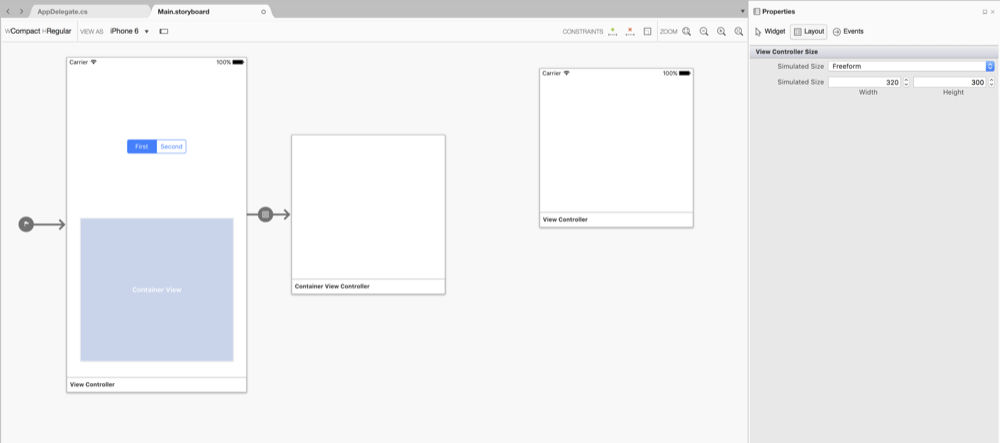
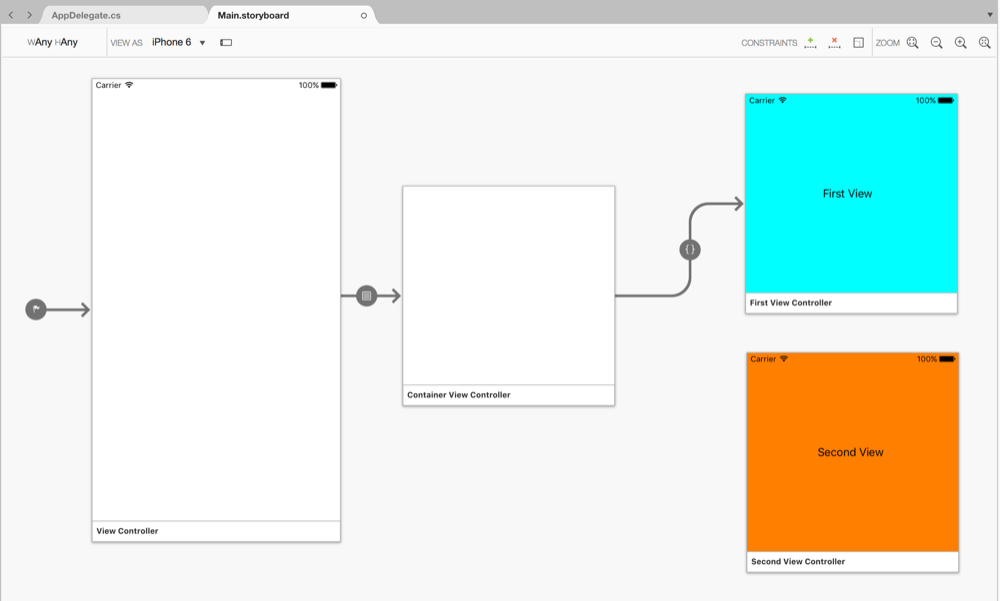
Drag and drop the Container View onto the View Controller. Notice that in additon to the Container View being added to the View Controller a new View Controller has also being created with an Embed Segue linking the two:-
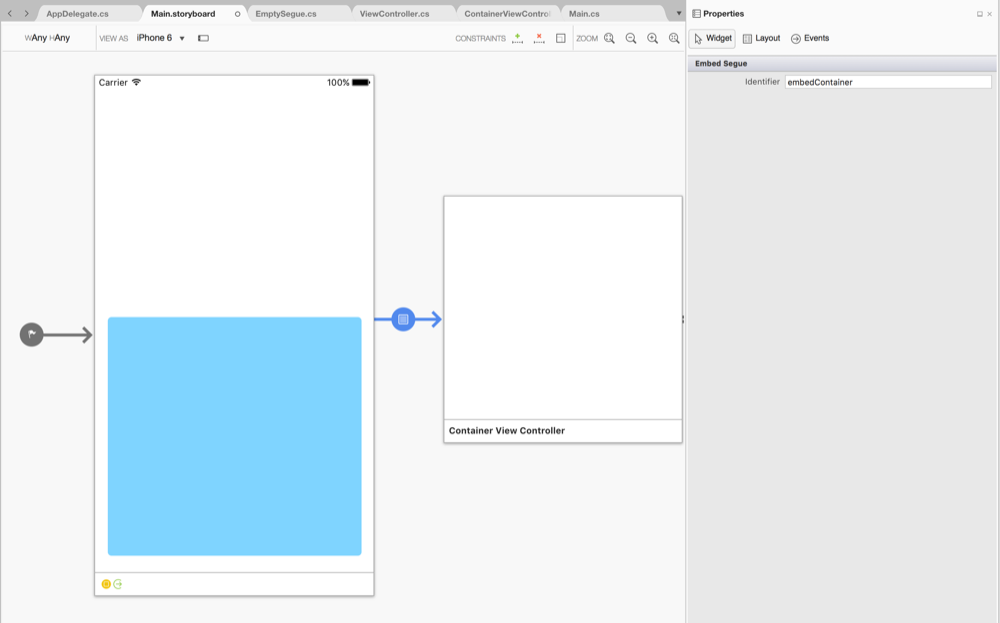
Next select the Embed Segue by clicking on the circular part and use the Properties pad to set the Identifier field to embedContainer. We will use this later to get a reference to the ContainerViewController :-
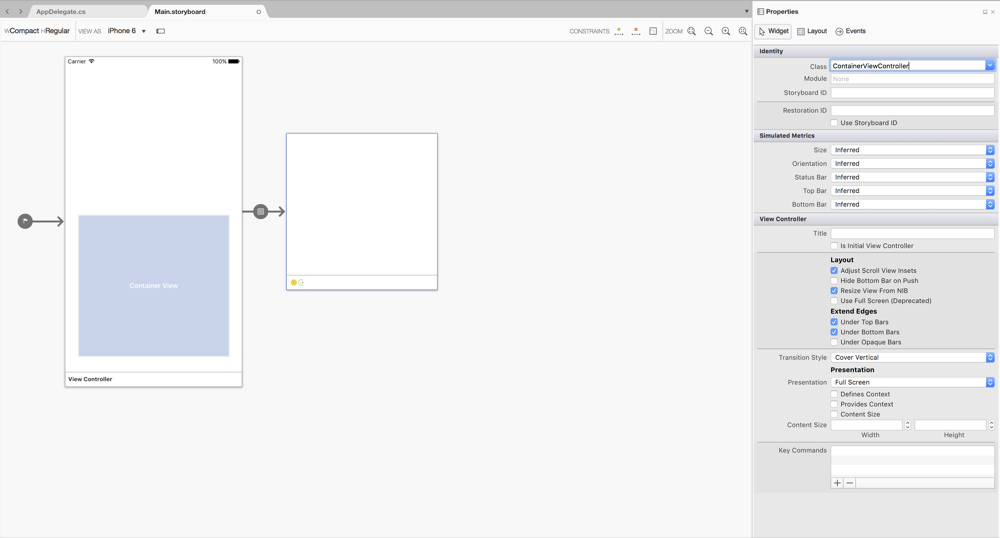
Next we can generate a code-behind file for the Container View's View Controller. Select the newly added View Controller and in the Properties pad Class Name filed we can enter CreateContainerViewControllerCodeBehind.png. when we press return the code-behind file ContainerViewController.cs will be generated:-
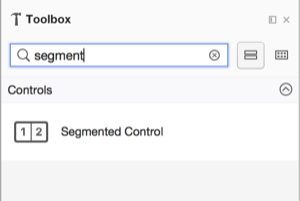
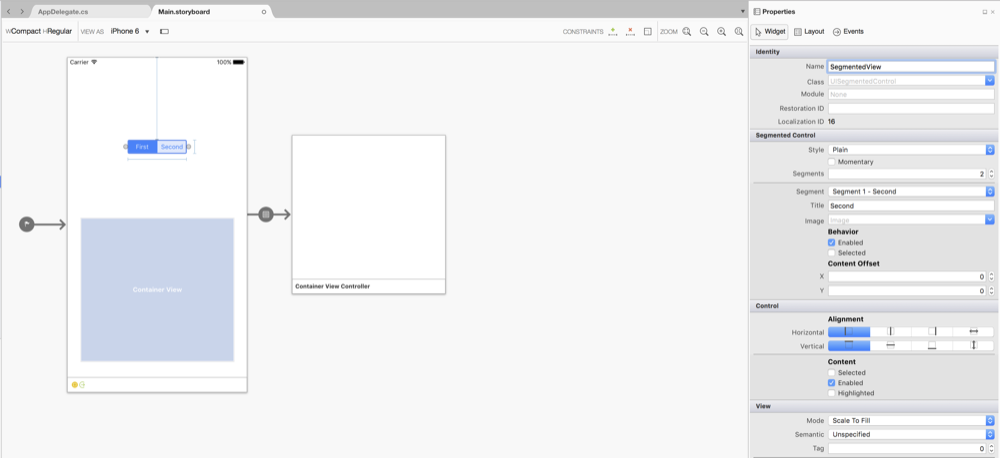
Next we can add a control to the main *View Controller which will handle switching between views. In the Toolbox pad type segment in the and the Segmented Control will be filtered in the Toolbox:-
Drag and drop the Segmented Control onto the View Controller.
Using the Properties pad set the Name field to SegmentedView :-
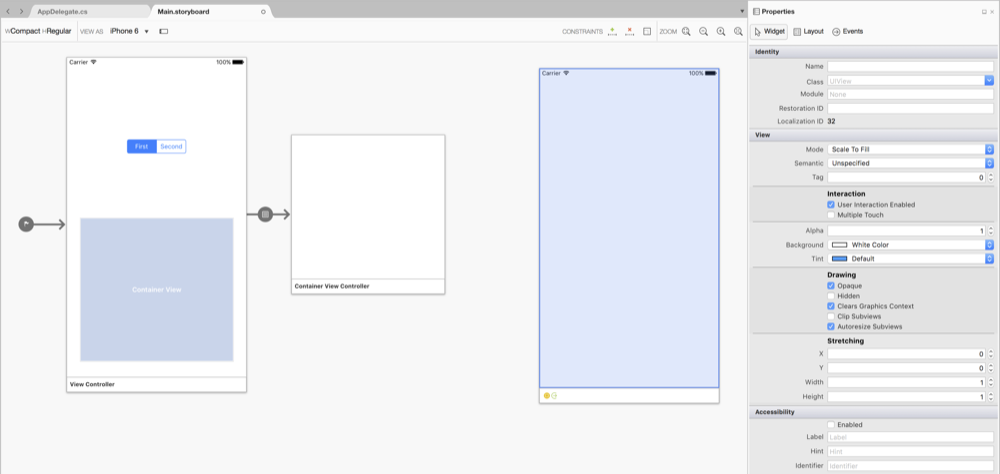
Now we can add the first child view. Drag and drop a View Controller from the toolbox onto the Desginer:-
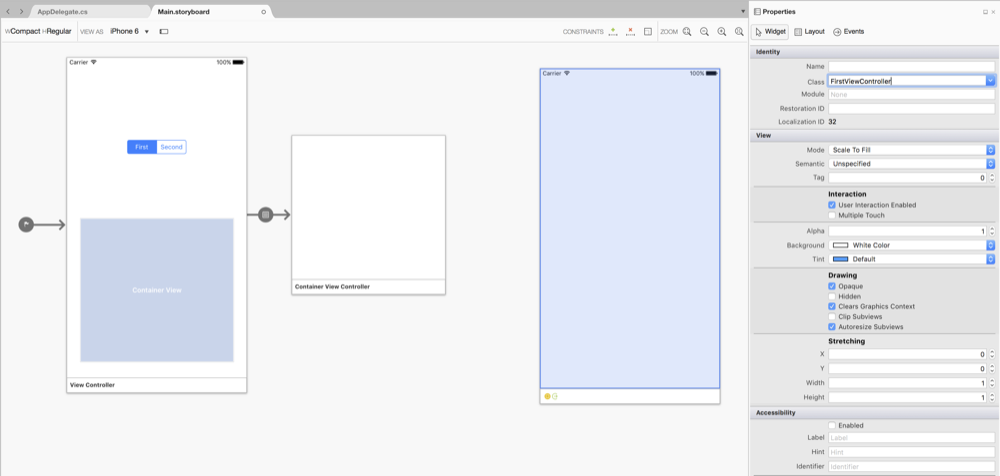
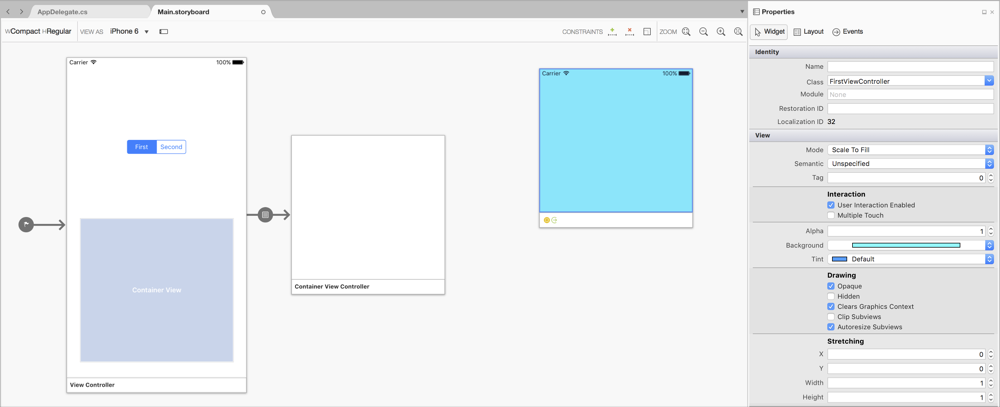
Although not strictly needed for this demo we can now genertae a code-behind class for this View Controller be entering FirstViewController in the Properties pad Class field :-
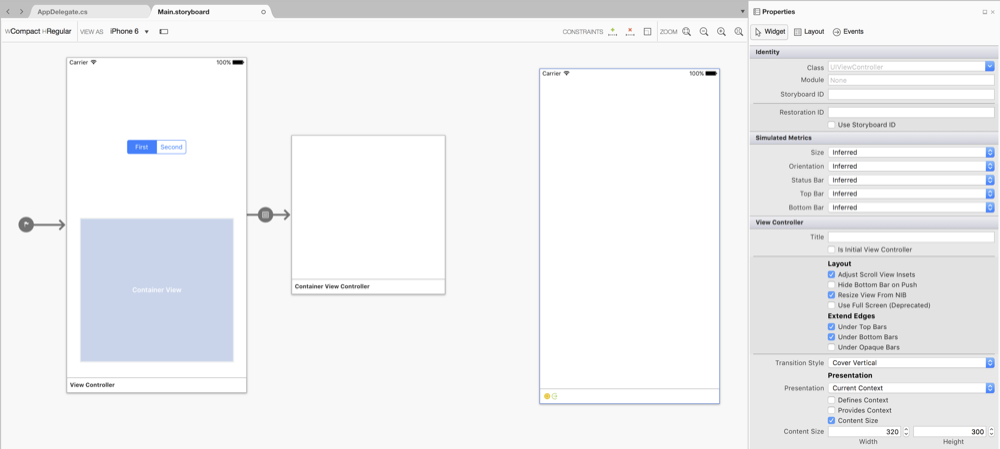
Note that this is now displayed full screen so we have to resize it to suit the size of the ContainerView in which it will be hosted.
Use the Properties pad to set the Presentation drop-down to Current Context. Check the Content Size option and set the Width to 320 and Height to 300 :-
At the top of the Presentation pad select the Layout tab. In the Simulated Size drop-down to Freeform. Set the Simulated Size Width to 320 and Height to 300 :-
Now we can set a background colour for the view to make it easy to see:-
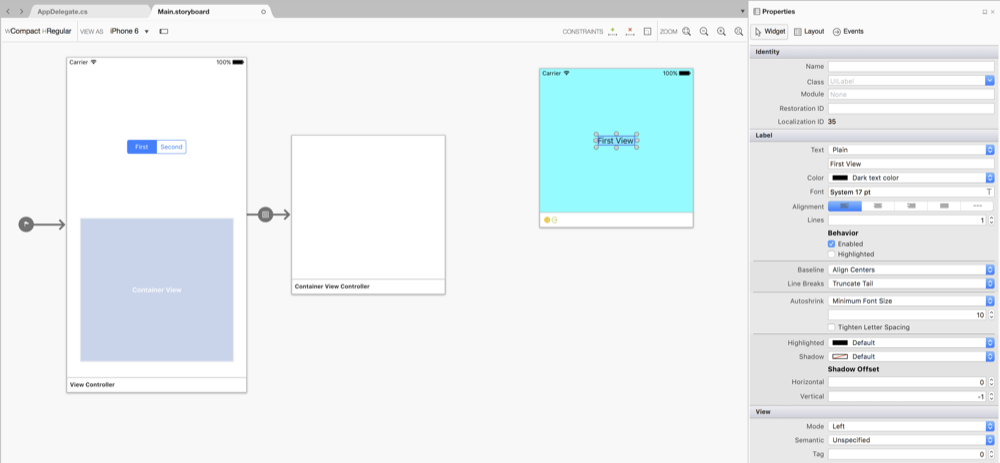
To further help demonstrate which view is being dislayed drag and drop a Label onto the view and set the Text to First View :-
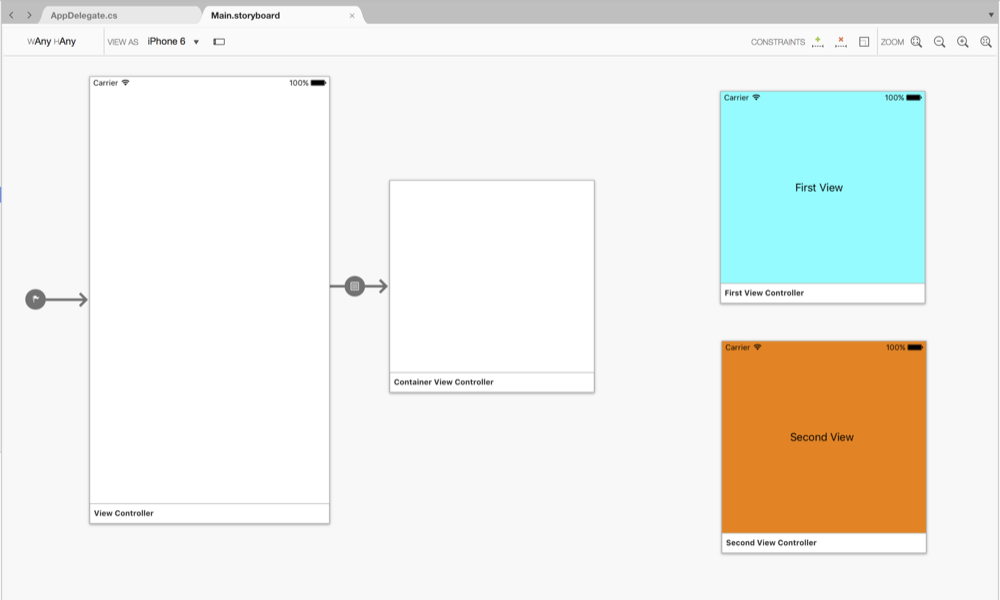
Repeat these steps to add a second view with a different colour:-
Next we can add a Custom Segue from the ContainerViewController to the FirstViewController. Ctrl + Click Drag from the ContainerViewController to the FirstViewController. A pop-up dialog is displayed:-
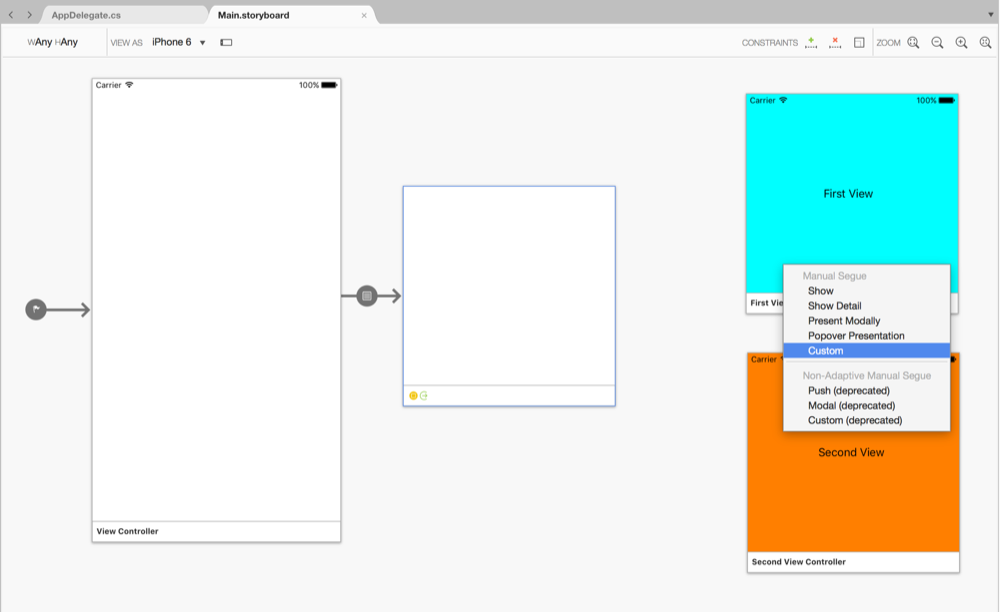
Choose the Custom option and a new Segue is added :-
Select the Segue by clicking on the circular part and using the Properties pad set the Name field to embedFirst and enter EmptySegue as the class name, this will create the EmbedSegue.cs and EmbedSegue.designer.cs files:-
![]()
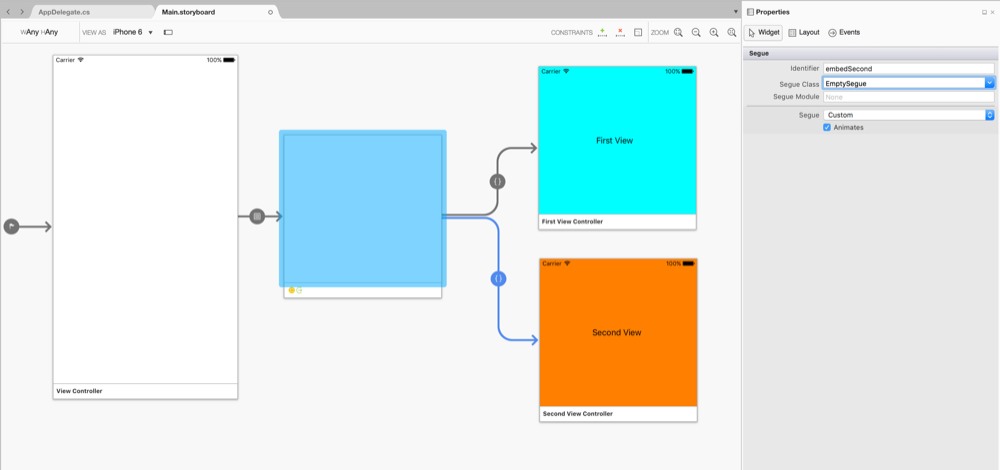
Repeat these steps to create a Segue from the ContainerViewController to the SecondViewController using the EmptySegue class and the Name field set to embedSecond :-
This completes the work we need todo in the Storyboard Designer. We can now open the EmptySegue.cs file and override the Perform method. Delete the call base.Perform; since the switching of the View Controllers is done within the ContainerViewController class. The class should look like this:-
public partial class EmptySegue : UIStoryboardSegue
{
    public EmptySegue (IntPtr handle) : base (handle)
    {
    }

    public override void Perform()
    {
        // Nothing. The ContainerViewController class handles all of the view
        // controller action.
    }
}
Next we can edit the ViewController.cs file to get a reference to the ContainerViewController and wire up the SegmentedControl events to switch the View Controllers.
Add a private member variable private ContainerViewController containerViewController; and override the PrepareForSegue method to set the containerViewController from the Segues's DestinationViewController property:-
public override void PrepareForSegue(UIStoryboardSegue segue, Foundation.NSObject sender)
{
    if (segue.Identifier == "embedContainer")
    {
        containerViewController =
            segue.DestinationViewController as ContainerViewController;
    }
}
Now that we have a reference to the ContainerViewController we can wire up the SegmentedControl events to call the methods PresentFirstViewAsync and PresentSecondViewAsync on the ContainerViewController. Edit the ViewDidLoad method and add the PresentContainerView method, the full class listing is :-
public partial class ViewController : UIViewController
{
    private ContainerViewController containerViewController;

    protected ViewController(IntPtr handle) : base(handle)
    {
        // Note: this .ctor should not contain any initialization logic.
    }

    public override void PrepareForSegue(UIStoryboardSegue segue,
                                         Foundation.NSObject sender)
    {
        if (segue.Identifier == "embedContainer")
        {
            containerViewController =
                segue.DestinationViewController as ContainerViewController;
        }
    }

    public override void ViewDidLoad()
    {
        base.ViewDidLoad();

        //select the First view
        SegmentedView.SelectedSegment = 0;
        PresentContainerView(SegmentedView.SelectedSegment);

        SegmentedView.ValueChanged += (sender, e) =>
        {
            var selectedSegmentId = (sender as UISegmentedControl).SelectedSegment;
            PresentContainerView(selectedSegmentId);
        };
    }

    async void PresentContainerView(nint selectedId)
    {
        //we need some synchronisation because the new view controller
        //is animated in. Disable the switch until the animation is complete
        if (selectedId == 0)
        {
            SegmentedView.Enabled = false;

            await containerViewController.PresentFirstViewAsync();

            SegmentedView.Enabled = true;
        }
        else if (selectedId == 1)
        {
            SegmentedView.Enabled = false;

            await containerViewController.PresentSecondViewAsync();

            SegmentedView.Enabled = true;
        }
    }

}
Note that we disable the SegmentedControl until the Present methods have completed to prevent synchronisation problems should the user toggle between the views very quickly.
Next we can get to the core of the technique by editing the ContainerViewController.cs file. Essentially we declare the methods PresentFirstViewAsync and PresentSecondViewAsync which are called in response to the SegmentedControl events. These methods call PerformSegue passing the appropriate Segue identifier. This enables us to override the PrepareForSegue method and to switch the View Controllers there.
The method for doing this is described in the Apple doucmentation Implementing a Container View Controller. The methods used in Michael Luton's article Storyboards With Custom Container View Controllers differ slightly from those in the Apple documentation, I have used the Apple guidance.
We use the Transition method of the UIViewController with animation options, in this case a Dissolve animation is used, a number of others are available. Note the use of the callback when the Transition animation completes to call methods on the View Controllers to complete the switching of the View Controllers.
Also of note is that I have added the use of a TaskCompletionSource property so that we can disable the SegmentedControl when we start to change views and then re-enable it after the Transition animation completes. Without this synchronisation tapping quickly on the SegmentedControl can result in the presented view getting out of synchronisation with the control.
The class listing is :-
public partial class ContainerViewController : UIViewController
{
    private NSString SegueIdentifierFirst = (NSString)"embedFirst";
    private NSString SegueIdentifierSecond = (NSString)"embedSecond";

    private TaskCompletionSource<bool> viewChanging;

    public ContainerViewController(IntPtr handle) : base(handle)
    {
    }

    public TaskCompletionSource<bool> ViewChanging
    {
        get { return viewChanging; }
    }

    public Task<bool> PresentFirstViewAsync()
    {
        viewChanging = new TaskCompletionSource<bool>();

        PerformSegue(SegueIdentifierFirst, this);

        return viewChanging.Task;
    }

    public Task<bool> PresentSecondViewAsync()
    {
        viewChanging = new TaskCompletionSource<bool>();

        PerformSegue(SegueIdentifierSecond, this);

        return viewChanging.Task;
    }

    public override void PrepareForSegue(UIStoryboardSegue segue,
                                         NSObject sender)
    {
        if ((segue.Identifier == SegueIdentifierFirst) ||
            (segue.Identifier == SegueIdentifierSecond))
        {
            if (ChildViewControllers.Length > 0)
            {
                SwapFromViewController(ChildViewControllers[0],
                                       segue.DestinationViewController);
            }
            else
            {
                AddInitialViewController(segue.DestinationViewController);
            }
        }
    }

    private void AddInitialViewController(UIViewController viewController)
    {
        //on first run no transition animation
        AddChildViewController(viewController);

        viewController.View.Frame = View.Bounds;

        Add(viewController.View);

        viewController.DidMoveToParentViewController(this);

        viewChanging.TrySetResult(true);
    }

    private void SwapFromViewController(UIViewController fromViewController,
                                        UIViewController toViewController)
    {
        fromViewController.WillMoveToParentViewController(null);

        toViewController.View.Frame = this.View.Bounds;

        AddChildViewController(toViewController);

        Transition(fromViewController,
                   toViewController,
                   0.3,
                   UIViewAnimationOptions.TransitionCrossDissolve,
                   () => { },
                   (bool finished) =>
                    {
                        fromViewController.RemoveFromParentViewController();
                        toViewController.DidMoveToParentViewController(this);

                        viewChanging.TrySetResult(true);
                    });
    }
}
Review of the Technique
This technique works well but has some limitations in terms of re-use. The use of Empty Segues seems counter-intuitive and at odds with the framework and it's intended use.
When looking at the methods used to switch between the View Controllers we can see that they are all publically available on the UIViewController class. Furthermore the Segue contains properties for the SourceViewController and DestinationViewController.
There would appear to be an opportunity to move the code to switch View Controllers from the ContainerViewController into a Segue which could then be re-used.
In the next section we will look to perform this refactoring.
Refactoring to a Transition Segue
In this section we will take the code which transitions the View Controllers out of the ContainerViewController and move it into the Perform method of the Segue. The aim being to create a re-usable Segue.
We start by creating an interface ITransitioningViewController with the ViewChanging property to handle synchronisation without taking a dependency on any particular ViewController. This is optional, the listing is :-
public interface ITransitioningViewController
{
    TaskCompletionSource<bool> ViewChanging { get; set;}
}
For clarity we will delete the existing EmptySegue class and create a new class. We do this by opening the Main.storyboard file and selecting the Segue connecting the ContainerViewController to the FirstViewController. Using the Properties pad we edit the Segue Class field from EmptySegue to TransitionSegue and press return to create the new TransitionSegue.cs and TransitionSegue.designer.cs** files:-
![]()
Edit the Segue connecting the ContainerViewController and the SecondViewController so that the Segue Class field is set to TransitionSegue.
Edit the TransitionSegue class such that the Perform method handles the View Controller transition, the class listing is :-
public partial class TransitionSegue : UIStoryboardSegue
{
    public TransitionSegue (IntPtr handle) : base (handle)
    {
    }

    public override void Perform()
    {
        if (SourceViewController.ChildViewControllers.Length > 0)
        {
            SwapFromViewController(SourceViewController.ChildViewControllers[0],
                                   DestinationViewController);
        }
        else
        {
            AddInitialViewController(DestinationViewController);
        }
    }

    private void AddInitialViewController(UIViewController viewController)
    {
        //on first run no transition animation
        SourceViewController.AddChildViewController(viewController);

        viewController.View.Frame = SourceViewController.View.Bounds;

        SourceViewController.Add(viewController.View);

        viewController.DidMoveToParentViewController(SourceViewController);

        var containerViewController =
            SourceViewController as ITransitioningViewController;

        if(containerViewController != null)
            containerViewController.ViewChanging.TrySetResult(true);
    }

    private void SwapFromViewController(UIViewController fromViewController,
                                        UIViewController toViewController)
    {
        fromViewController.WillMoveToParentViewController(null);

        toViewController.View.Frame = SourceViewController.View.Bounds;

        SourceViewController.AddChildViewController(toViewController);

        SourceViewController.Transition(fromViewController,
                   toViewController,
                   0.3,
                   UIViewAnimationOptions.TransitionCrossDissolve,
                   () => { },
                   (bool finished) =>
                    {
                        fromViewController.RemoveFromParentViewController();
                        toViewController.DidMoveToParentViewController(
                                             SourceViewController);

                        var containerViewController =
                            SourceViewController as ITransitioningViewController;

                        if (containerViewController != null)
                            containerViewController.ViewChanging.TrySetResult(true);
                    });
    }
}
Next we can edit the ContainerViewController class to remove the methods AddInitialViewController and SwapFromViewController and add the use of the interface ITransitioningViewController. The class should now look like this :-
public partial class ContainerViewController : UIViewController,
                                               ITransitioningViewController
{
    private NSString SegueIdentifierFirst = (NSString)"embedFirst";
    private NSString SegueIdentifierSecond = (NSString)"embedSecond";

    private TaskCompletionSource<bool> viewChanging;

    public ContainerViewController(IntPtr handle) : base(handle)
    {
    }

    public TaskCompletionSource<bool> ViewChanging
    {
        get { return viewChanging; }

        set { viewChanging = value; }
    }

    public Task<bool> PresentFirstViewAsync()
    {
        ViewChanging = new TaskCompletionSource<bool>();

        PerformSegue(SegueIdentifierFirst, this);

        return viewChanging.Task;
    }

    public Task<bool> PresentSecondViewAsync()
    {
        ViewChanging = new TaskCompletionSource<bool>();

        PerformSegue(SegueIdentifierSecond, this);

        return viewChanging.Task;
    }
}
This completes the refactoring and now we have a re-usable TransitionSegue class and the ContainerViewController is much simplified.