This post continues on from the previous posts Xamarin iOS Table Views and MVVM Light and Digging Deeper into XamariniOS Table Views with MVVM Light.
It is part of a series of posts investigating how to use the MVVM pattern on the Xamarin platforms using shared View Models/Models/Services.
Overview
In this post we start to implement the Android version of the app. The application will present a list of Todo Tasks using MVVM Light to bind from an ObservableCollection in the ViewModel to a ListView. The tasks are held in memory and can be created using a button on the Toolbar.
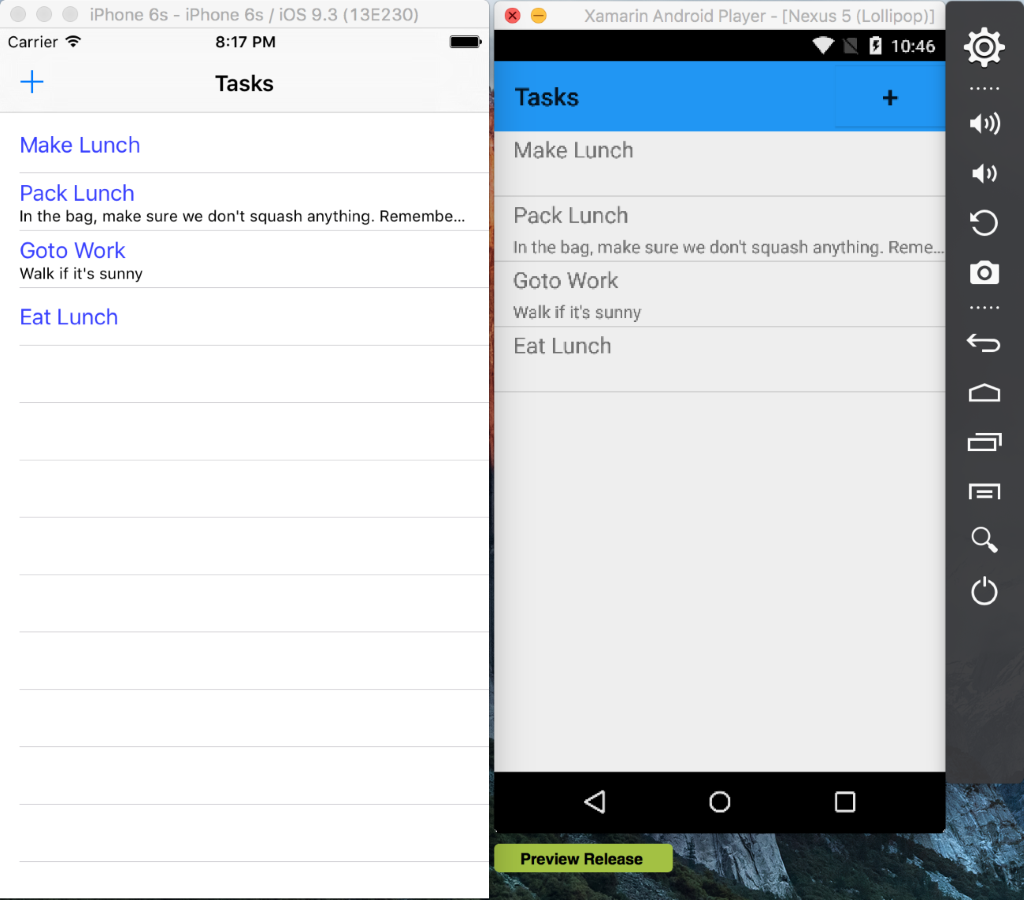
The app we create here has parity with the iOS version except for the swipe to delete feature. I will cover that in a future post so as to keep the length of this post more manageable. The iOS and Android versions of the app are shown below:-

The main focus of the post is to use the ObservableAdapter provided by MVVMLight to bind the ListView to the ViewModel's ObservableCollection.
Resources
Laurent Bugnion mentions the
ObservableAdapterin his Xamarin University guest lecture titled ‘MvvM Light Toolkit with Xamarin’.The MVVM Light source code contains the Flowers sample which demonstrates the
ObservableAdapter.Mark Allibone’s blog post Xamarin.Android MVVM Light ListView bindings.
The Xamarin docs for ListViews and Adapters.
James Montemagno's blog posts Android Tips: Hello Toolbar, Goodbye Action Bar and Introduction to Android Material Design.
The video Xamarin Android Tutorial 47 Material Design Customizing Toolbar.
The Xamarin docs for Material Theme.
Key Points
- Binding an Android
ListViewto anObservableCollectionsuch that it automatically add and removes items from the list as theObservableCollectionis modified is straight forward. It requires essentially a call to an extension method GetAdapter to create theObservableAdapterand implementation of a method to provide the View for each row:-
protected override void OnCreate (Bundle savedInstanceState)
{
  base.OnCreate (savedInstanceState);

  // Set our view from the "main" layout resource
  SetContentView (Resource.Layout.Main);

  ...

  TaskList.Adapter = Vm.TodoTasks.GetAdapter(GetTaskAdapter);
}

private View GetTaskAdapter(int position,
                            TaskModel taskModel,
                            View convertView)
{
  // Not reusing views here
  convertView = LayoutInflater.Inflate(
                  Resource.Layout.TaskTemplate, null);

  var title = convertView.FindViewById<TextView>(
                Resource.Id.NameTextView);

  title.Text = taskModel.Name;

  var desc = convertView.FindViewById<TextView>(
               Resource.Id.NotesTextView);

  desc.Text = taskModel.Notes;

  return convertView;
}
- The GetAdapter extension method can be found in the MVVM Light source code in the Galasoft.MvvmLight.Platform (Android) project. Another method is provided for using an
IList<T>as the data source. It is responsible for creating anObservableAdapterand initialising it to use theObservableCollectionand the method providing theViewfor each row. It's in the folder Helpers defined in theExtensionsAndroidclass and is defined thus:-
public static ObservableAdapter<T> GetAdapter<T>(
            this ObservableCollection<T> collection,
            Func<int, T, View, View> getTemplateDelegate)
{
  return new ObservableAdapter<T>
  {
    DataSource = collection,
    GetTemplateDelegate = getTemplateDelegate
  };
}
- This example uses a custom Layout defined in the
TaskTemplateto provide a View for each row. An alternative method would be to use one of the built in layouts defined inAndroid.Resources.Layout. The Xamarin docs Populating a ListView with Data provide examples of how to do this, the example code below demonstrates this:-
public override View GetView(int position,
                             View convertView,
                             ViewGroup parent)
{
  View view = convertView; // re-use an existing view, if one is available
  if (view == null) // otherwise create a new one

  view = context.LayoutInflater.Inflate(
           Android.Resource.Layout.SimpleListItem1, null);

  view.FindViewById<TextView>(
         Android.Resource.Id.Text1).Text = items[position];

  return view;
}
The
ObservableAdapter<T>is defined in the Helpers folder of the Galasoft.MvvmLight.Platform (Android) project. It derives fromBaseAdapter<T>and usesINotifyCollectionChangedto listen to changes in theObservableCollection.Mark's blog post has a section titled 'Be aware of the Activity Lifecycle'. This is worth reading as he outlines how Android will destroy and re-create the Activity for example when the orientation changes and the implications of a potential memory leak. I have implemented his suggested Initialisation in the TaskListViewModel.
The Toolbar used requires a little setup to use the Material Design theme, requiring the creation of a style.
The Example Step by Step
The android example app extends the previous skeleton android app and is built alongside the existing iOS project.
The code for this example is in GitHub.
The example app presents a list of Tasks with notes in a ListView. Some example task data has been seeded. New Tasks can be added via the '+' button in the Tool Bar.

The data is held in memory in an ObservableCollection in the TaskViewModel. Each task is represented by a TaskModel, see the class diagram below.

To start off we will edit the ViewModel to add an initialisation method to handle the Activity destruction and re-creation on orientation etc as suggested by Mark Allibone.
Open the TaskListViewModel and edit the constructor to remove the seed data and add the methods Initialise and SeedData as shown below:-
public TaskListViewModel()
{
  AddTaskCommand = new RelayCommand(AddTask);
}

private List<TaskModel> SeedData()
{
  var tasks = new List<TaskModel>()
      {
        new TaskModel
            {
              Name = "Make Lunch",
              Notes = ""
            },
        new TaskModel
            {
              Name = "Pack Lunch",
              Notes = "In the bag, make sure we don't squash anything. Remember to pack the orange juice too."
            },
        new TaskModel
            {
              Name = "Goto Work",
              Notes = "Walk if it's sunny"
            },
        new TaskModel
            {
              Name = "Eat Lunch",
              Notes = ""
            }
      };
      return tasks;
}

public void Initialize()
{
  if (TodoTasks != null)
  {
    // Prevent memory leak in Android
    var tasksCopy = TodoTasks.ToList();
    TodoTasks = new ObservableCollection<TaskModel>(tasksCopy);
    return;
  }

  TodoTasks = new ObservableCollection<TaskModel>();

  var people = SeedData();
  TodoTasks.Clear();
  foreach (var person in people)
  {
    TodoTasks.Add(person);
  }
}
We need to create a class to provide access to the ViewModelLocator so add the App class :-
public static class App
{

  private static ViewModelLocator locator;


  public static ViewModelLocator Locator

  {

    get

    {

      if (locator == null)

      {

        // First time initialization


        locator = new ViewModelLocator();

      }


      return locator;

    }

  }

}
Next we will remove the default button code in the MainActivity. Open the MainActivity class in the ObservableTables.Droid project and edit it to remove the existing button code:-
int count = 1;

protected override void OnCreate (Bundle savedInstanceState)
{
  ...

  // Get our button from the layout resource,

  // and attach an event to it

  Button button = FindViewById<Button>(
                    Resource.Id.myButton);


  button.Click += delegate
                 {

                   button.Text =
                     string.Format("{ 0} clicks!", count++);

                 } ;
}
Next we will change the Activity Label, edit the Activity attribute to change the table from ‘ObservableTables’ to ‘Tasks’, from :-
[Activity (Label = "ObservableTables",
           MainLauncher = true,
           Icon = "@mipmap/icon")]
to :-
[Activity (Label = "Tasks",
           MainLauncher = true,
           Icon = "@mipmap/icon")]
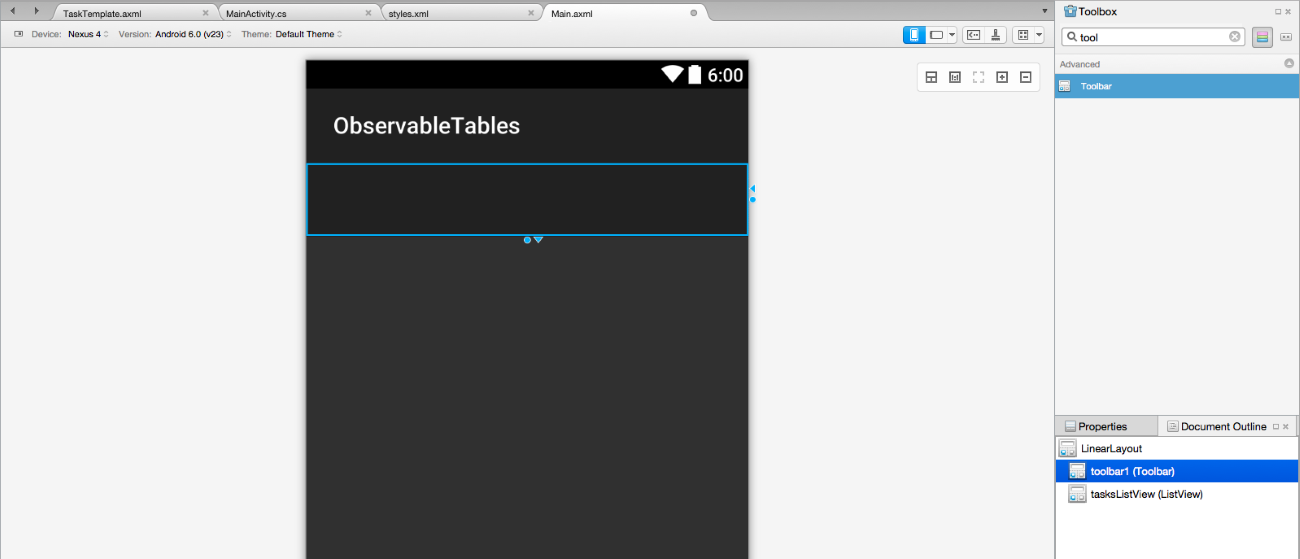
Now we will remove the default Button from the Layout. Open the Main.xml in the Resources\layout folder.
Select the Button and delete it.
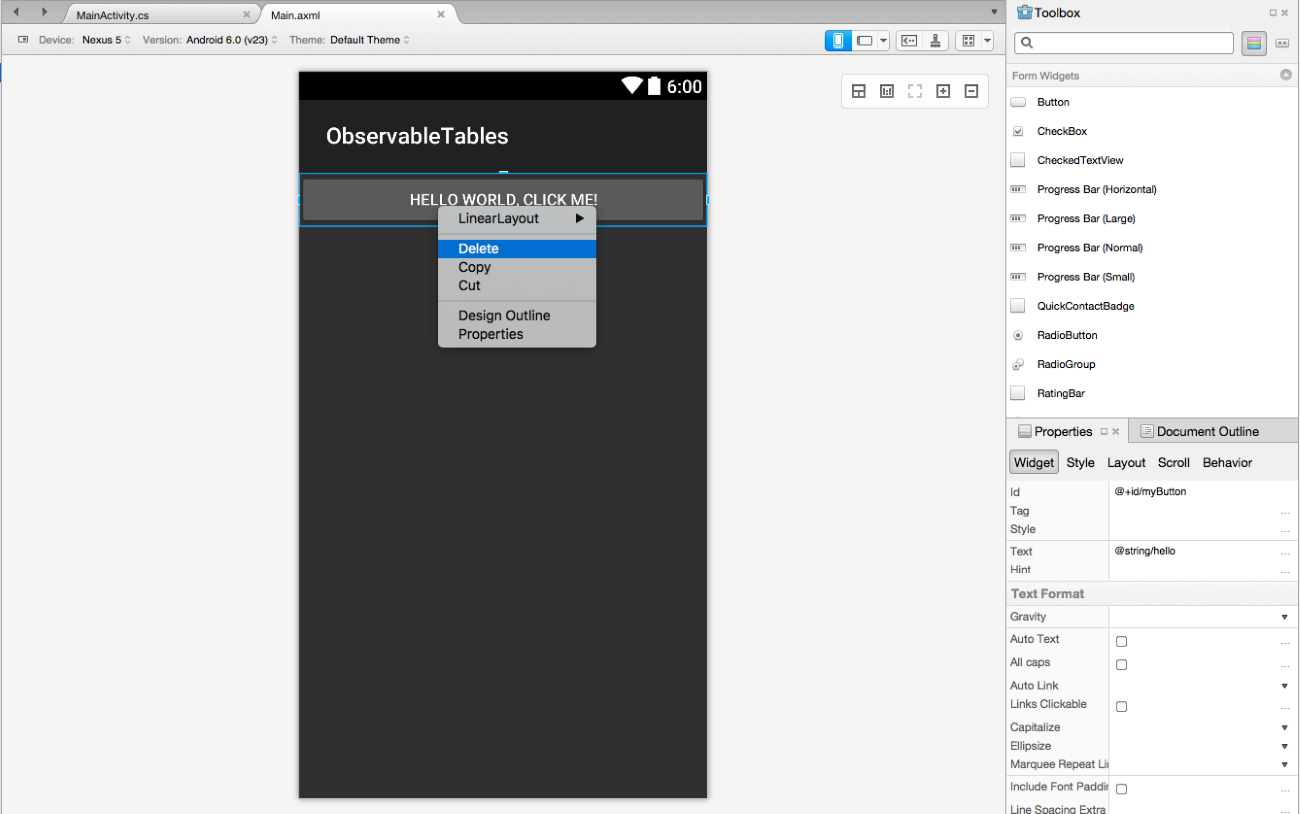
Select a ListView in the Toolbox and drag it onto the page.

Edit the Id of the the ListView in the PropertiesPad to ‘@+id/tasksListView’.
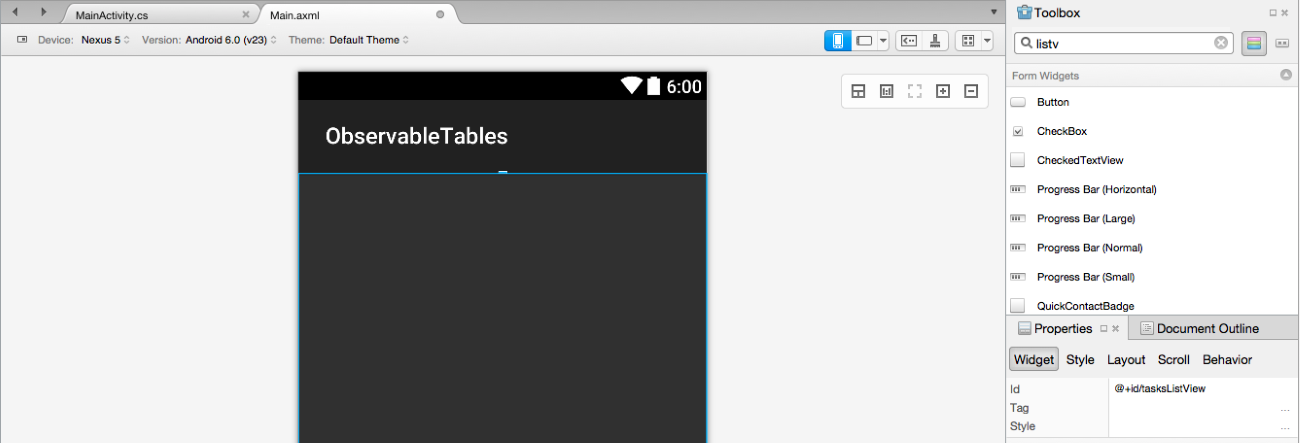
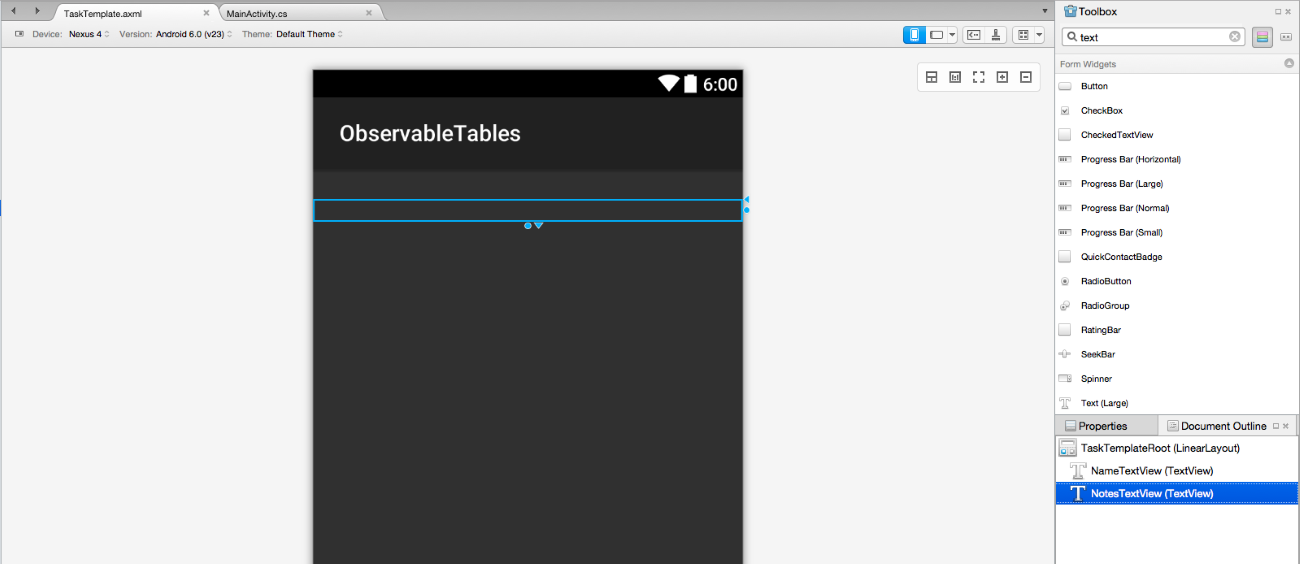
The Document Outline pad should now display the ListView contained in the LinearLayout as below.

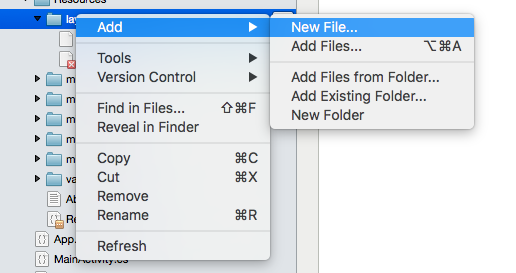
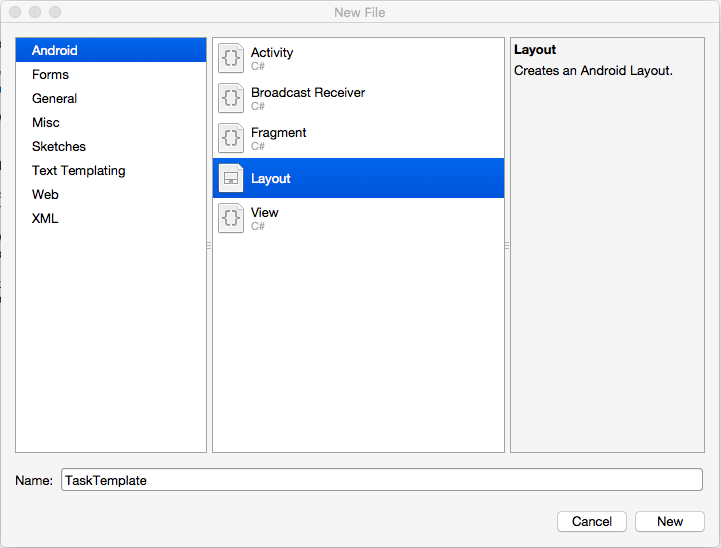
Now we will create the Layout which will be used for the View for each row of the ListView. As previously mentioned in the Key Points section we could also use a pre-defined Layout from the Android.Resources.Layout. Create the TaskTemplate.axml in the layout folder - right click the layout folder and select the Add File option.
Select Android and the Layout option and name it TaskTemplate.axml.
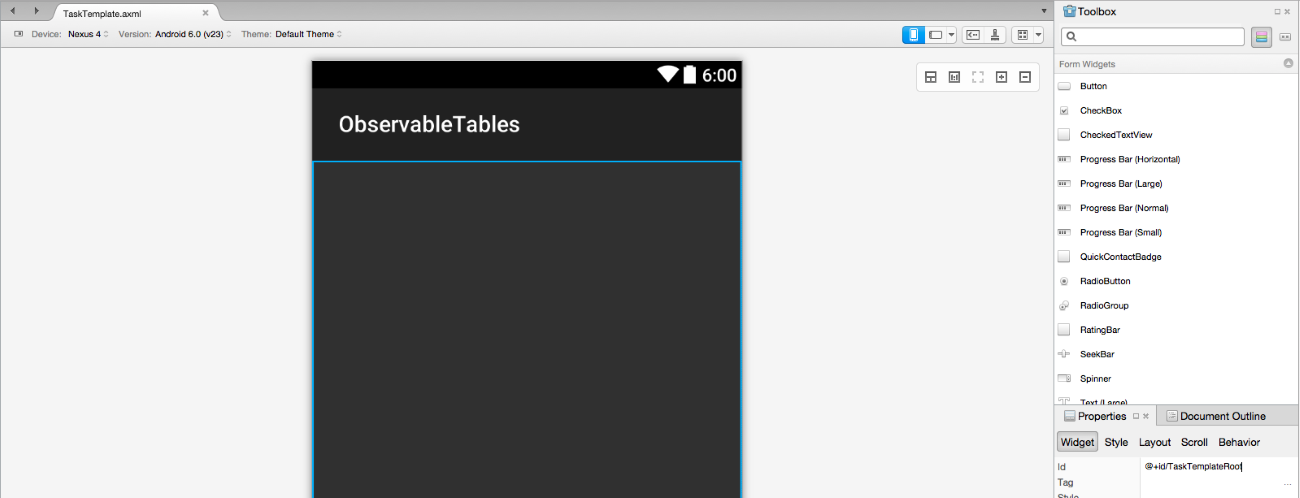
Double click on the new file TaskTemplate.axml to open the layout. The designer will display the layout, clicking on the DocumentOutline pad will show that this is an empty LinearLayout.
![]()
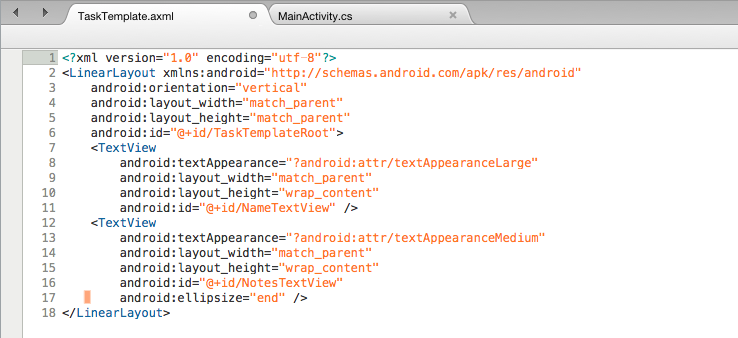
Clicking the Source view will show the markup.
![]()
Return to the Designer view and use the Properties Pad to assign the Id field to ‘@+id/TaskTemplateRoot’. We will use this later to retrieve the layout in code.
Now we need to add text fields for the Task Name and Notes fields.
In the Toolbox type ‘text’ in the search and observe that there are four options for TextViews.

Select the Text (Large) widget and drag it over the layout in the designer, the background will highlight in green as you drag over. Now drop the TextView and the designer should show the TextView with ‘Large Text’.
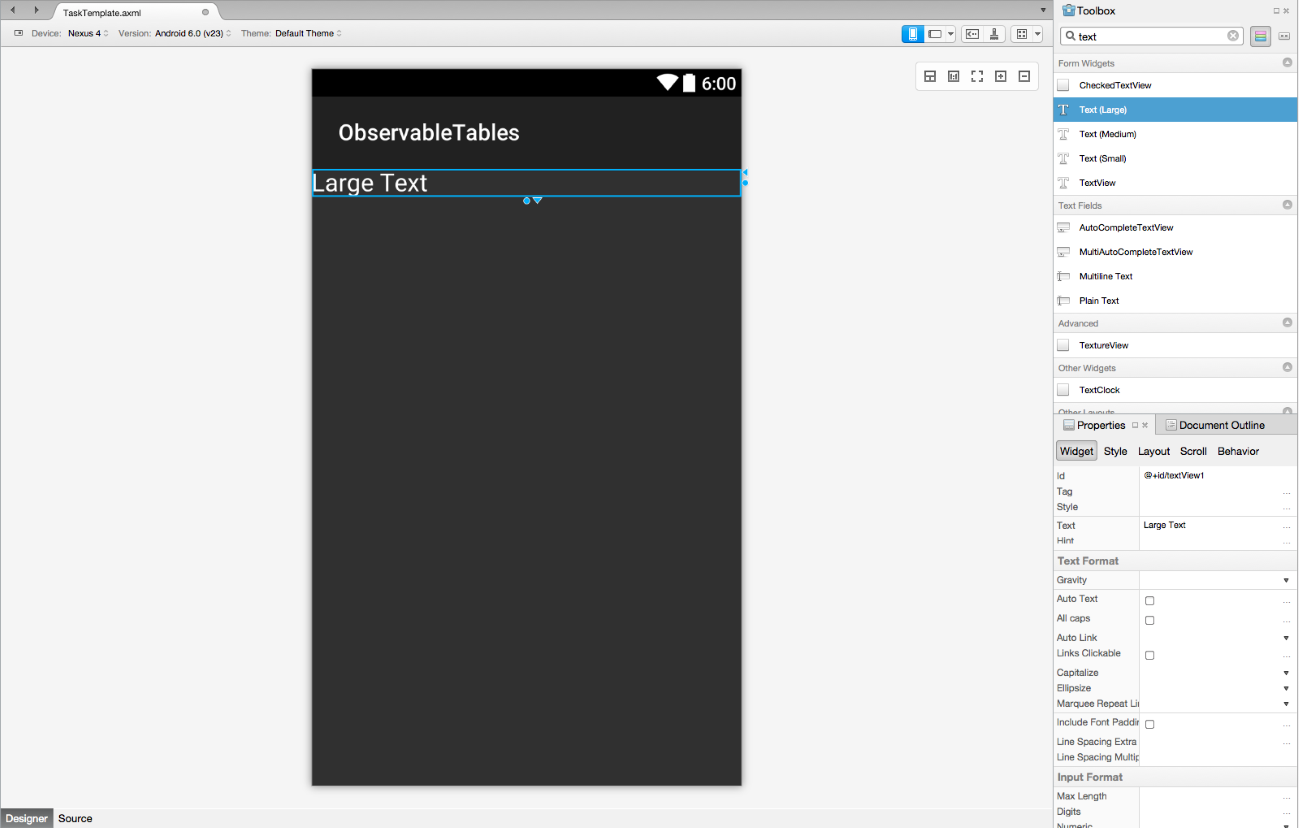
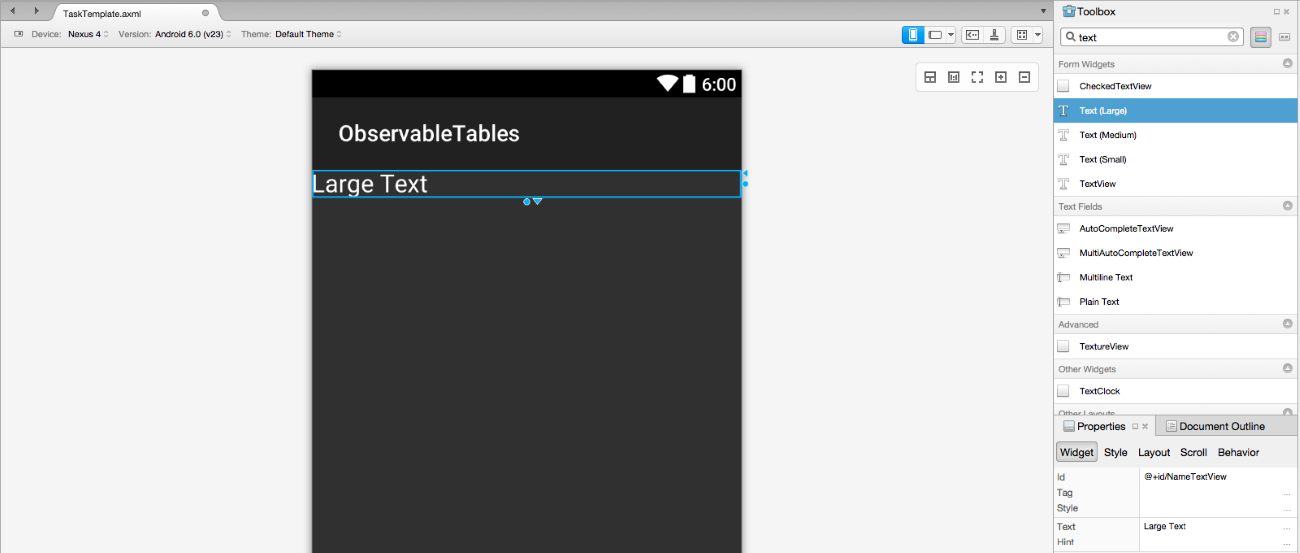
Now edit the Id in the Properties pad to ‘@+id/NameTextView’.
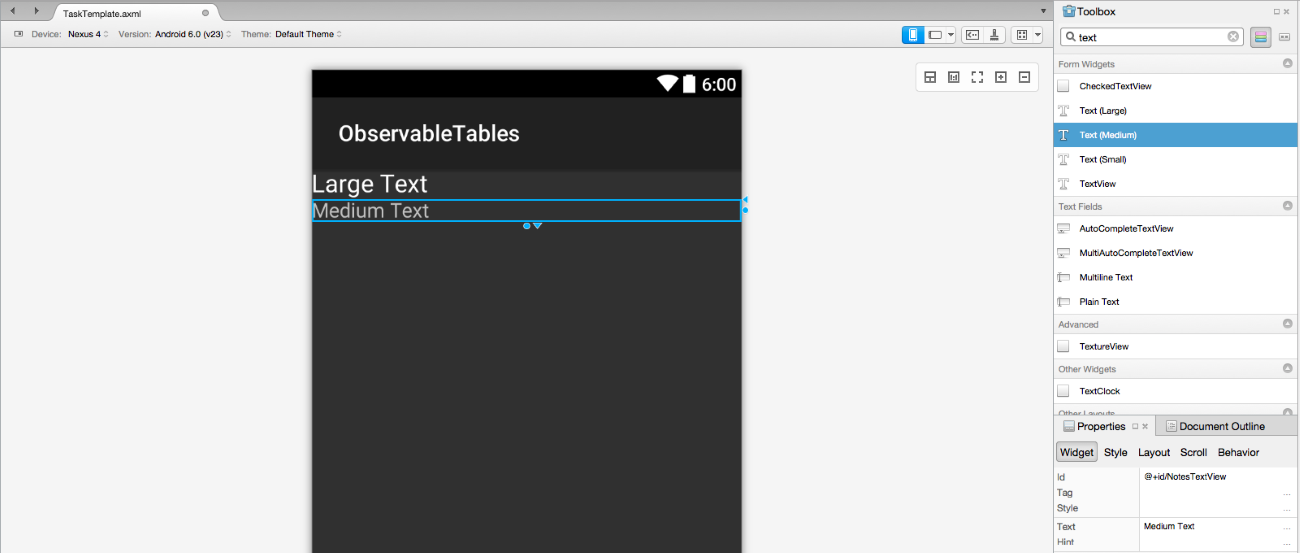
Next add a TextView for the Notes field, this can be a smaller font size so select a Text (Medium) widget in the Toolbox and drag and drop it beneath the Large Text TextView.
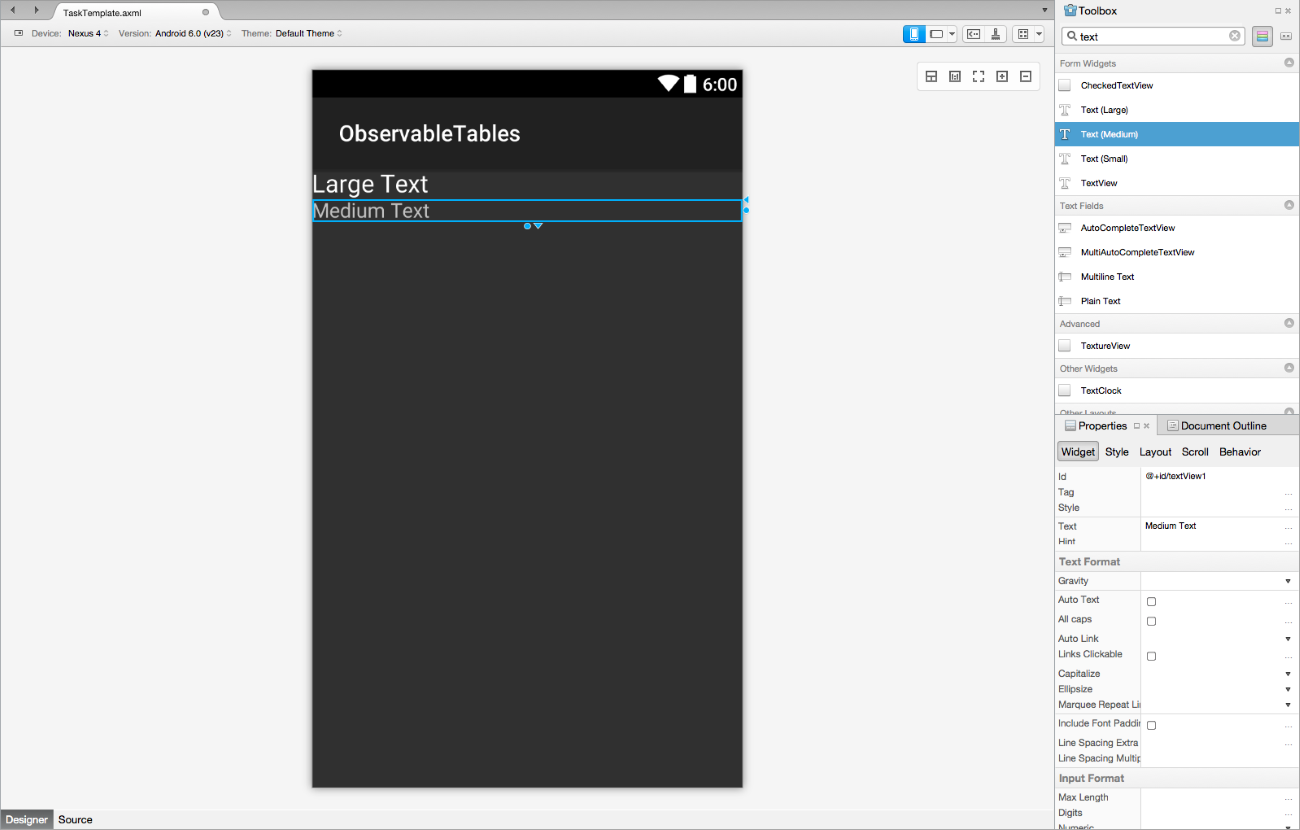
Now edit the Id in the Properties pad to ‘@+id/NotesTextView’.
Now edit the Text properties of both the TextViews so that they are empty.
Next we will add properties to the MainActivity to get the ListView and ViewModel. Edit the MainActivity.cs to add the properties for the ViewModel and ListView:-
private ListView taskList;

public ListView TaskList
{
  get
  {
    return taskList ??
      (taskList = FindViewById<ListView(
                    Resource.Id.tasksListView));
  }
}

public TaskListViewModel Vm
{
  get
  {
    return App.Locator.TaskList;
  }
}
Now create the method which will be called by the ObservableAdapter to provide the View for each row. This will be passed into the extension method GetAdapter. Add the GetTaskAdapter method which references the TaskTemplate.axml
private View GetTaskAdapter(int position,
                            TaskModel taskModel,
                            View convertView)
{
  // Not reusing views here
  convertView = LayoutInflater.Inflate(
                  Resource.Layout.TaskTemplate, null);

  var title = convertView.FindViewById<TextView>(
                Resource.Id.NameTextView);
  title.Text = taskModel.Name;

  var desc = convertView.FindViewById<TextView>(
               Resource.Id.NotesTextView);
  desc.Text = taskModel.Notes;

  return convertView;
}
Now we can use the extension method GetAdapter to create the ObservableAdapter and bind the ListView to the view model's ObservableCollection. Edit the OnCreate method to create the Adpater from the ObservableCollection :-
protected override void OnCreate (Bundle savedInstanceState)
{

  base.OnCreate (savedInstanceState);


  // Set our view from the "main" layout resource

  SetContentView (Resource.Layout.Main);


  Vm.Initialize ();

  TaskList.Adapter = Vm.TodoTasks.GetAdapter(GetTaskAdapter);

}
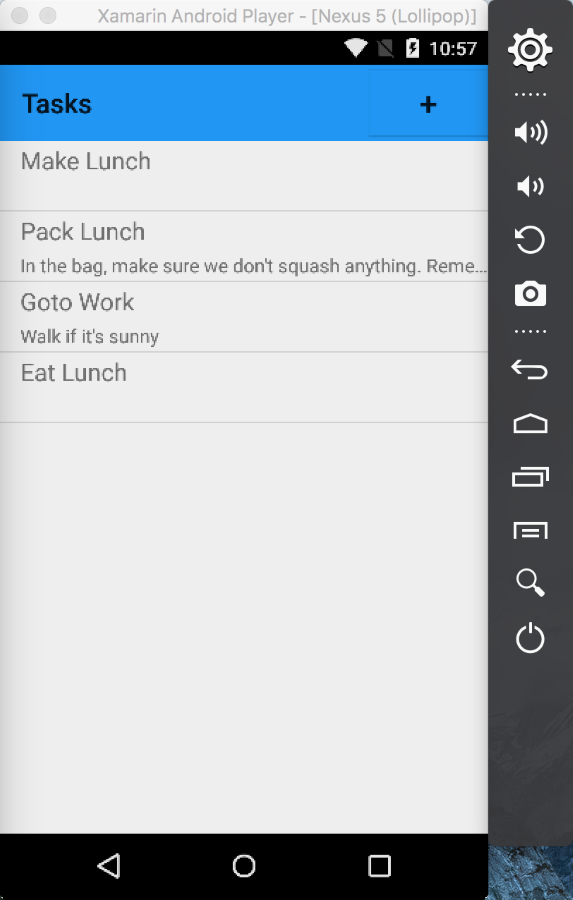
Running the app now should display the list of tasks:-

However the notes are overflowing to multiple lines, we can edit the TaskTemplate to restrict the notes to a single line and place an ellipsis at the end to mark the overflowing text.
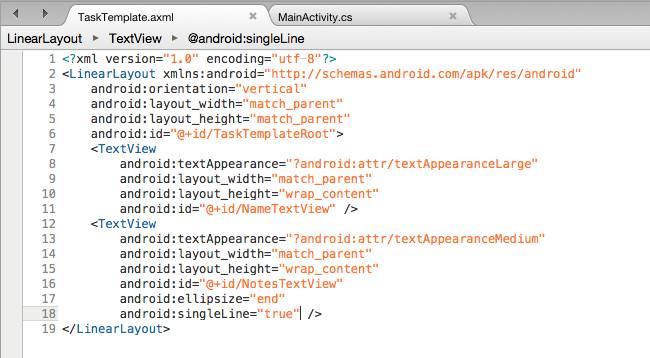
Open the TaskTemplate in the Designer and use the DocumentOutline pad to select the NotesTextView.
Set the Ellipsis property to end, note the different options.

Now click the Source tab to display the markup.
Next restrict the TextView to a single line by adding the line ‘android:singleLine="true”’
Running the application again we should see that the Notes have been restricted.
However when running the iOS and Android versions side by side the fonts in the Android are somewhat larger.

This can be fixed by changing the TextViews textAppearance property from Large and Medium to Medium and Small.
From :-
<TextView
      android:textAppearance="?android:attr/textAppearanceLarge"
...
<TextView
      android:textAppearance="?android:attr/textAppearanceMedium"
To :-
<TextView
      android:textAppearance="?android:attr/textAppearanceMedium"
...
<TextView
      android:textAppearance="?android:attr/textAppearanceSmall"
As can be seen below the font sizes are now similar.

Now we will add a Toolbar which will contain a Button to add new tasks. This requires some setup of the Material Design, I followed the instructions in James Montemagno’s blog post Introduction to Android Material Design.
Create a new folder named 'values-v21` under the Resources folder.
Add a new File, choose xml, name it styles
Add the following:-
<resources>
  <style name="AppTheme"
    parent="@android:style/Theme.Material.Light.DarkActionBar">

  <item name="android:windowNoTitle">true</item>

  <!--We will be using the toolbar so no need to show ActionBar-->

  <item name="android:windowActionBar">false</item>

  <!-- Set theme colours from
  http://www.google.com/design/spec/style/color.html#color-color-palette-->

  <!-- colorPrimary is used for the default action bar background -->

  <item name="android:colorPrimary">#2196F3</item>

  <!-- colorPrimaryDark is used for the status bar -->

  <item name="android:colorPrimaryDark">#1976D2</item>

  <!-- colorAccent is used as the default value for colorControlActivated
         which is used to tint widgets -->

  <item name="android:colorAccent">#FF4081</item>

  <!-- You can also set colorControlNormal, colorControlActivated
         colorControlHighlight and colorSwitchThumbNormal. -->

  </style>

</resources>
Now we need to tell Android to use the correct Theme. Open the MainActivity and add ’Theme = "@style/AppTheme”’ to the existing Activity attribute ‘Theme = "@style/AppTheme",
‘
From :-
[Activity (Label = "Tasks",
           MainLauncher = true,
           Icon = "@mipmap/icon")]
public class MainActivity : Activity
{
To :-
[Activity (Label = "Tasks",
           Theme = "@style/AppTheme",
           MainLauncher = true,
           Icon = "@mipmap/icon")]

public class MainActivity : Activity
{
Now we can add the Toolbar. Open the Main.xml in the Designer, type ‘tool’ in the Search and drag the Toolbar to the top of the Layout.
Change the Id of the ToolBar in the Properties Pad from ‘@+id/toolbar1’ to ‘@+id/tasksToolbar’
Edit the OnCreate method of the MainActivity to add:-
var toolbar = FindViewById<Toolbar>(
                Resource.Id.tasksToolbar);

//Toolbar will now take on default Action Bar characteristics

SetActionBar (toolbar);
//You can now use and reference the ActionBar
ActionBar.Title = "Hello from Toolbar";
Full method listing:-
protected override void OnCreate (Bundle savedInstanceState)
{

  base.OnCreate (savedInstanceState);


  // Set our view from the "main" layout resource

  SetContentView (Resource.Layout.Main);


  var toolbar = FindViewById<Toolbar>(
                  Resource.Id.tasksToolbar);

  //Toolbar will now take on default Action Bar characteristics

  SetActionBar (toolbar);

  //You can now use and reference the ActionBar

  ActionBar.Title = "Hello from Toolbar";


  TaskList.Adapter = Vm.TodoTasks.GetAdapter(GetTaskAdapter);

}
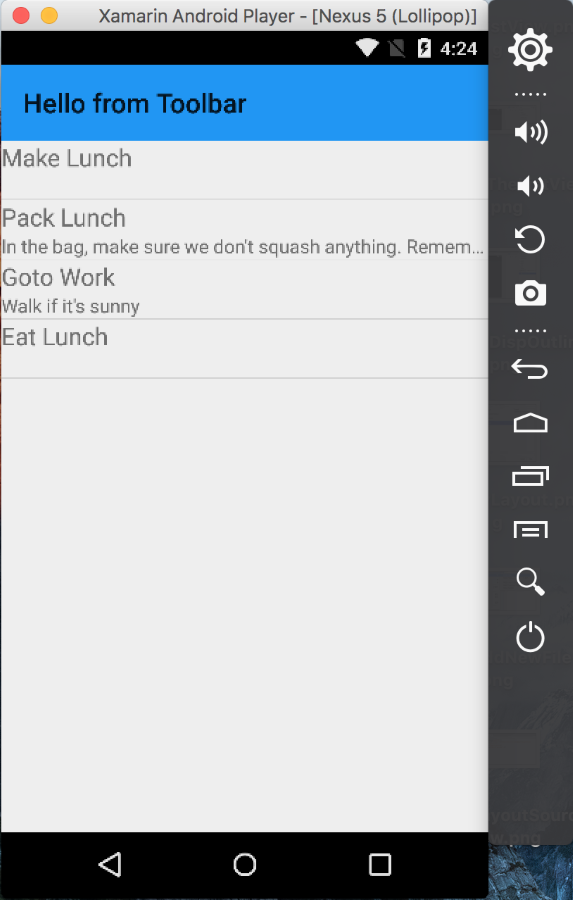
Running the application should now display the Toolbar with the text ‘Hello from Toolbar’ as per James example.
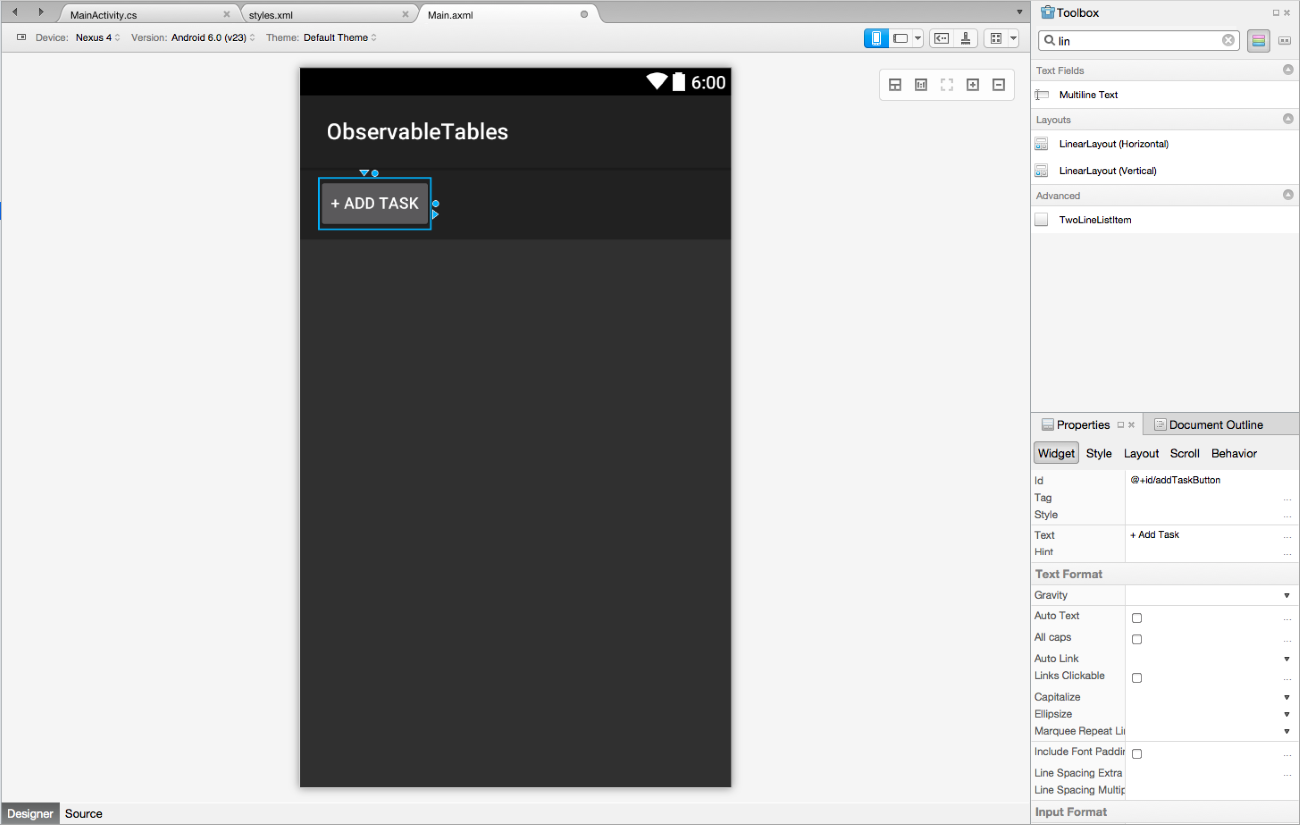
Next up we need to add a Button to the Toolbar which will be used to add a new task.
Open the Main.axml in the Designer. Using the Document Outline pad select the Toolbar so we can see it with highlighted borders.

Now type ‘lin’ in Search and select the LinearLayout(Horizontal) and drag it onto the Toolbar which will highlight in green when we are over it.
Note that the default height is set to wrap_content in the Properties pad Layout section.
Edit the height to match_parent.

Now select a Button in the Toolbox and drag it onto the LinearLayout. Use the green highlight indicator to ensure it is dropped on the correct element.
Use the Properties pad to change the Id from ‘@+id/button1’ to ‘@+id/addTaskButton’ and the Text from ‘Button’ to ‘+’.
Edit the MainActivity class to add a property and backing field for the button:-
private Button addTaskButton;


public Button AddTaskButton
{

  get

  {

    return addTaskButton
 ??
      (addTaskButton = FindViewById<Button>(
                         Resource.Id.addTaskButton));

  }

}
And add the code below to the OnCreate method to set the command binding of the Buttons Click event to the RelayCommand AddTaskCommand on the TaskListViewModel.
AddTaskButton.Click += (sender, e) => {};
// Actuate the AddTaskCommand on the VM.

AddTaskButton.SetCommand(
"Click",
 Vm.AddTaskCommand);
Comment out the setting of the ActionBar Title
Run the application and we now have a functioning button in the Toolbar to add tasks. Pressing the Button will create a new Task with the name ‘New Task’.
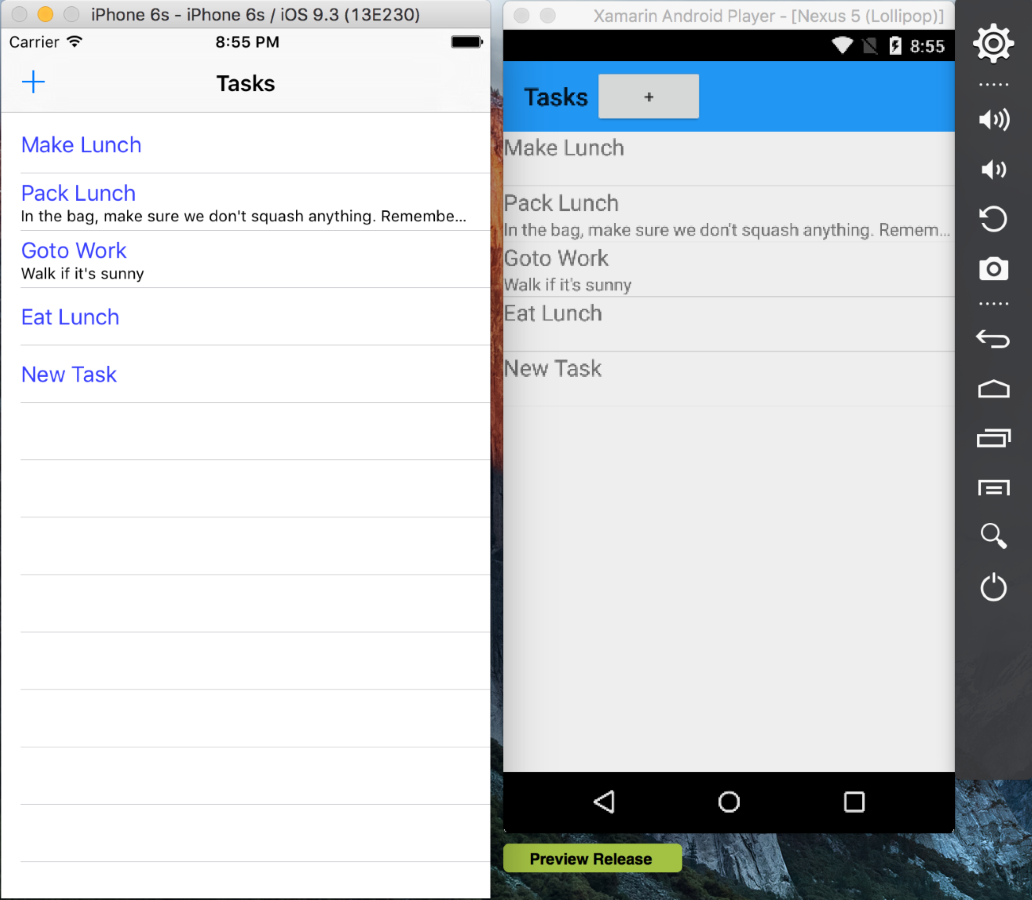
When running the Android and iOS applications side by side as shown below the Android version could do with a little more work on the styling, the iOS defaults to something more presentable straight away.
To improve the styling of the Toolbar open the Main.axml and edit the source. Setting the Background and Title of the Toolbar, aligning the Add Button to the right and increasing it's font size help:-
<Toolbar
        android:minHeight="?android:attr/actionBarSize"
        android:background="?android:attr/colorPrimary"
        android:minWidth="25px"
        android:layout_width="match_parent"
        android:layout_height="wrap_content"
        android:id="@+id/tasksToolbar"
        android:title="Tasks"
        android:gravity="center_horizontal">
        <Button
            android:text="+"
            android:layout_alignParentRight="true"
            android:layout_width="wrap_content"
            android:layout_height="wrap_content"
            android:layout_marginLeft="2dp"
            android:id="@+id/addTaskButton"
            android:background="?android:attr/colorPrimary"
            android:textSize="24dp"
            android:layout_gravity="right" />
    </Toolbar>
To improve the look of the rows in the ListView edit the TaskTemplate.axml. Adding some margins makes the row more presentable:-
<TextView
        android:textAppearance="?android:attr/textAppearanceMedium"
        android:layout_width="match_parent"
        android:layout_height="wrap_content"
        android:layout_marginLeft="15dp"
        android:layout_marginTop="2dp"
        android:layout_marginBottom="2dp"
        android:id="@+id/NameTextView" />
    <TextView
        android:textAppearance="?android:attr/textAppearanceSmall"
        android:layout_width="match_parent"
        android:layout_height="wrap_content"
        android:layout_marginLeft="15dp"
        android:layout_marginTop="2dp"
        android:layout_marginBottom="2dp"
        android:id="@+id/NotesTextView"
        android:ellipsize="end"
        android:singleLine="true" />
Running the application it now looks better.
The iOS and Android versions of the application.
Now we have two (admittedly basic) apps which share the same ViewModel and Model using the MVVMLight framework. There hasn't been that much of a learning curve if you already have experience of using the MVVM pattern with MVVMLight or Prism on say WPF or Windows Runtime then much of that knowledge is transferable.