I've been working to get a Mobile DevOps setup with Xamarin and Visual Studio Team Services/Xamarin Studio/HockeyApp/Xamarin Test Cloud and will be writing some posts to cover this for future reference. These are written from the perspective of a developer getting started rather than an ALM/DevOps professional so some things may not be optimal - I'll try to update the posts with any feedback showing a better way.
This post will cover getting started setting up a VSTS Team Project and getting the code into it. Subsequent posts will cover setting up Continuous Integration Builds, UI Testing, Deployments and Monitoring.
One thing I have noticed is that the VSTS/Xamarin/HockeyApp tooling is changing at a very fast pace and care is needed to consider the dates of information found on the Internet since a lot of it is out of date.
Resources
Creating Git repositories with Team Services and Getting Started with Git in Team Services
Code Mill Minute: Setting Up Xamarin Studio To Work With TFS Online Git Source Control
Tom Walker’s post Setting Up Xamarin Studio with VSO using Git and Video Setting Up Xamarin Studio with VSO using Git
GitHub’s Caching your GitHub password in Git
Microsoft Git Credential Manager for Mac and Linux
Key Points
I started off using Xamarin Studio 6.1 from the Alpha update channel, however I would recommend using the Stable release since I experienced problems with Continuous Integration Builds
Visual Studio Team Services supports TFVC (centralized version control -CVS) or Git Repositories (de-centralized version control - DVCS) - The Git option is the option to choose if you use Xamarin Studio on a Mac.
Visual Studio Team Services is available free for 5 users or less, this does have some restrictions such as the number of build agents and number of build minutes (currently 240 per month)
Visual Studio has a great integration with VSTS and support for Git repositories. Xamarin Studio is less well integrated but I'm really liking that it's lightweight and fast. I'll be writing the posts from the perspective of a Xamarin Studio user but most things will be applicable to Visual Studio users.
VSTS uses email addresses to sign in and these contain an '@' symbol which presents problems working with Git. Visual Studio users will have no problem but using any other Git client you will need to generate an alias using the VSTS Alternate authentication credentials. I found Matthew Soucoup's and Tom Walker's posts useful here.
Having to keep entering the username and password details will quickly become tiresome. Microsoft provides the Git Credential Manager for Mac and Linux to overcome this problem.
Create a Visual Studio Team Services Team Project
Get started by going to the Visual Studio Home page and click on the button ‘Get Started for free’ under the Visual Studio Teams Services (VSTS) column.
Login in with the Microsoft account you wish to associate with VSTS
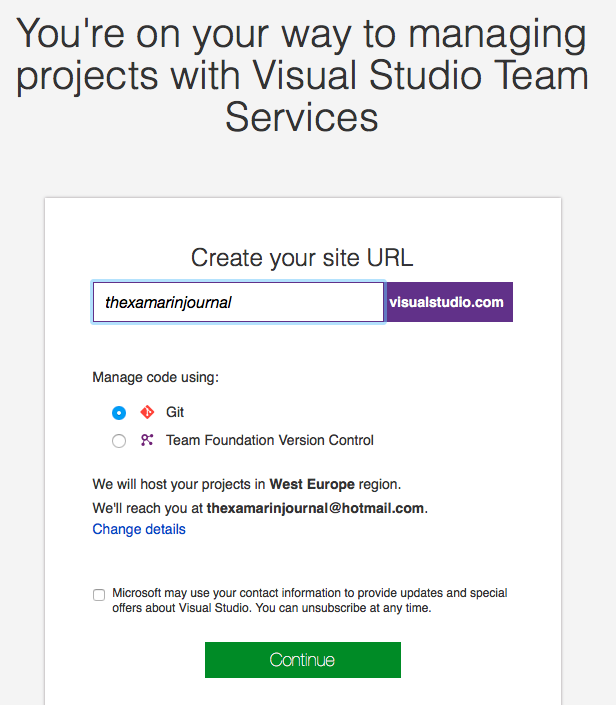
The page below is displayed enter a name for the site Url. Note that the default Version Control system is Git, this is the option to choose if you are using Xamarin Studio on a Mac. Click on the ‘Continue’ button.
When the VSTS site has been created the welcome page below will be displayed:-
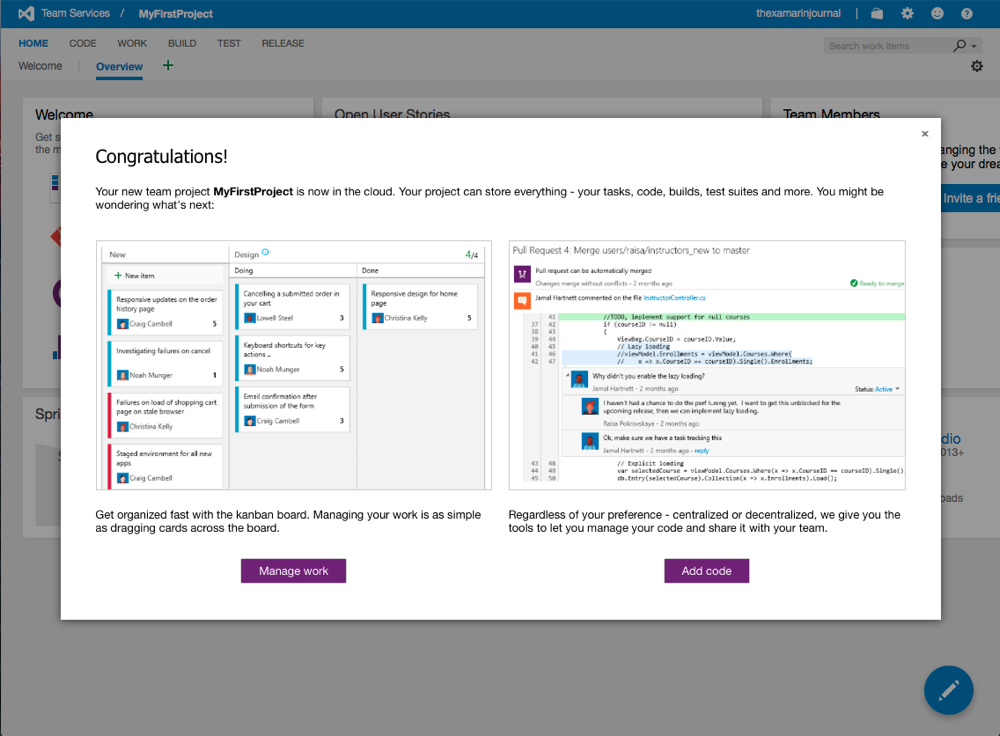
Note that a team project titled ‘MyFirstProject’ has been created. The process type for the project will be ‘Agile’, generally I’m working with the Scrum process so we will delete this team project and create a new one. Close the dialog using the ‘x’ button in the top right.
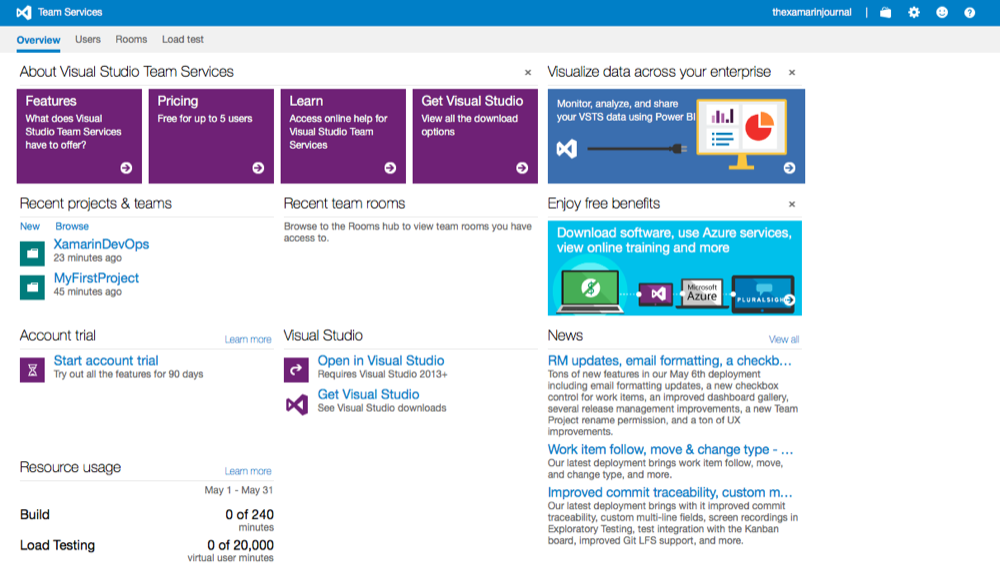
Click on the Team Services in the top right and the Overview page shown below will be displayed:-
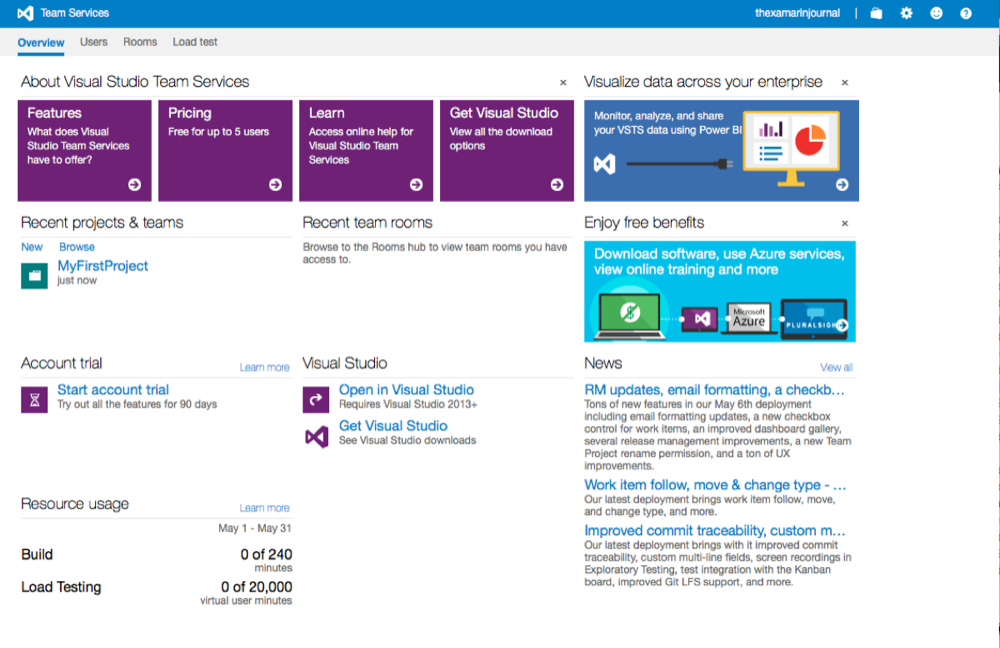
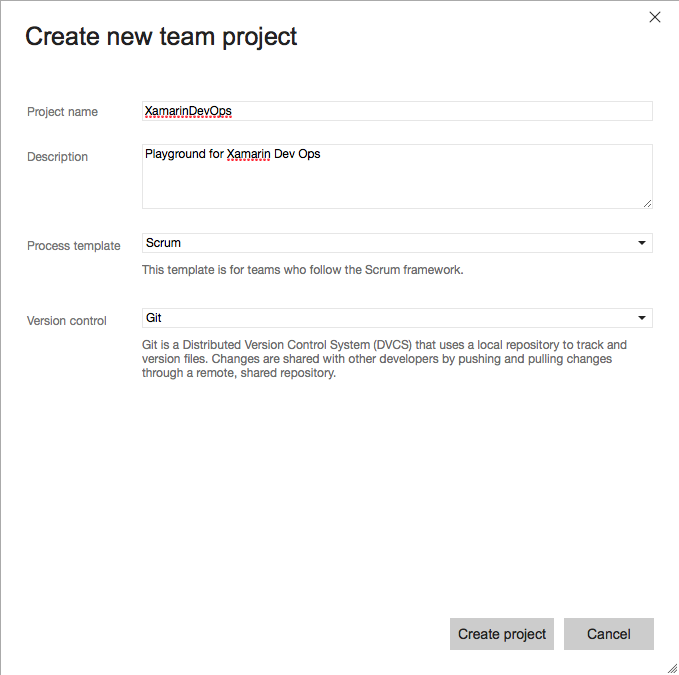
Click on the ’New’ link under the ‘Recent projects & teams’ heading and the ‘Create new team project’ dialog will be displayed as shown below, enter a name and description and set the Process template as required, in this case we will use Scrum:-
Click the ‘Create project’ button. When the creation is completed the confirmation dialog below will be shown:-
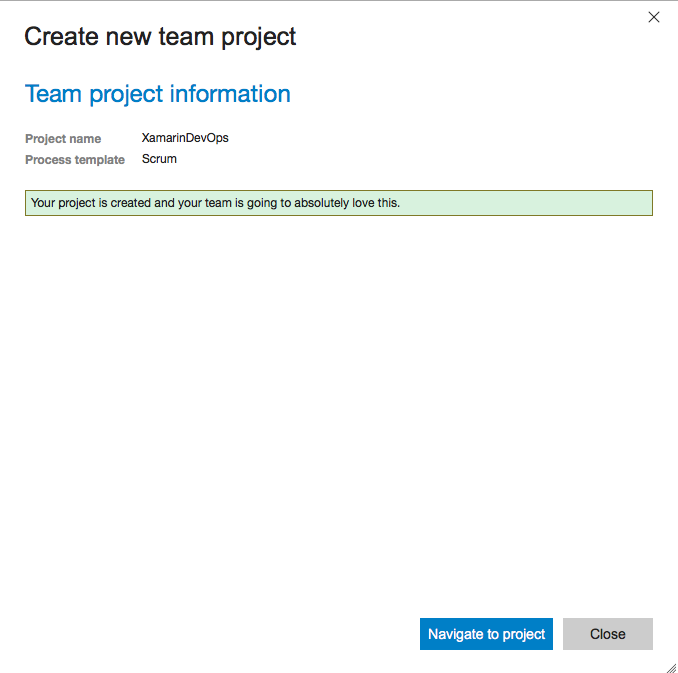
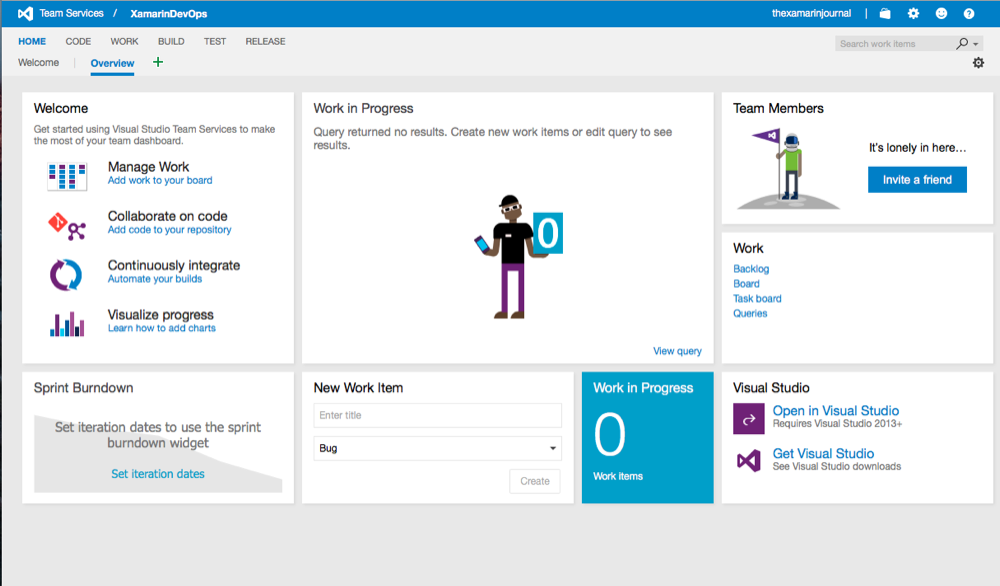
Click the ’Navigate to project’ button and the ‘Welcome’ dialog below will be shown:-
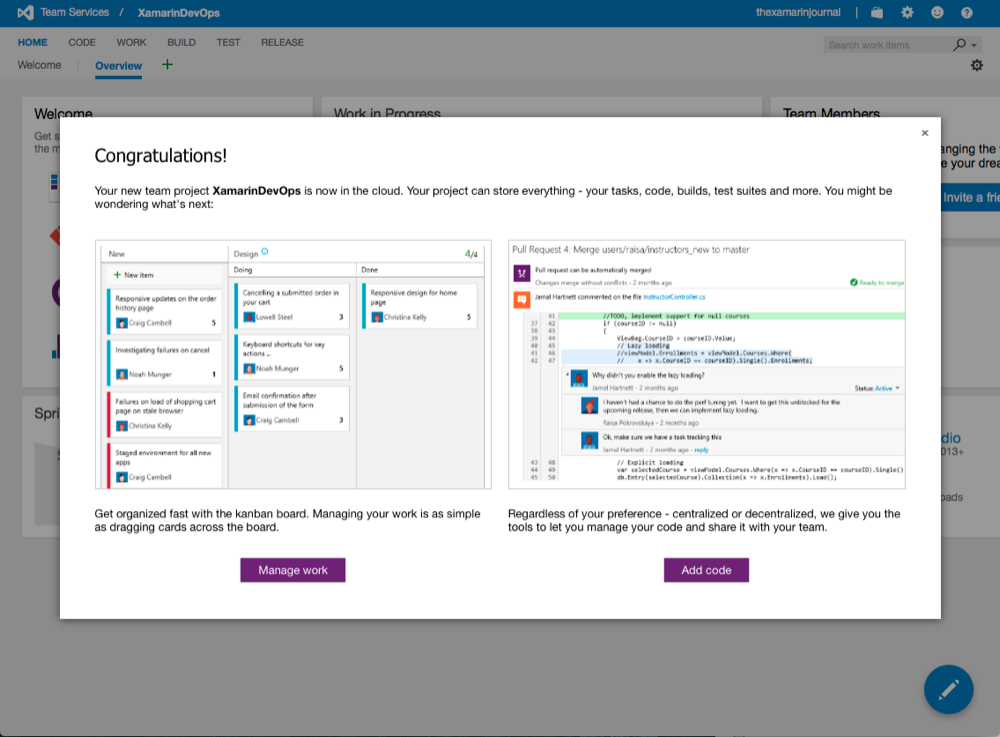
Setup the Git Credentials
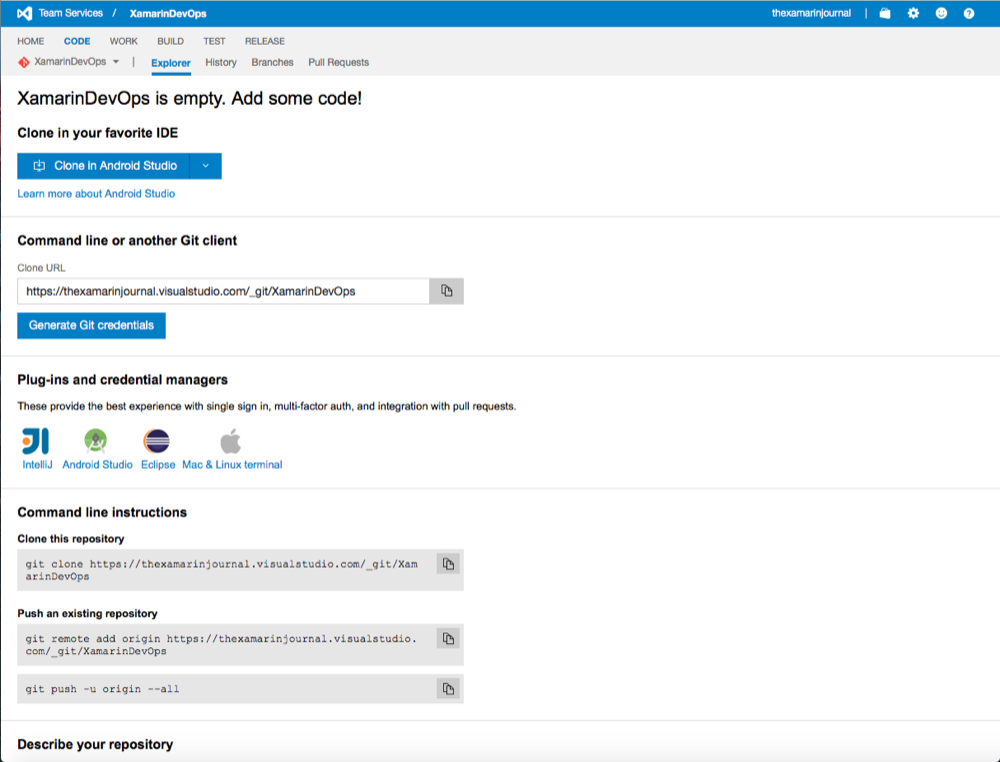
Click the ‘Add code’ button and the ‘Explorer’ tab of the ‘Code’ page will be displayed as shown below:-
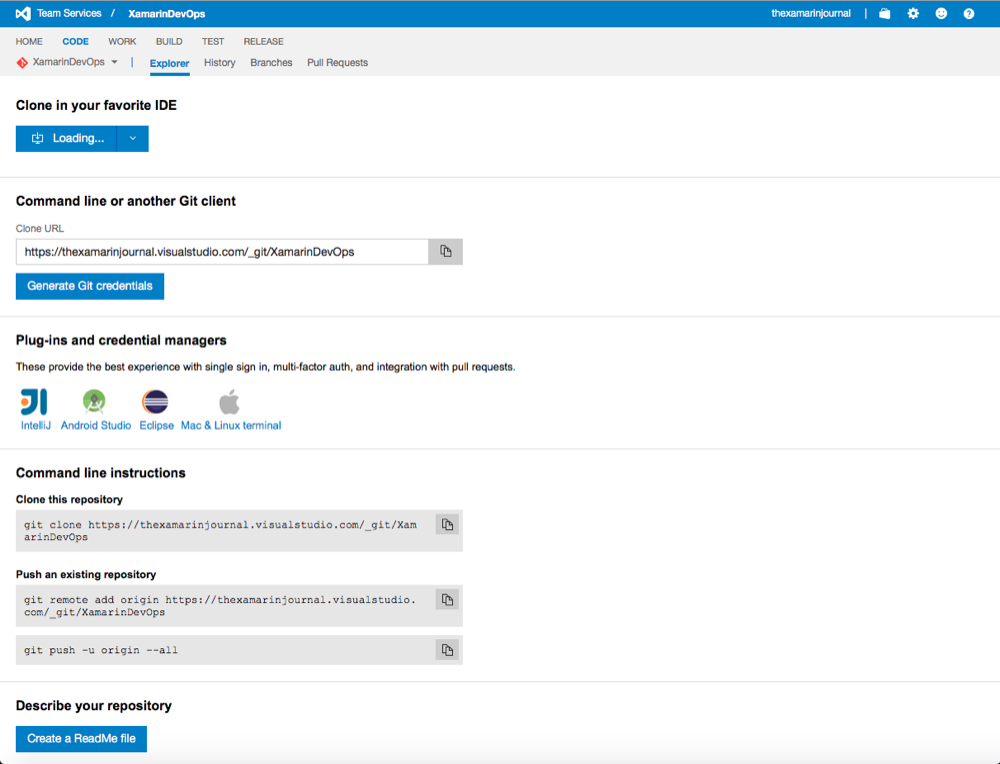
Note the ‘Generate Git credentials’ button. This will create an Alternative authentication credential which is a username alias. Because the sign-in to VSTS is with email addresses which contain the ‘@‘ symbol this presents a problem when using Git on Mac OSX.
Click the ‘Generate Git credentials’ button and enter a username and password. Next click the ‘Save Git Credentials’ button.
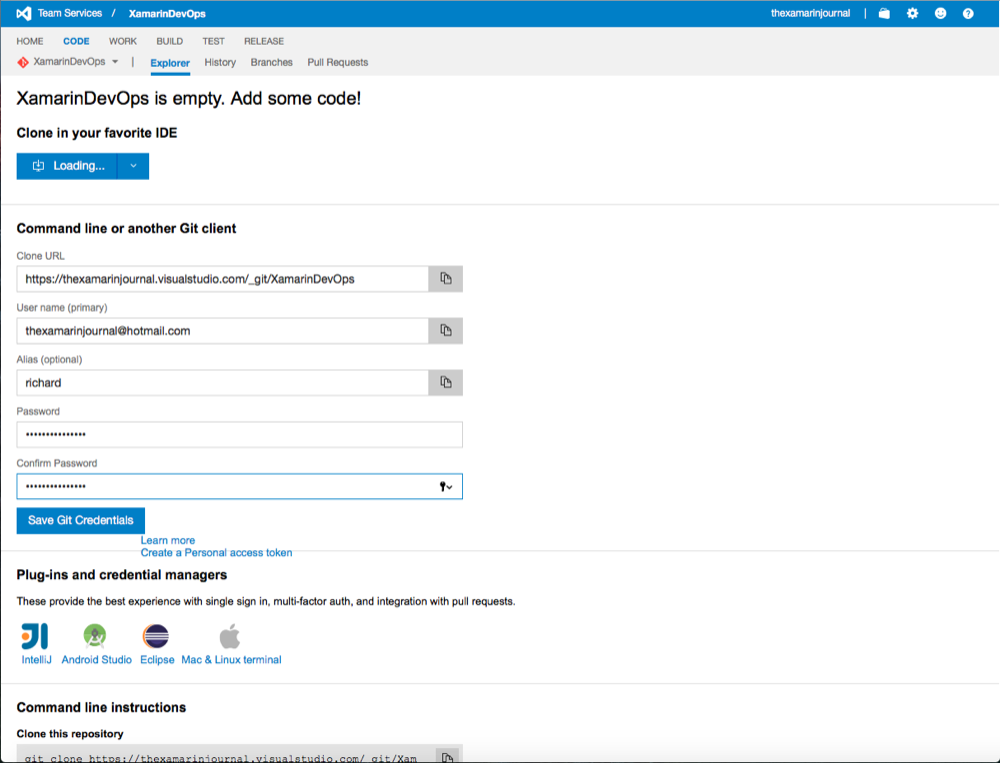
As can be seen in the image below in this instance I have already created an alias with the name ‘richard’ so we can navigate to the security page, which is another way of accessing the security credentials:-

Click on the link ‘thexamarinjournal’ and then select the ‘My Profile’ option as shown below:-

The ‘Edit Profile’ page will be displayed as shown below:-

Next click on the ‘Security’ tab:-
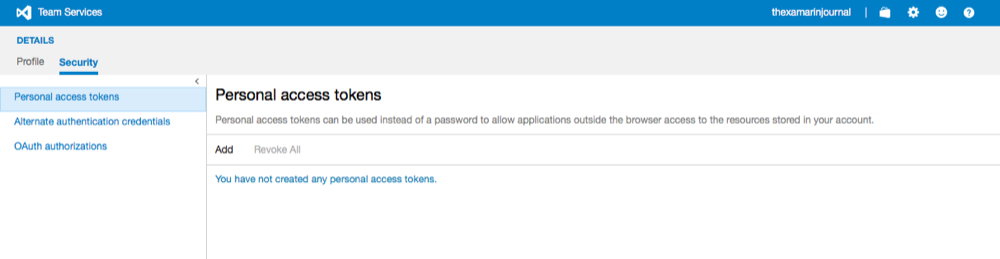
Click on the ‘Alternate authentication credentials’ and the page below will be displayed with a recommendation to use personal access tokens.
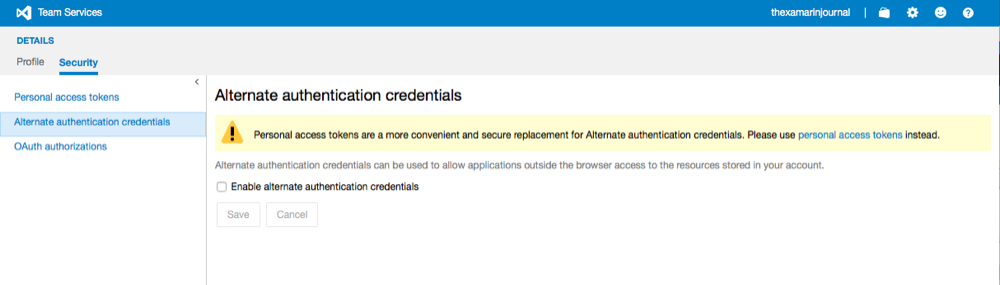
Check the ‘Enable alternate authentication credentials’ and the edit boxes will be displayed, fill these in with something memorable and short as you could be typing these in a lot:-
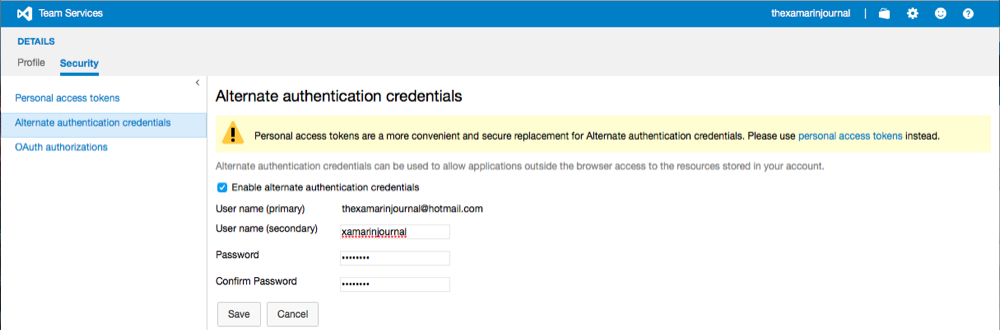
Click the ‘Save’ button, then the ’Team Services’ link in the top left title bar to get back to the overview page.
Click on the XamarinDevOps entry under the ‘Recent projects & teams’ section. The Team project page will be shown again:-
Click on the link ‘Add code to your repository’ and we get back to the ‘Code Explorer’ page:-
Clone/Checkout the Repository
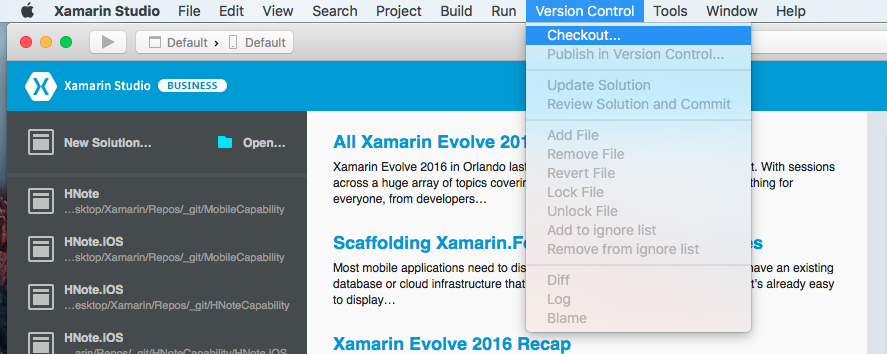
Next start Xamarin Studio. Next select the ‘Checkout’ option of the ‘Version Control’ menu:-
Now the ‘Select Repository’ dialog will be displayed:-
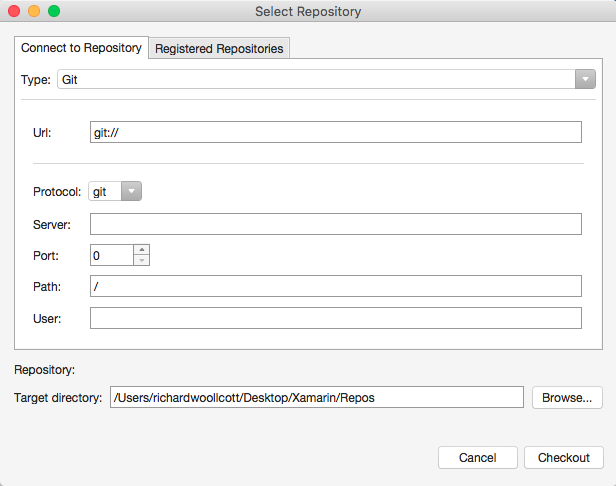
Now paste in the Url copied from VSTS into the Url textbook:-
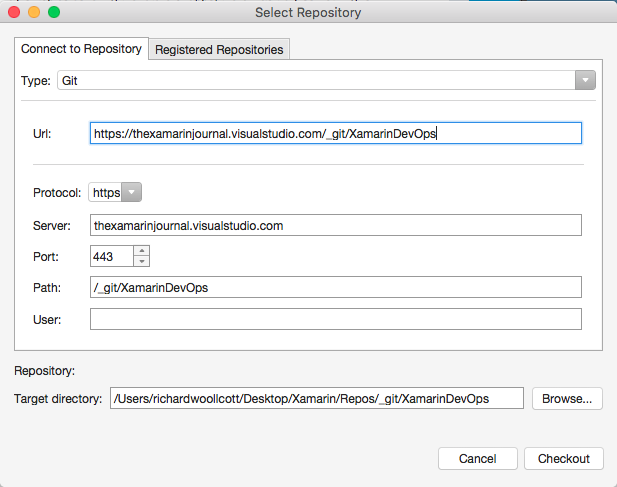
Now press the ‘Checkout’ button and a ‘Git Credentials’ dialog is displayed:-
![]()
Enter the alias that we created in VSTS:-
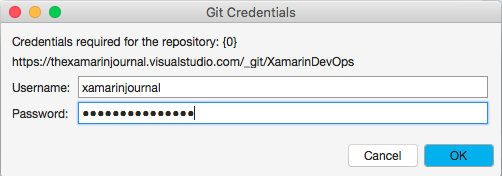
Click the ‘OK’ button.
As an alternative we could use the git command line command
git clone https://thexamarinjournal.visualstudio.com/_git/XamarinDevOps
A good reference is Matthew Soucoup’s post.
Tom Walker also shows another alternative using the Publish option.
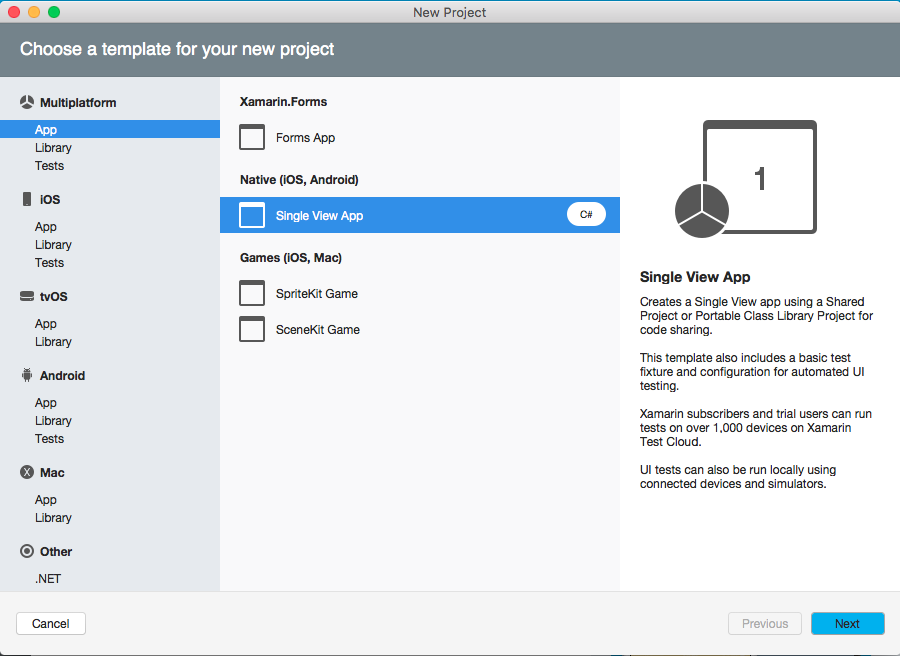
Create a new solution
Now we can create a solution to add to the VSTS Git repository. Click the ’New Solution’ button. Select a ’Single View App’ for iOS and Android:-
Click the ‘Next’ button and give the app a name:-
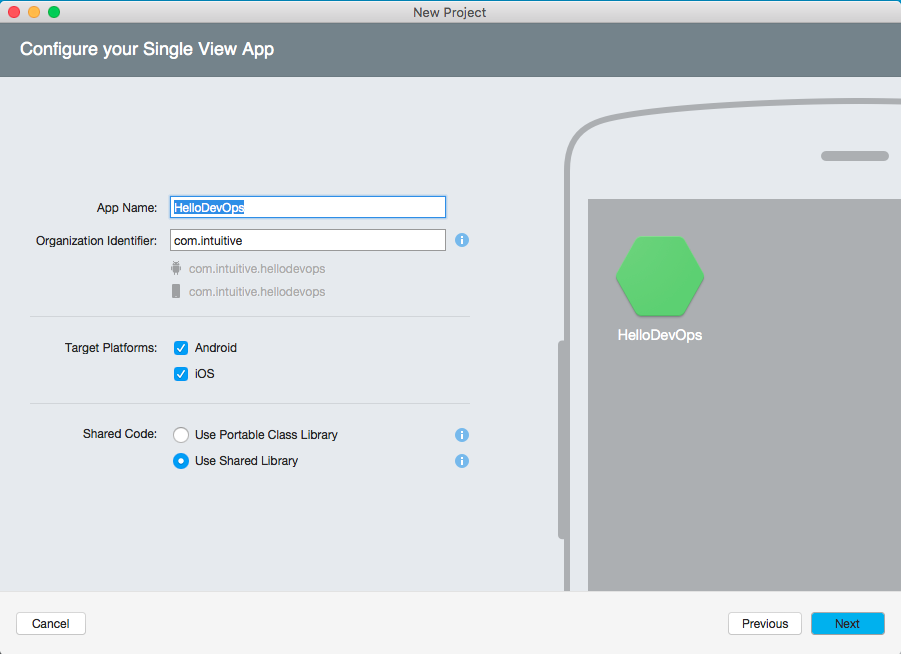
Click the ’Next’ button and use the ‘Browse’ button to select the directory ‘XamarinDevOps’ which we just create via the git clone command. Check the ‘Use git for version control’ option.
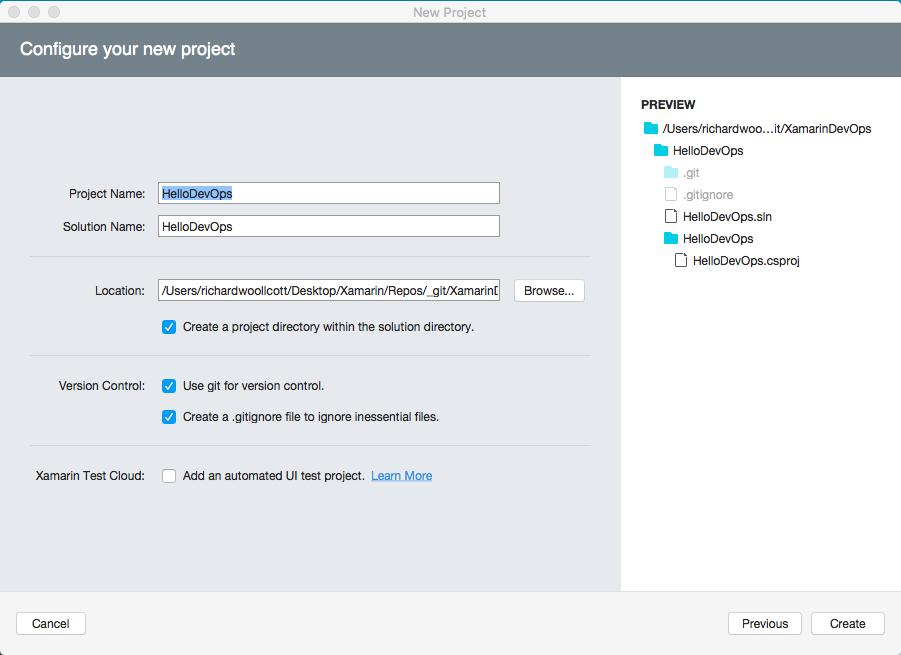
Click the ‘Create’ button.
Check the solution builds.
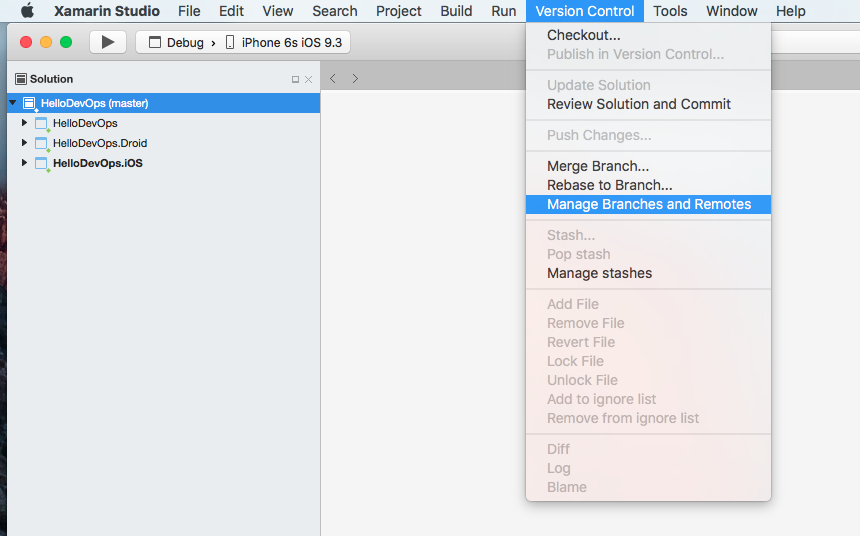
Commit To The Local Repository
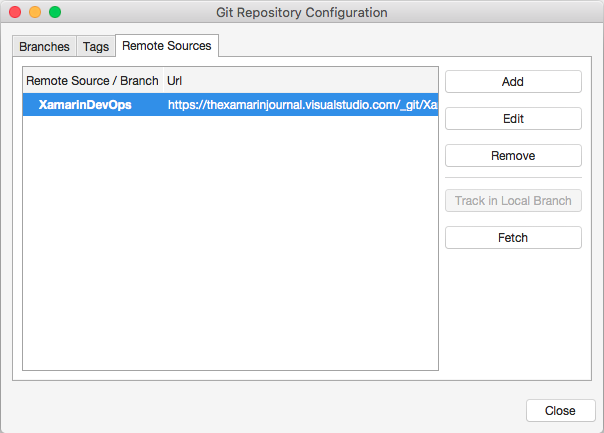
Click on the ‘Remote Sources’ tab. Now click the ‘Add’ button.
Enter the Url
https://thexamarinjournal.visualstudio.com/_git/XamarinDevOps.
Now click the ‘OK’ button. The Remote Sources tab should now contain the ‘XamarinDevOps’ repository as shown below:-
Select the ‘Review Solution and Commit’ option on the ‘Version Control’ menu:-
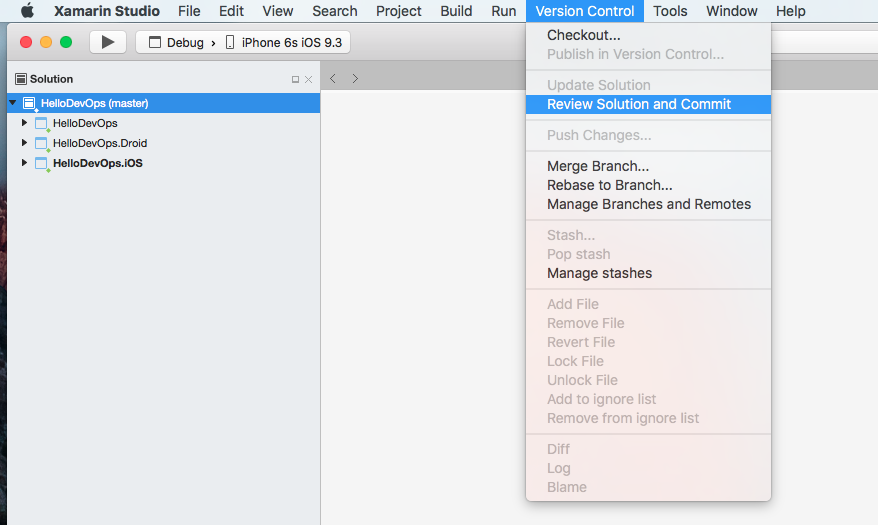
The Version Control Status page will be displayed as shown below:-
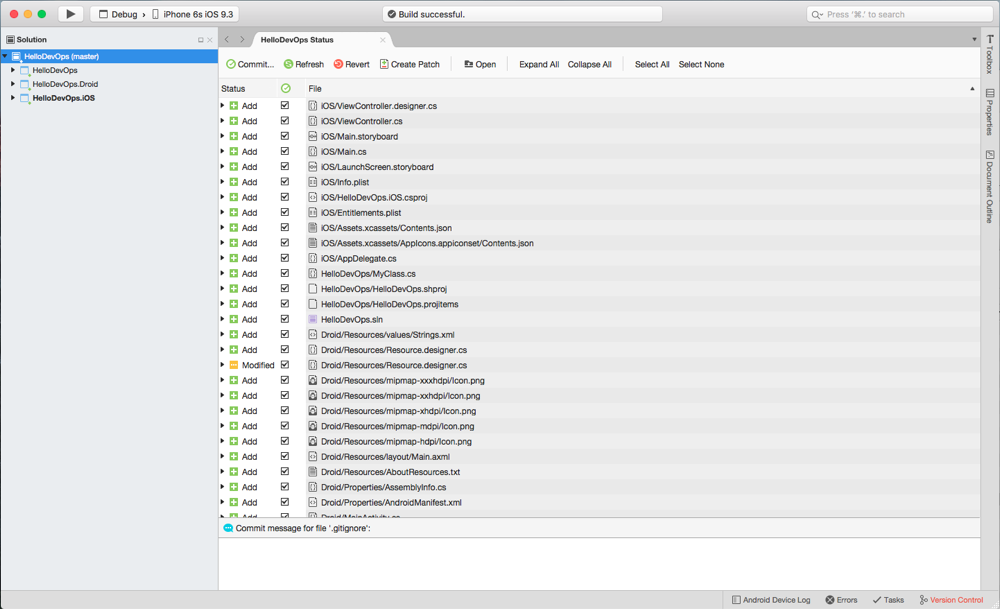
Click on the ‘Commit’ button and the ‘Commit Files’ dialog will be shown:—
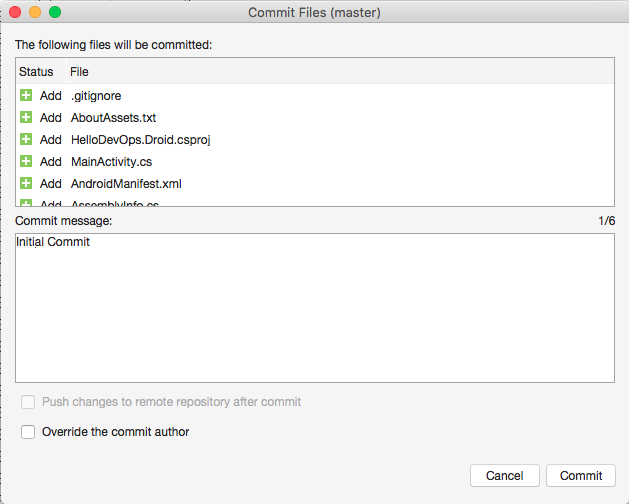
You may get a ‘User Information Conflict’ dialog, choose the most appropriate option. I used the ‘Use the Xamarin Studio configuration’ option. Click the ‘OK’ button.
Enter the alias we created earlier in the Git Credentials dialog:-

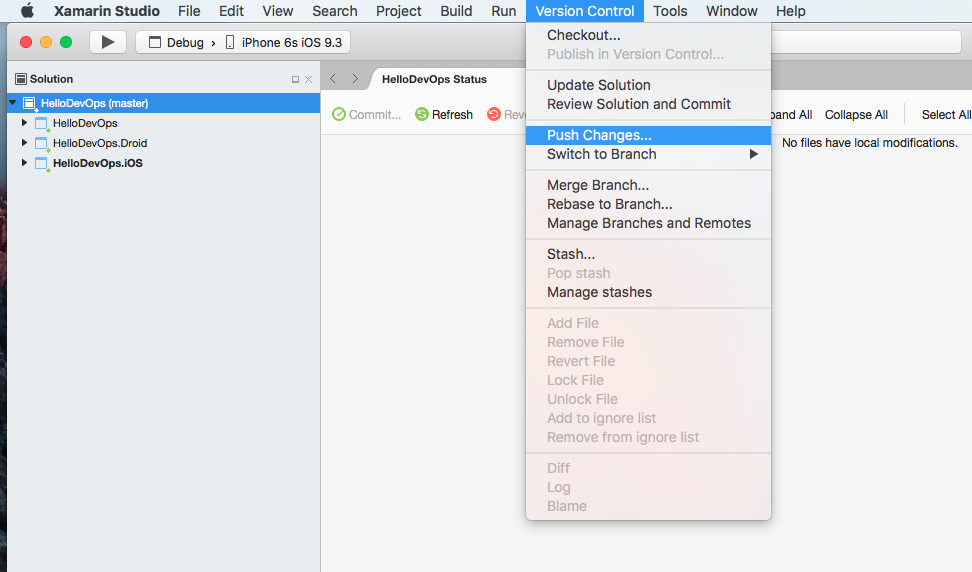
Push Changes To The VSTS Repository
Now that we have committed the changes to the local repository we need to push the changes back to the remote VSTS repository. So select the 'Push Changes..' option of the 'Version Control' menu.
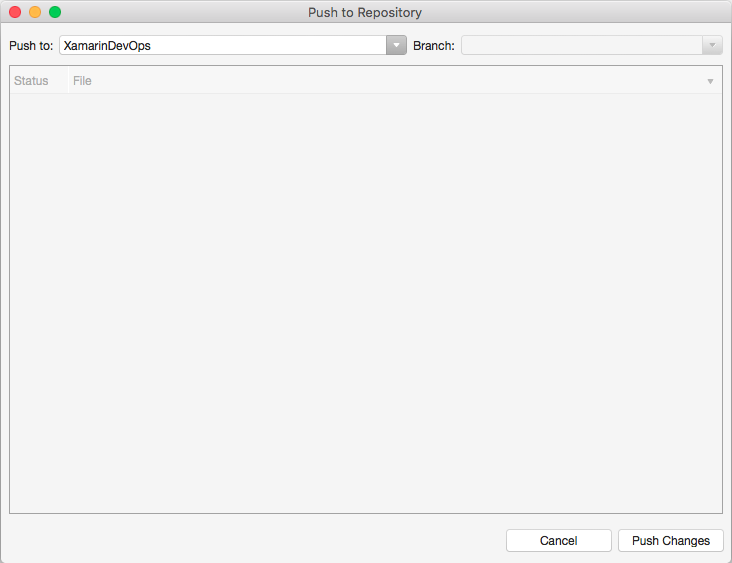
The 'Push to Repository' dialog is shown. Click the 'Push Changes' button.
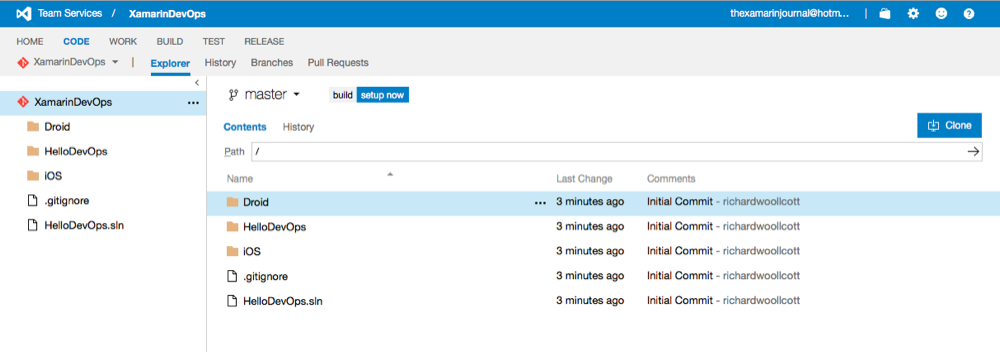
Now if we go back to the VSTS 'Code' page and select the 'Explorer' tab we can see that the solution has been pushed upto the VSTS Git repository:-
The Microsoft documentation Getting Started with Git in Team Services is a useful reference showing how to get started with working with Git branches and provides other links for working with Git.
As the post is getting quite long I will end here and detail the creation of Continuous Integration Builds for Xamarin.Android and Xamarin.iOS in the next post.