This post shows how to setup Visual Studio Team Services to build a Xamarin Android application.
It builds upon the VSTS Team Project created in the getting started post.
Resources
Microsoft documentation Specify your build steps, Build your Xamarin app and Build: Xamarin.Android
Brandons H’s post eXtreme Agile: Continuous Mobile Deployment with VSTS. In this post he demonstrates how to protect the Xamarin account password in the build steps using a build variable. Note that the post is a little out of date and there is now a Build Xamarin.Android Project build step.
The Microsoft documentation Use Variables details the pre-defined build variables and the use of Secret Variables to protect passwords etc required in Build Step Definitions.
The Xamarin documentation Build Process
The Xamarin documentation Part 1 - Preparing an Application for Release and Part 2 - Signing the Android Application Package describes how to sign the application package.
The Xamarin Android documentation Manually Installing an APK
The Android documentation for the Android Debug Bridge tool.
The Xamarin Android documentation Set Up Device for Development
Key Points
The CI Build Process requires a Xamarin Licence.
You must be using the Stable update channel for these Hosted CI builds to work. I was initially using Xamarin Studio 6.1 from the Alpha Channel and the Android builds were failing so I reverted back to the Stable channel and they worked fine. This is to be expected, but worth noting none the less.
The Application Package must be signed in order to install a Release build onto a device.
Create Xamarin.Android Continuous Integration Build
Picking up where my previous post ended we now have our solution in the VSTS Git Repository as can be seen below:-
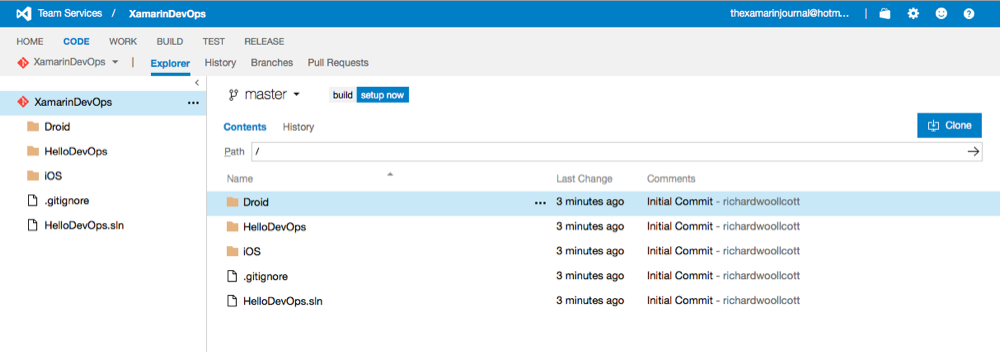
Note there is a ‘setup now’ button to the right of the ‘build’ label. Click this button and the ‘Create new build definition’ dialog shown below will be displayed:-
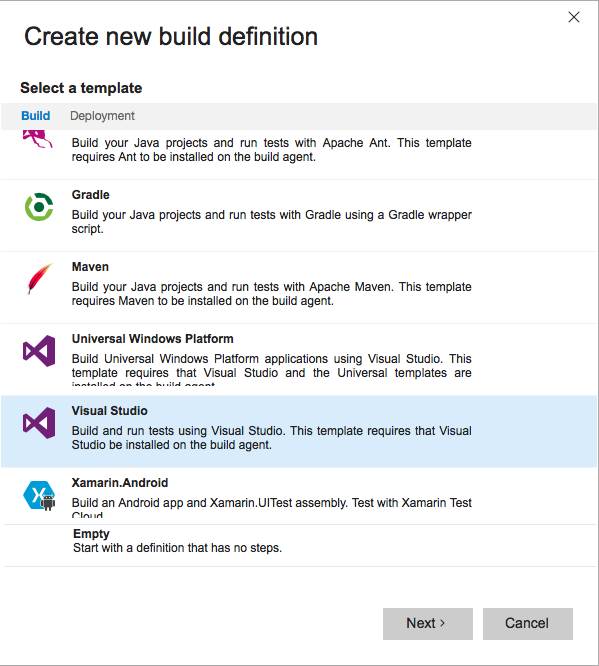
Double click the Xamarin.Android entry and the Settings page of the dialog is displayed. Check the ‘Continuous integration’ option. Next click the ‘Create’ button and the new build definition will be created:-
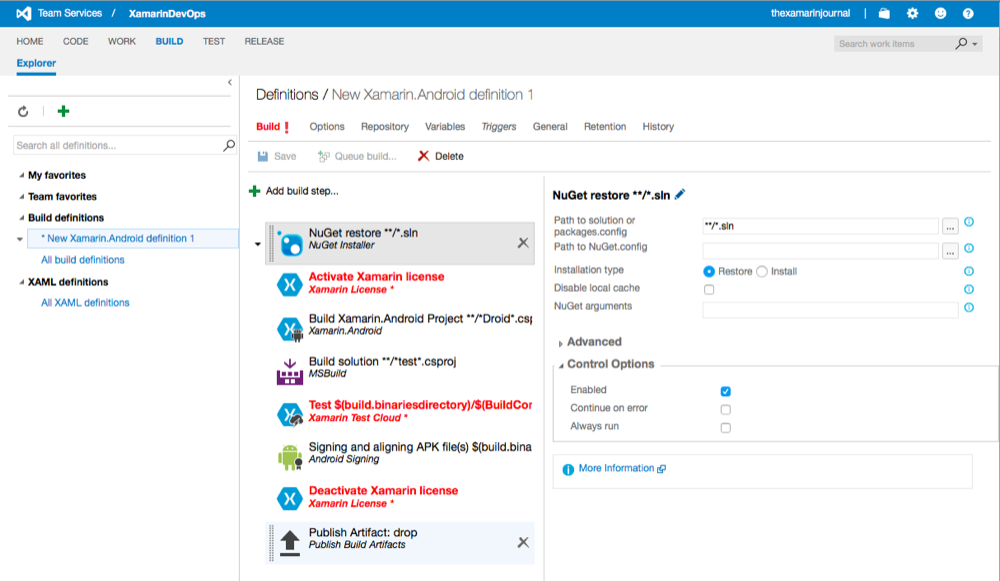
Note that the build steps ‘Activate Xamarin license’, ’Test’ and ‘Deactivate Xamarin license’ are coloured red to indicate that they require setting up.
Click on the ‘Activate Xamarin license’ build step and you will be able to see that the ‘Email’ and ‘Password’ fields are empty and have an asterix next to them. You need to enter the details of the Xamarin license which you will use for the build agent, note that the password field will display your password in plain text. This may not matter to you, but if it does then we can use ‘secret variables’ to hide the sensitive information.
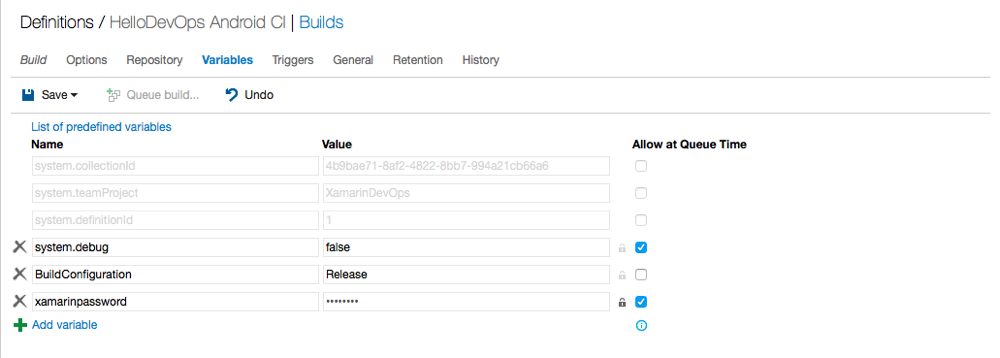
Click on the ‘Variables’ tab:-
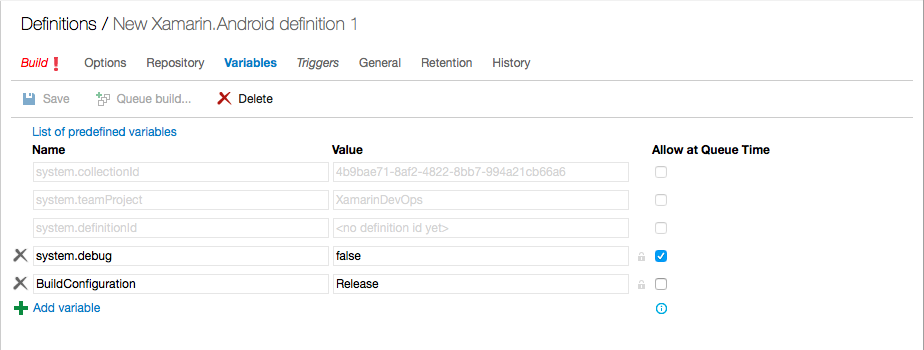
Now click on the ‘+ Add variable’ button and enter ‘xamarinpassword’ or something similar into the Name textbox. Next click the padlock icon to the right of the ‘Value’ textbook and enter the password which will be protected.
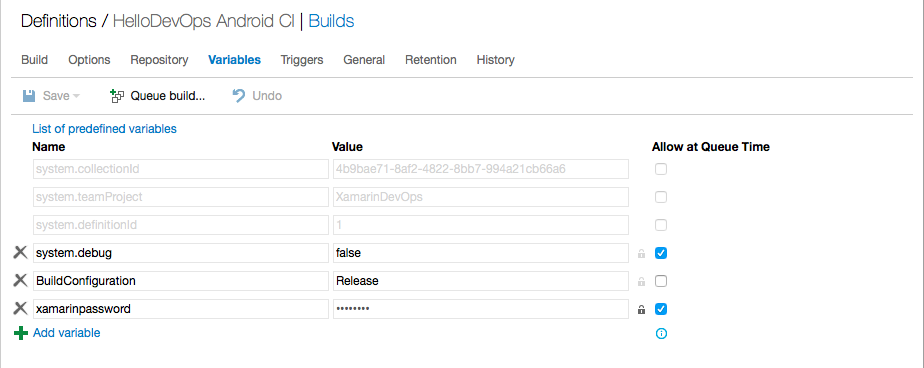
Now click the ‘Build’ tab and enter $(xamarinpassword) in the Password textbox and check the ‘Allow at Queue Time’ option. Also check the ‘Always run’ option in the ‘Control Options’ panel as shown below:-

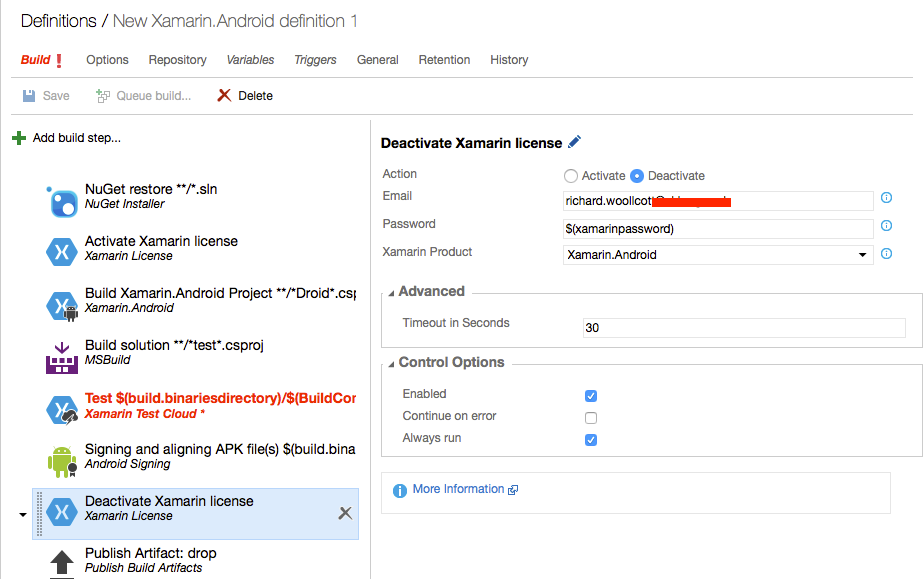
Select the ‘Deactivate Xamarin license’ build step and setup the Email and Password fields and make sure the Always run option is ticked as shown below:-
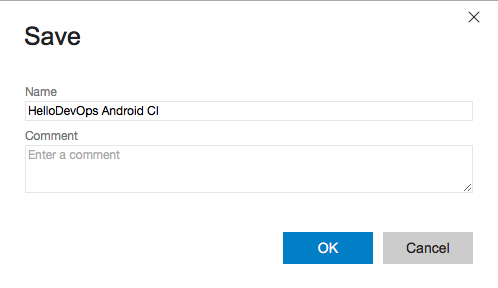
Now click the ‘x’ icon on the ‘Xamarin Test Cloud’ build step since at this moment we don’t have any UI tests. Now click the ‘Save’ button, enter a name for the build:-
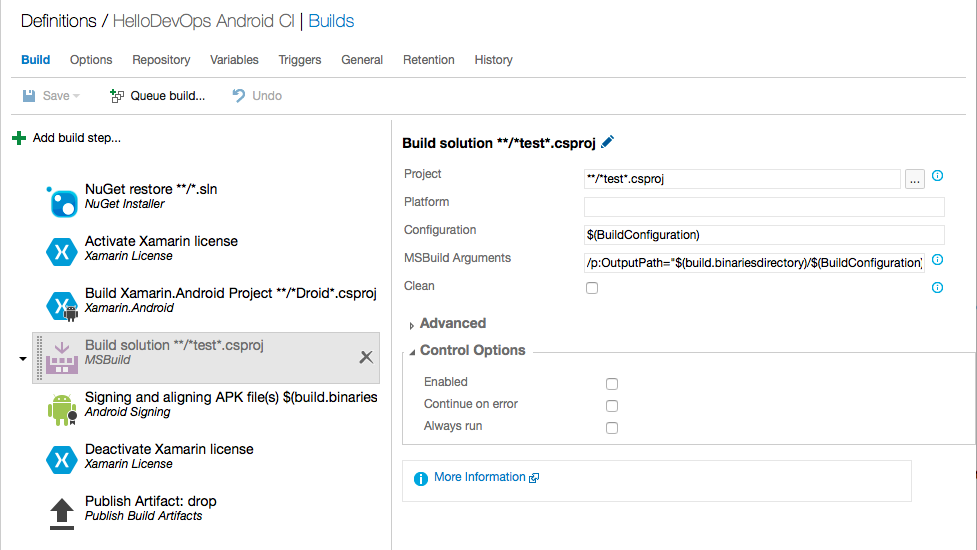
Next disable the MS Build build step for the tests by unchecking the ‘Enabled’ option in the ‘Control Options’ panel:-
Click the ‘OK’ button and press the ‘Queue build’ button:-
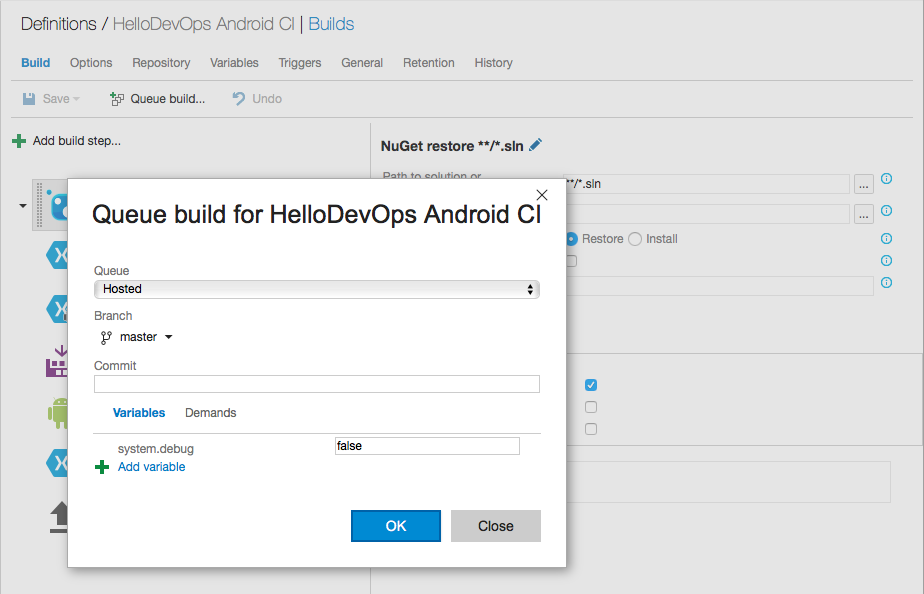
Click the ‘OK’ button:-
Create a Certificate and Associated Keystore file
We have now built an Android Application package (.apk) but we now need to consider if this needs to be signed.
The Xamarin Android documentation Build Process describes how the build process works and is a useful reference. Basically all Debug builds are signed with a debug.keystore file which is generated when Xamarin.Android is installed.
The Xamarin documentation Part 1 - Preparing an Application for Release and Part 2 - Signing the Android Application Package describes how to sign the application package.
The Archive for Publishing section shows how to open the Archive Manager which we can use to generate the certificate and associated keystore file.
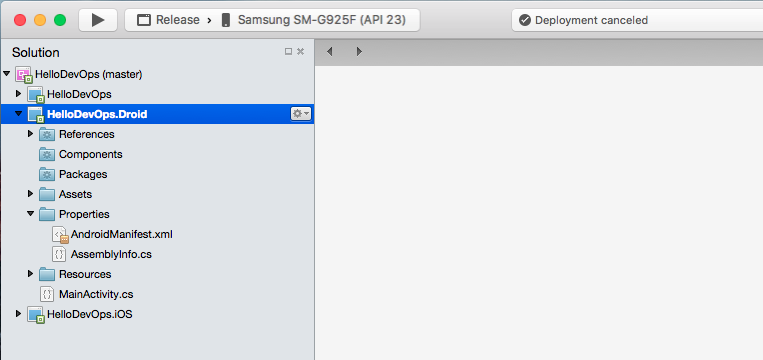
In Xamarin Studio select the Android application project and then select the 'Release' build configuration:-
Next select the 'Archive for Publishing' option from the 'Build' menu.
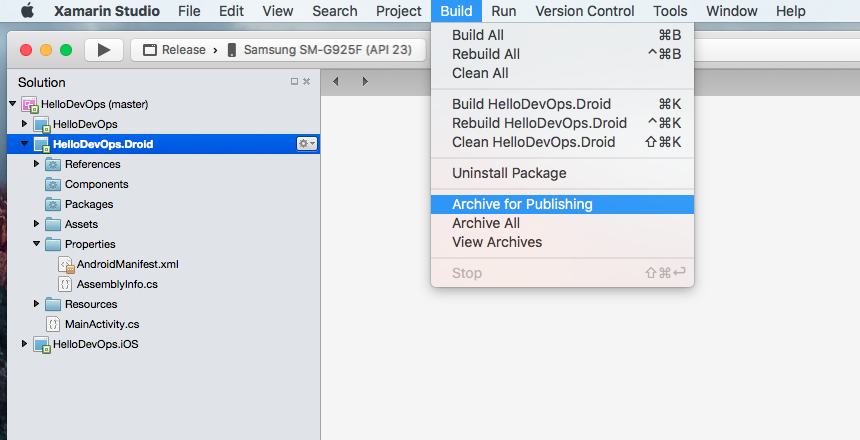
This will build the application in Release configuration and bundle it into an archive file. The Archive Manager is now displayed:-
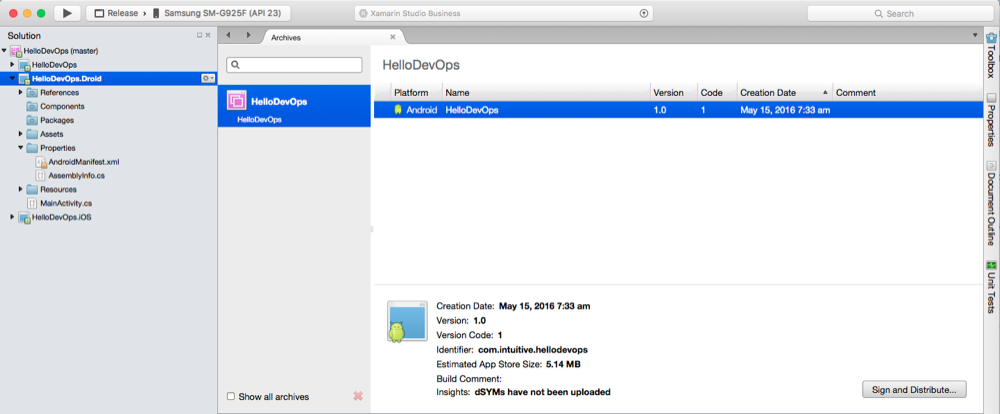
Next click the 'Sign and Distribute...' button. The 'Sign and Distribute' dialog is opened:-
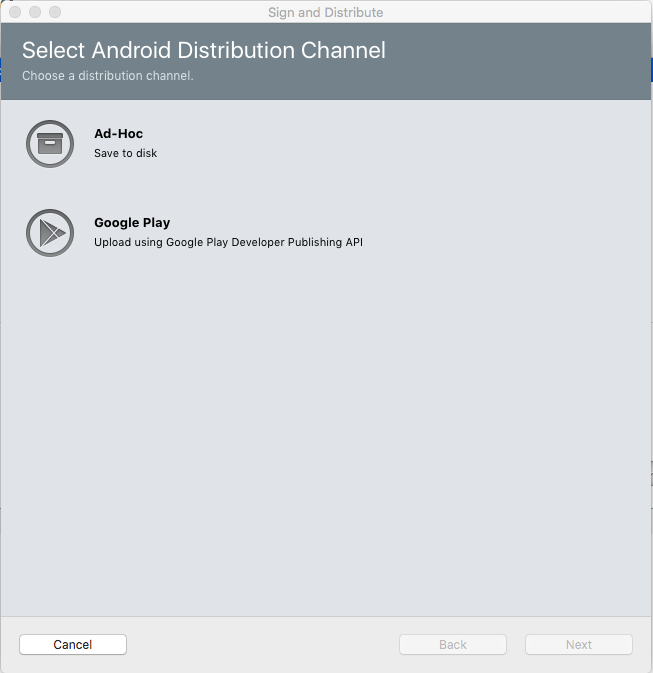
At this point we can choose the 'Ad-Hoc' or 'Google Play' option. For this post the scenario we are working towards is to sideload the application to Android devices for the purposes of developing and testing the application. Select the 'Ad-Hoc' option and click the 'Next' button:-
![]()
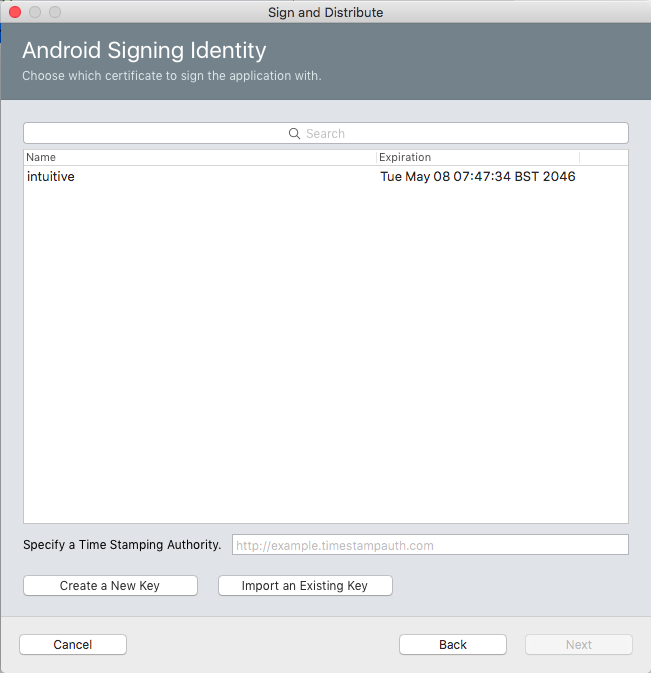
In this instance we have not performed this previously so we need to click the 'Create a New Key' button. The 'Create New Certificate' dialog is displayed:-
![]()
Enter your details and click the 'OK' button to create the certificate.
Select the certificate entry we created and right-click it. The 'Show Alias Info' context menu will be displayed:-
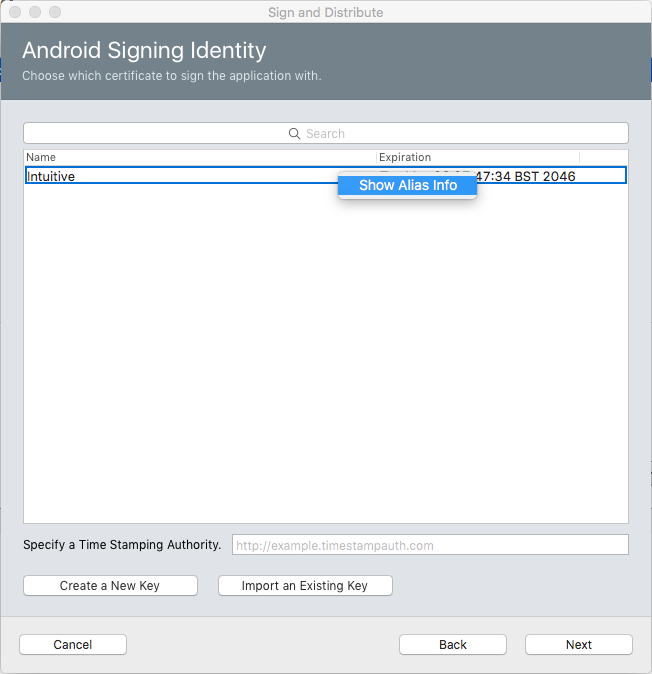
Select this option and the Certificate infomation will be displayed:-

From this dialog we can see the location of the .keystore file at the bottom of the dialog.
Add the Keystore to the Git Repository
The VSTS build step requires access to this file to sign the application package. Copy this .keystore file to the HelloDevOps\Droid folder.
Using Terminal navigate to the HelloDevOps\Droid folder and add the file to the Git repository by executing the command:-
git add Intuitive.keystore
Now return to Xamarin Studio and click the 'OK' button on the 'Alias Info' page and then the 'Cancel' button on the 'Sign and Distribute' dialog.
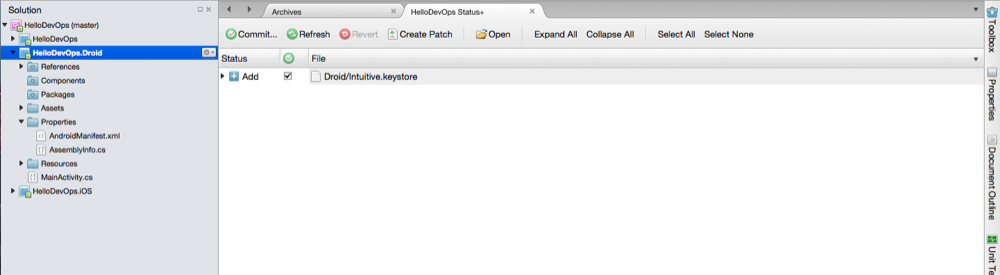
Select the 'Review Solution and Commit' option on the 'Version Control' menu. the .keytore file should be listed as an 'Add' status:-
Click the 'Commit' button and the 'Commit Files' dialog is displayed. enter a commit message and select the 'Push changes to remote repository after commit' option:-
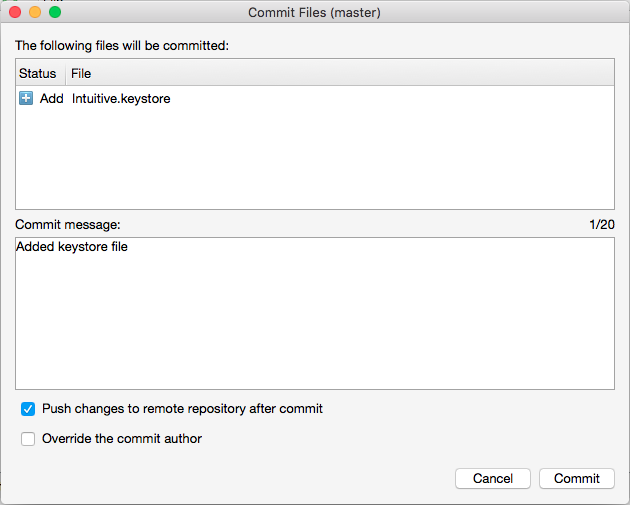
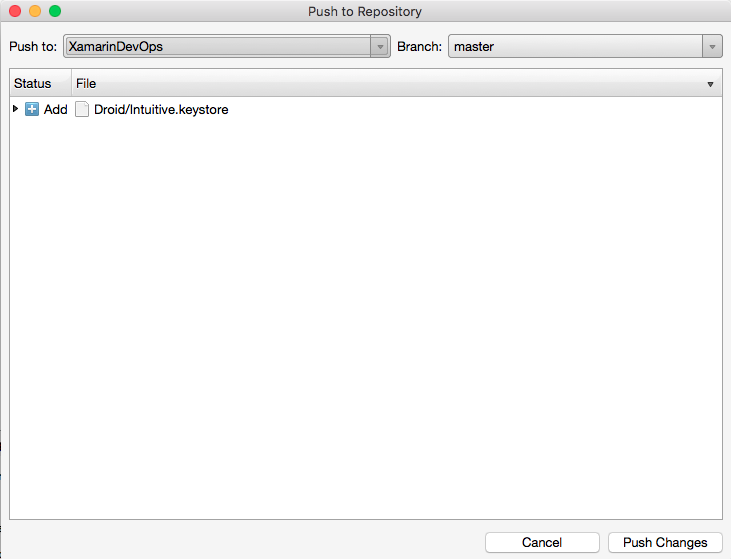
Click the 'Commit' button. The 'Push to Repository' dialog is automatically shown:-
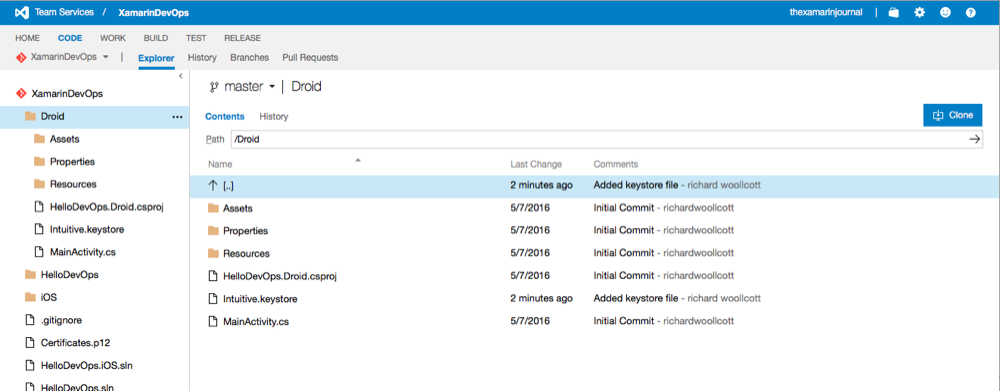
Returning to VSTS and navigating to the 'Code' page's 'Explorer' tab we can confirm that the .keystore file has been added to the repository:-
Setup the VSTS Android Signing Build Step
Navigate to the 'Build' page and right click the 'HelloDevOps Android CI' entry:-
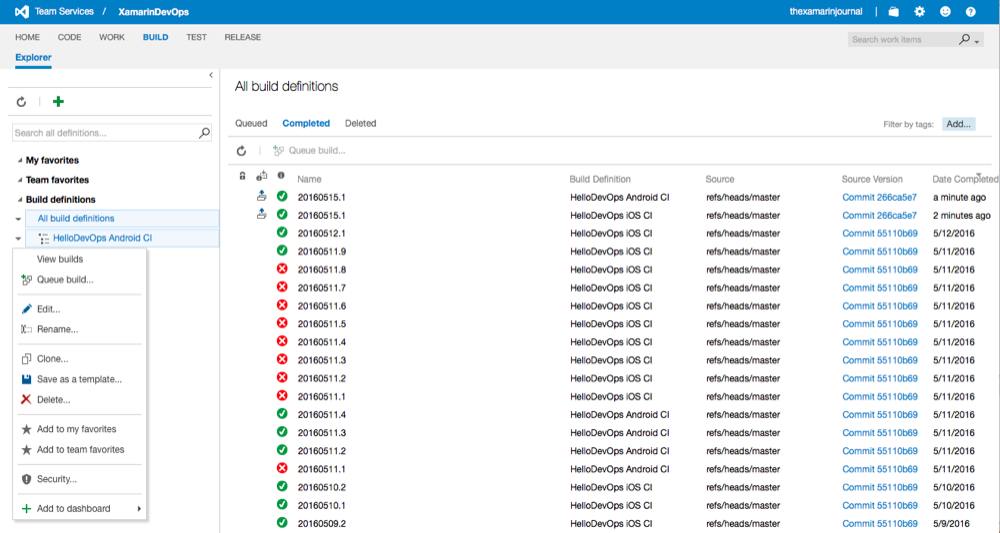
Select the 'Edit' option. The Edit build definition page is displayed. Select the 'Android Signing' build step:-
![]()
Check the 'Sign the APK' option. Note that the 'Jarsigner options' panel has expanded:-
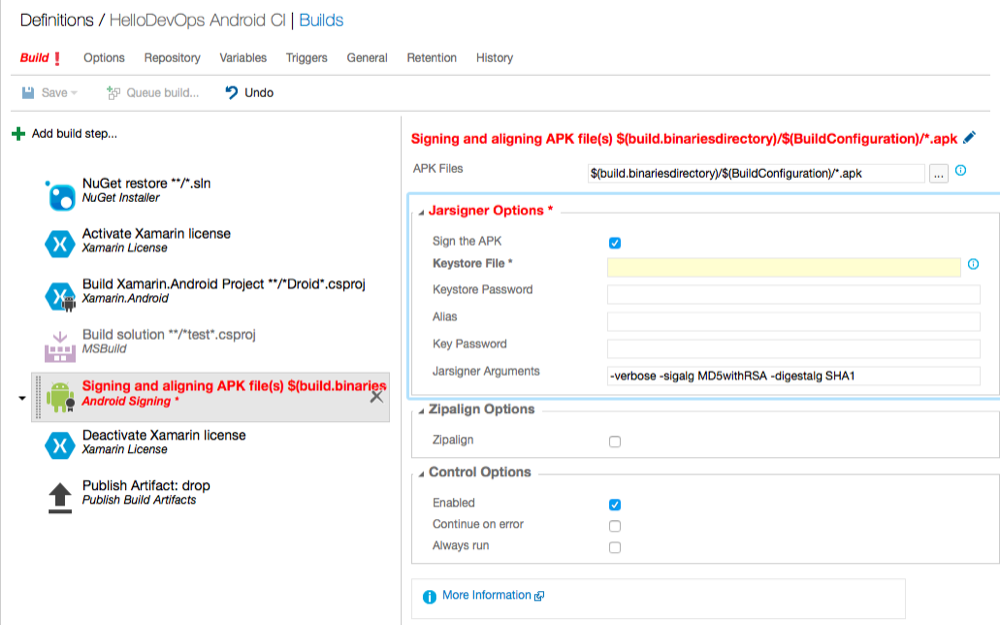
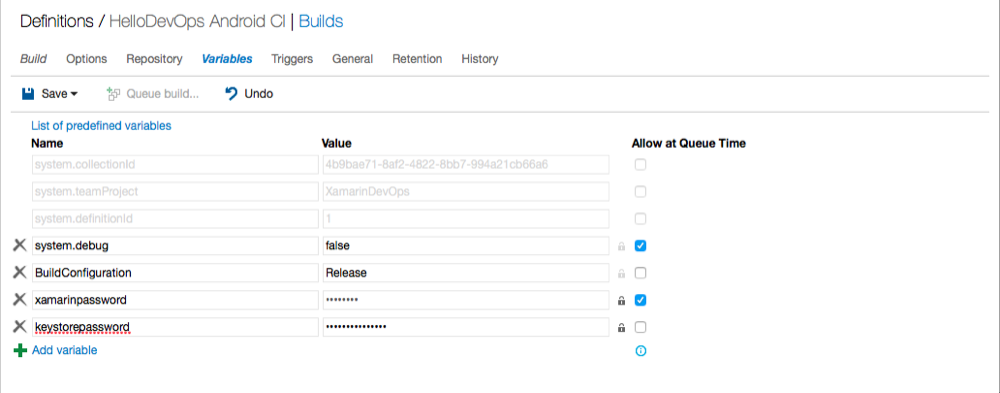
Note that some of the fields require the passwords we used in the certificate creation. Once again it's good practice to use secret variables for these passwords so click the 'Variables' tab:-
Next click the '+ Add variable' link. Enter a name for the keystore password variable and the password. Click the padlock icon to hide the password:-
Next click the 'Build' tab to return to editing the 'Android Signing' build step. Enter the password variable(s) as appropriate and enter the path to the .keystore file as shown below. Also check the 'Zipalign' option in the 'Zipalign Options' panel:-

Click the 'Save' button and then the 'OK' button.
Run a Build and Download the Application Package
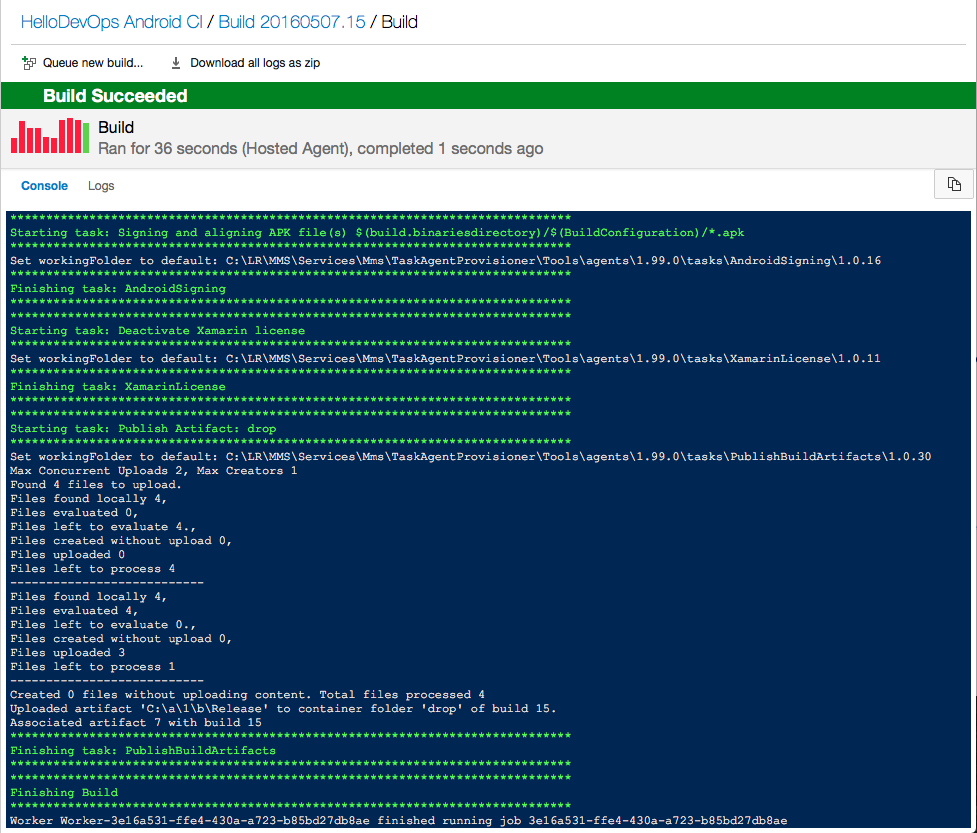
Now we can try a build by clicking the 'Queue Build' button. The build output window is displayed:-

Next we can download the build artifacts. Click on the Build number (Build 20160515.3 in this example) and the Build page is displayed at the 'Summary' tab:-
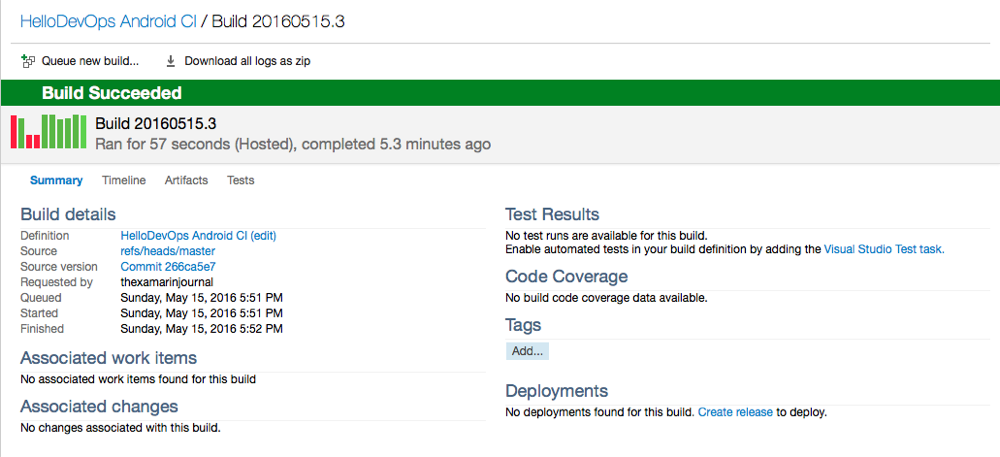
Click on the 'Artifacts' tab:-
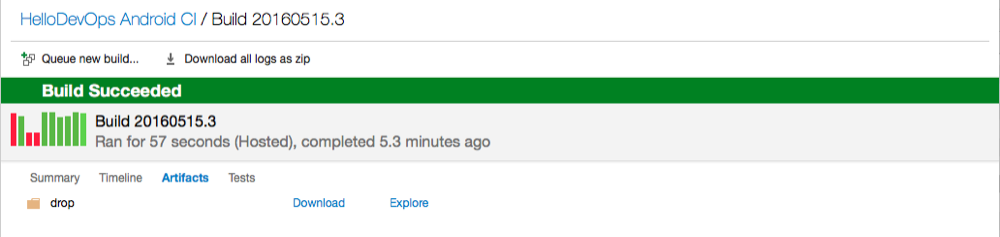
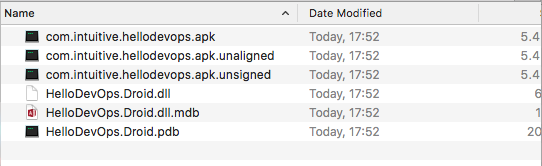
Now click on the 'Download' link to download the build artifacts Once downloaded the Drop.zip file should contain an Application Package .apk file:-
Install the Application Package on a Device
Now we can insall the application package onto a device. The Xamarin documentation details how to do this in the section Manually Installing an APK. Other methods could be used such as using an Android File Explorer to copy the .apk file onto the device and then running it locally. Publishing by adding the .apk file as an e-mail attachment or hosting the .apk file on a web server and then clicking the downloadlink in a web browser on the device are also commonly used methods of manually installing an application package on a device.
The method we are going to show uses the 'Android Debug Bridge' (adb) tool. This is insalled as part of the Android SDK and as such this method should be available to every Xamarin.Android developer. I found the Xamarin documentation Set Up Device for Development to be useful, it includes instructions for installing USB drivers for your device for example.
The Android Debug Bridge tool typically works over the USB connection of the device to the computer, it can be configured to work over a wireless network connection. We will use the USB connection method.
We can view the Android SDK installation path by opening the Android SDK Manager. In Xamarin Studio Select the 'Android SDK Manager...' option on the 'Tools' menu:-
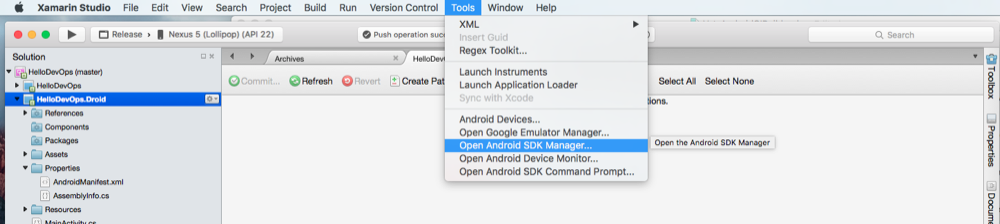
The Android SDK Manager will open. Note that the SDK Path is shown across the top of the dialog:-
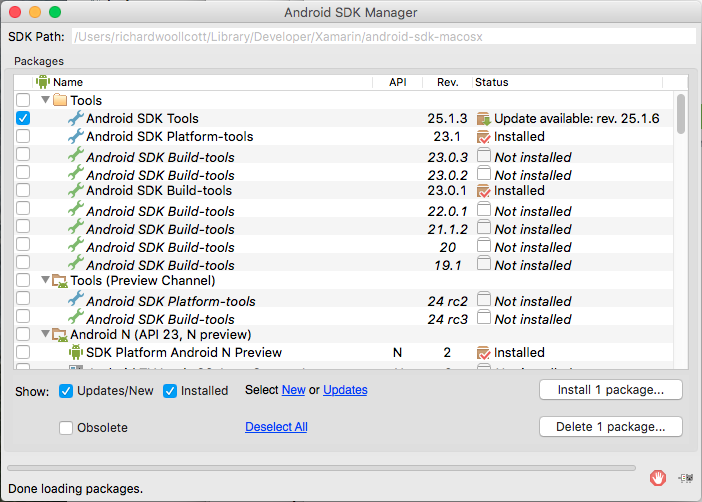
On a Mac run the Terminal and navigate to the SDK directory in this case '/Users/richardwoollcott/Library/Developer/Xamarin/android-sdk-macosx'. Now navigate to the folder 'platform-tools'.
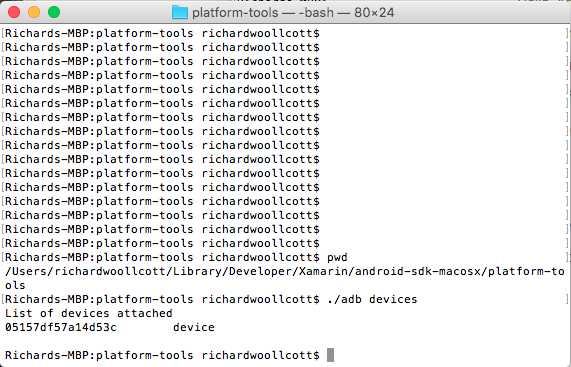
Next execute the command:-
./adb devices
A list of attached devices should be displayed, for example:-
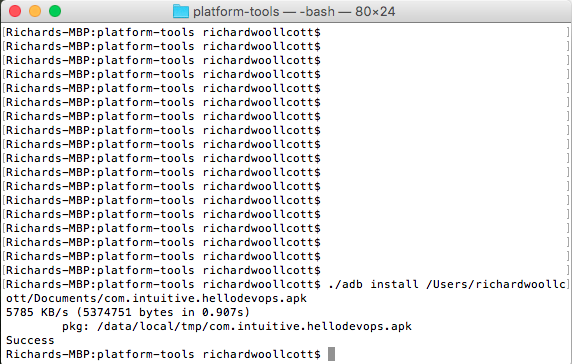
I copied the .apk file out of the drop.zip to the documents folder. We can now issue the following command to install the application package to the device:-
./adb install /Users/richardwoollcott/Documents/com.intuitive.hellodevops.apk
This should complete getting the Android app setup for basic Continuous Integration builds in VSTS.
Adding a versioning build step, unit test and UI tests would be the obvious next steps to complete the Continuous Integration Builds before starting Continuous Deployment using HockeyApp.