This post covers the installation of the Visual Studio Team Services Build and Release Agent on OSX. This is the new cross platform agent and is currently in a Preview state. This is written in C# using the .Net Core CLR and runs on Windows, OSX, Ubuntu and Red Hat.
The existing VSO Agent is marked as Deprecated, care should be taken when using documentation on the internet to check if it refers to the new or old version of the agents.
This post uses the Visual Studio Team Services site created in the other blog posts in this series. I have deleted the existing Build Agent setup for MacinCloud as the free version of VSTS supports only a single private build agent.
This post covers installation and setup of the VSTS Build Agent on OSX on your own hardware to enable building of iOS projects only. Note Android projects cannot be built using this setup, installing the build agent on Windows is required for this. The article Xamarin DevOps with VSTS - Setup a Cross Platform Build Agent on Windows shows how to setup a VSTS build agent on Windows.
Resources
The Cross Platform VSTS Build Agents are hosted on GitHub:- Visual Studio Team Services Build and Release Agent and Start OSX Agent
Donovan Brown's post How to Add a User to Team Foundation Administrators Group in Visual Studio Team Services
Instructions covering How to upgrade OpenSSL in OS X?
Key Points
The Agents used in this post are the new cross platform agents and are currently in a Preview state.
The free Visual Studio Team Services account supports one private agent in addition to the Hosted Agent. This agent can be used for say an iOS Build Agent using MacinCloud VSTS Build Agent or hosting the cross platform build agent locally on your own Apple Mac. This latter option is the focus of this post.
If you need more VSTS Agent slots then follow the instructions Pay for more services in Visual Studio Team Services
Configure a Personal Access Token
The ReadMe.md for the Cross Platform VSTS Build Agent contains links to the releases for the various platforms and instructions for getting started.
The first step is to follow the Configure Account and Roles instructions.
Note if you created the VSTS site then you should have the correct permissions for the next steps, however if you encounter problems due to insufficent permissions then follow the instructions in Donovan Brown's post How to Add a User to Team Foundation Administrators Group in Visual Studio Team Services.
Navigate to the VSTS Home page:-

Click on settings cog in the top right and the Control Panel will be displayed:-
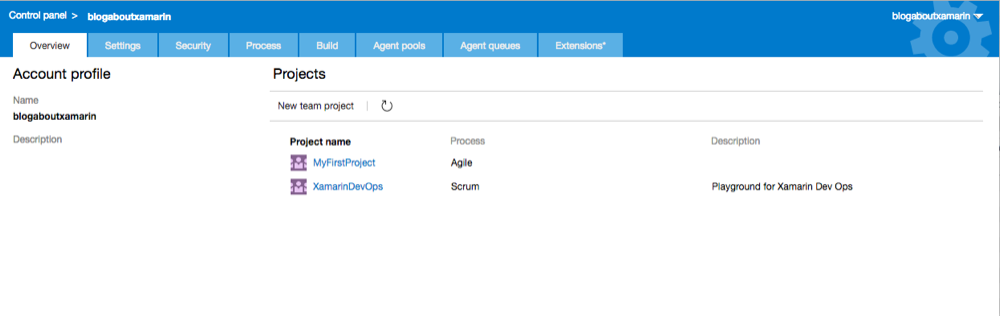
Select the ‘Agent pools’ tab and then select the ‘All Pools’ entry:-
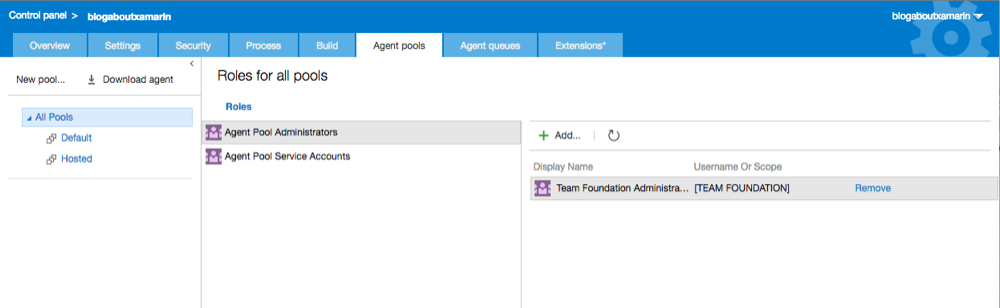
Now add your user to both the ‘Agent Pool Administrators’ and ‘Agent Pool Service Accounts’ roles. Select the ‘Agent Pool Administrators’ entry and click the ‘Add’ button. The ‘Add users and groups’ dialog is displayed:-
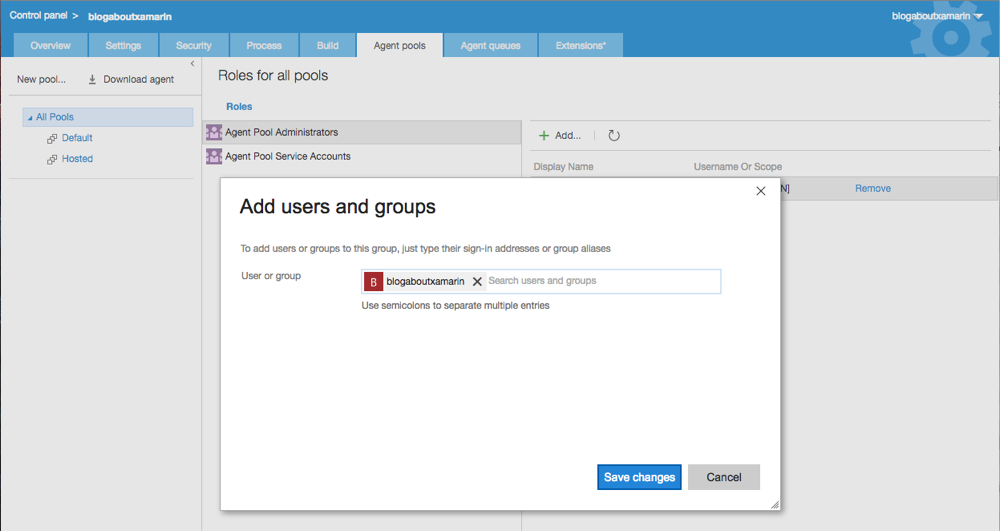
Enter the user in this case ‘blogaboutxamarin’ and then click the ‘Save changes’ button and the user will have been added:-

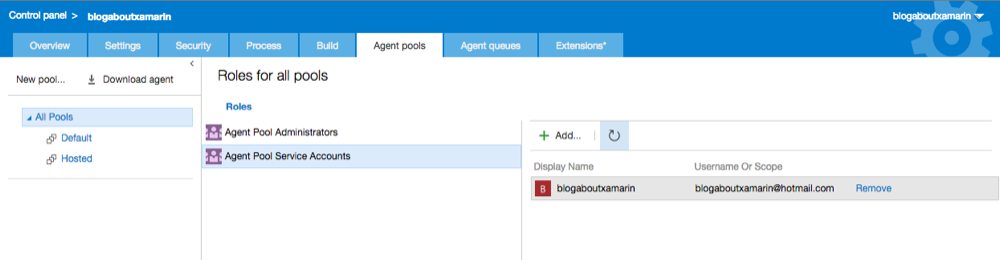
Select the ‘Agent Pool Service Accounts’ entry and repeat the previous steps to add the user. The user 'blogaboutxamarin' should now be listed under the Agent Pool Service Accounts:-
Now we can create the Personal Access Token. Go back to the previous tab and click on the user name ‘blogaboutxamarin’ in the top right and select the ‘My Profile’ entry:-

Click on the ‘Security’ tab and the ‘Personal access tokens’ list will be displayed. This should be empty:-
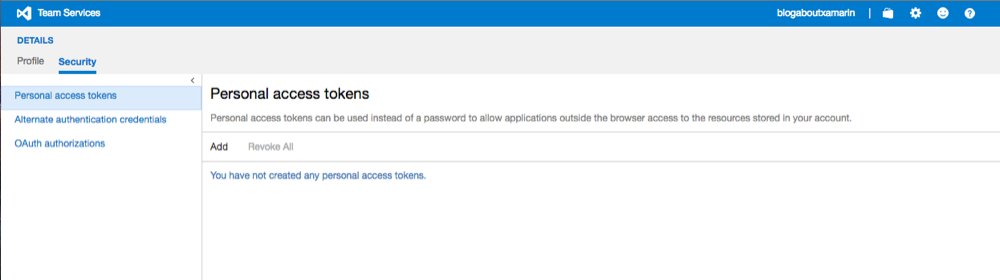
Click the ‘Add’ button and the ‘Create a personal access token’ page is displayed:-
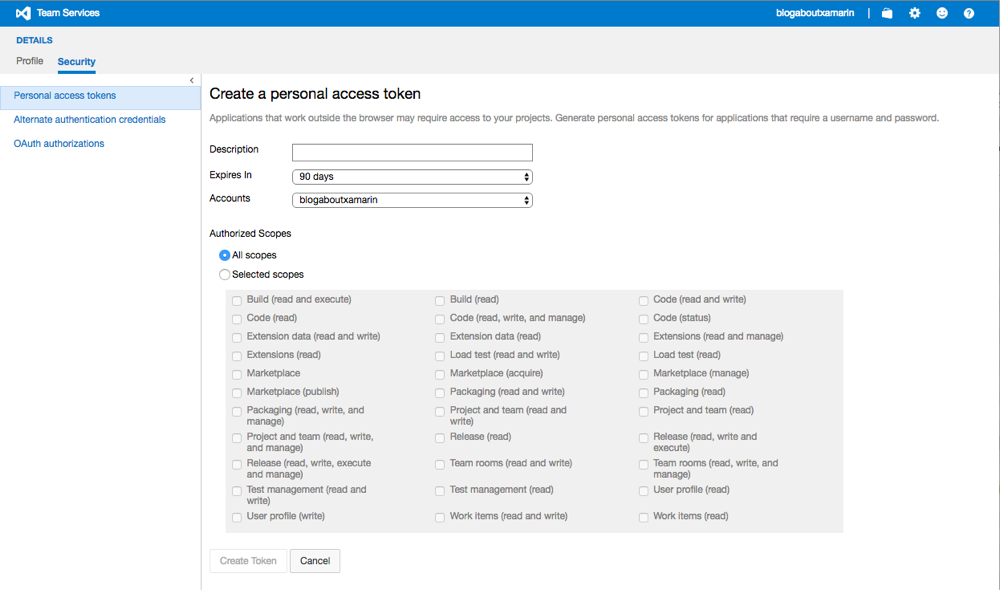
Next enter a description and set the ‘Expires in to the ‘1 year’ option. The ‘All scopes’ option should be checked.

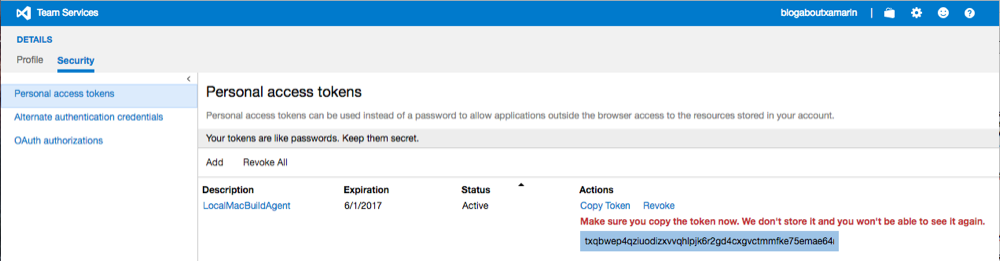
Click the ‘Create Token’ button. The token will now be displayed with a message warning that it’s only available this one time so copy it.
Installation of the OSX Build Agent
Next we can move onto the installation of the Cross Platform VSTS Build Agent itself. We need to follow the Start OSX instructions.
The first step of the OSX install involves ensuring the System Requirements are installed. This is essentially updating OpenSSL to the correct version. Open a Terminal and execute the commands
brew update
brew install openssl
brew link --force openssl
We can check the version by executing the command
openssl version
Richards-MBP:~ richardwoollcott$ openssl version
OpenSSL 1.0.2h  3 May 2016
Now we can follow Step 2 and download the agent from the Releases page.
Navigate to the users home directory, in this case /Users/richardwoollcott
Next we create a directory into which we will extract the agent and navigate to it by executing the commands:-
mkdir myagent && cd myagent
We are now ready to extract the agent by executing the command:-
tar xzf ~/Downloads/vsts-agent-osx.10.11-x64-2.101.1.tar
We can check the directory contents, we will be running the scripts config.sh and run.sh :-
Richards-MacBook-Pro:myagent richardwoollcott$ ls
bin        config.sh   externals
config.cmd    env.sh      run.sh
Configure the Build Agent
Next we configure the agent by executing the command:-
./config.sh
The Terminal window should display:-
Richards-MacBook-Pro:myagent richardwoollcott$ ./config.sh
Password:

>> End User License Agreements:

Building sources from a TFVC repository requires accepting the Team Explorer Everywhere End User License Agreement. This step is not required for building sources from Git repositories.

A copy of the Team Explorer Everywhere license agreement can be found at:
  /Users/richardwoollcott/myagent/externals/tee/license.html

Enter accept the Team Explorer Everywhere license agreement now? (Y/N) (press enter for N) >
Type 'Y' and press enter to accept the license agreement. Now we need to enter the VSTS site URL:-
Enter accept the Team Explorer Everywhere license agreement now? (Y/N) (press enter for N) > Y

>> Connect:

Enter server URL >
In this example we enter:-
https://blogaboutxamarin.visualstudio.com
Next we are prompted to enter the authentication type:-
Enter authentication type (press enter for PAT) >
So press enter to use the Personal Access Token (PAT) authentication. We are now prompted to enter the PAT:-
Enter personal access token >
Paste in the PAT and press enter and the agent will connect to the server:-
Enter personal access token > ****************************************************
Connecting to server ...
Saving credentials...

>> Register Agent:

Enter agent pool (press enter for default) >
Press enter to use the default agent pool and we are prompted for an agent name:-
Enter agent name (press enter for Richards-MBP) >
Press enter to accept the default name (or enter another name) and the agent will be added to the Default Agent Pool in VSTS. Note that if adding this agent will exceed the number of private build agent slots then as message is displayed:-
No more private agent slots available, please purchase more. For more information visit: http://go.microsoft.com/fwlink/?LinkID=623705 Current max: 1  Xaml Controllers: 0  Build Agents: 1
Failed to add the agent.  Try again or ctrl-c to quit
If this happens follows the Pay for more services in Visual Studio Team Services instructions to purchase another private build agent slot ($15 per month per agent). The agent is added to the Agent Pool we selected earlier, in this example it's named Default.
Scanning for tool capabilities.
Connecting to the server.
Successfully added the agent
Enter work folder (press enter for _work) >
Press enter to accept the default work folder (or enter another name):-
2016-06-01 20:13:35Z: Settings Saved.
Enter run agent as service? (Y/N) (press enter for N) >
The agent settings have been saved and we are prompted to run the agent as a service or interactively. In this example we will choose to run the agent interactively, this will require we manually start the agent in a Terminal window in order to use it. Choosing the services option we would not have to do this and the build agent daemon will always be running and available. We press enter and the configuration is complete:-
Enter run agent as service? (Y/N) (press enter for N) >
Richards-MacBook-Pro:myagent richardwoollcott$
Running the Build Agent
Now we can run the agent by executing the command:-
./run.sh
The Terminal window should display:-
Richards-MacBook-Pro:myagent richardwoollcott$ ./run.sh
Scanning for tool capabilities.
Connecting to the server.
2016-06-01 20:16:33Z: Listening for Jobs
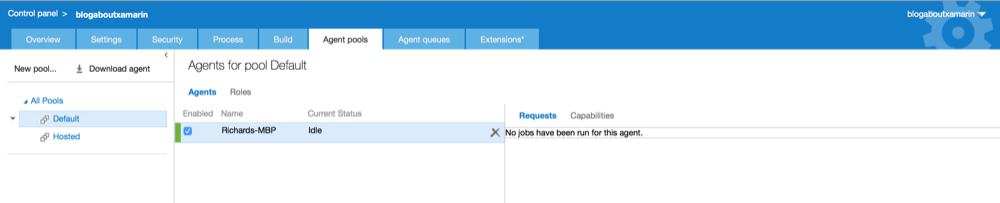
Returning to the VSTS Agent Pools tab we can now see the the Default Agent Pool has an Agent Richards-MBP listed:-
Queueing a Build
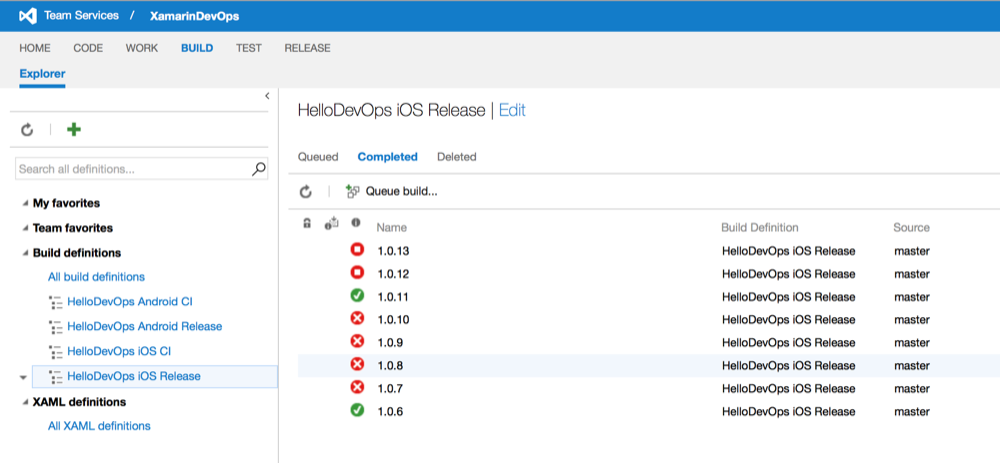
Now we can return to the VSTS Build page, select the HelloDevOps iOS Release build:-
Now we can start a build by clicking the Queue build... button. The Queue build dialog is displayed. Ensure that the Default agent pool is selected in the Queue drop down:-

Press the OK button and the build will start. We can see from the Build Summary Page that the build ran on the local agent Richards-MBP we have just installed and configured:-

We can also see the build request listed in the Agent Pools tab:-

Returning to the Terminal window we can see that it shows the output of the Agent:-
2016-06-01 20:16:33Z: Listening for Jobs
2016-06-01 20:26:11Z: Running job: Build
2016-06-01 20:28:30Z: Job Build completed with result: Succeeded
This completes the setup of a local VSTS Build Agent on OSX.